Analytics is the way to understand blog’s popularity on Internet. After creating a blog in blogger the next vital requirement is to add Analytics code to it. Go along these steps and add analytic Tracking code in your blogger in easy way:
1. Go to Google Analytics. You may follow this link to access it: http://www.google.co.in/analytics
2. Click on Sign in.
3. A New webpage will be opened. Here, Click on Sign up.
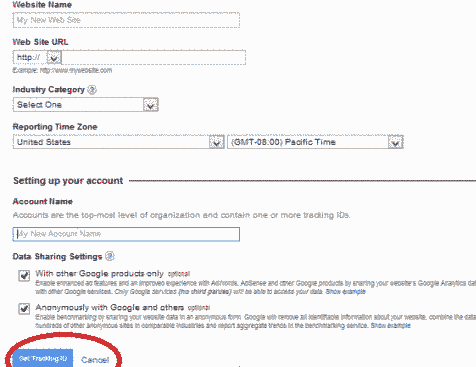
4. A web page titled Would you like to Track will be accessed. Here fill up your blog’s detail and click on Get Tracking ID.
5. A Pop up will be accessed. Click on I Accept. 5. Now tracking code is before. Select Tracking code (Ctrl + A) Copy this code (Ctrl + C).
![]() 6. Now go to your blogger. You may go by clicking: Blogger
6. Now go to your blogger. You may go by clicking: Blogger
7. Sign in with you blog username and password.
8. Here you have come to blogger home. Click on Template in Left Sidebar
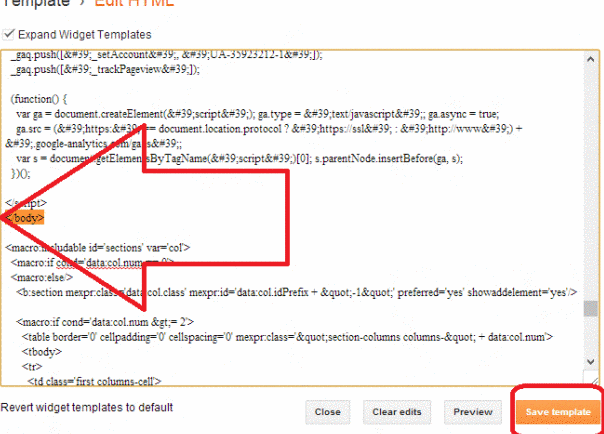
9. Click on Edit html.
8. Check the box Expand Widget Templates.
9. Press Ctrl + F at along with.
10. Write </body> in Search Box. Paste the analytics tracking code just before wherever this closing body tag comes.
11. At last Click on Save Template.
Now you may click your website url in Google Analytics homepage and after then hit on All Website Data to see data related to your website.