Some Snowing Desktop tools allow display dropping snowflakes on Windows 10 PC screen. Continuously falling snow makes your desktop look cool. Here you will find the ways to add snowfall effect to your PC screen using two small software. See a very interesting guide – How to Personalize Windows 10 Desktop With Rainmeter.
For Snowing Desktop in Windows 10, these freeware are Desktopsnowok and Snowflakes. Both of these software lets you showcase white color ice coming down on the screen. Follow this article to personalize your PC – How to Set Desktop Gadgets on Windows 10.
Table of Contents
Snowing Desktop to Windows 10
1. Using Desktopsnowok

Desktopsnowok
Step 1 – Follow this link to download Desktopsnowok at first. This is a zip file having 144kb size so the download will end in seconds. Unzip the file and locate the setup DesktopSnowOK_x64.exe.
Step 2 – Double click on this .exe file and enjoy falling snow desktop.
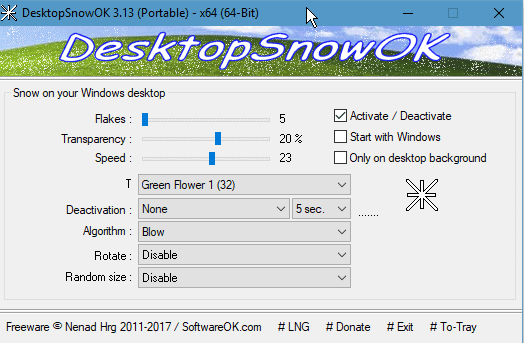
Step 3 – Slide the bar of Flakes to increase and decrease the snowflakes. You can set the number of snowflakes to show on your desktop from here.
Step 4 – Change the transparency of the flake using the bar next to it.
Step 5 – Increase or decrease speed by changing its slider. Pulling the bar forward will improve the speed while towards backward will reduce.
Step 6 – In addition, you can change the Snowflakes and use the falling leaves instead. Simply click the drop down next to T and select a suitable option from Green, Leaf, Yellow Flower, Orange Flower, Blue Flower, Flakes in glass, Red Ball, Blue Ball, Tennis Ball, Soccer Ball, Baseball, Heart, and Star.
Step 7 – Set Deactivation time using the dropdown and select appropriate seconds and movements.
Step 8 – You can set Algorithm with the dropdown after selecting Blow and Snowfall. Snowfall option allows dropping the items in the downward direction and Blow option sends the objects into upward.
Step 9 – The flakes or other items can rotate and a drop-down is available next to Rotate letting you choose Enable or Disable.
Step 10 – The Snowflakes or other items permit to change its size. Click the Drop down subsequent to Random size and select a preferable percentage.
Step 11 – 3 other options on the user interface of the Desktopsnowok software – Activate / Deactivate, Start with Windows and Only on desktop background permits you to optimize the settings.
Step 12 – To stop Desktopsnowok, simply click on Exit on the tool.
2. With Snowflakes

Snowflakes tool
Step 1 – Download Snowflakes by navigating to this web page. After the download gets over-extract the file and just open. You will experience Snowing Desktop in Windows 10.
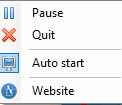
You can Stop Snowflakes dropping on Windows 10 desktop from its icon on the System tray.
Conclusion
So Adding Snowing Desktop to Windows 10 is very easy with these tools. Snowflake is a super easy tool and requires only a single click to run. While Desktopsnowok is feature efficient and you can enjoy many types of cool desktop animations with this. So download the tools and follow the guide and experience cool desktop.