In this topic let us describe to you how to change the Windows Live Account to the Local Account in Windows 8.1. When your internet is on and if you have newly set up Windows 8.1 operating system then the system forces you to sign up with Windows Live Account. This setting comes as default on Windows 8.1 which means that from next time you will log into the Windows you have to access through Windows Live Account. This sometimes become an irritable as you don’t want to share your Microsoft password with someone else. There is a reason behind this particular behavior of Windows 8.1. Onedrive, user settings or the app that you download from the Windows Store are all synced automatically without your knowledge with your account. Now if you don’t want all the things of your system to be synced then you can switch from Windows Live Account to Local Account.
Remember one that changing to your Local Account doesn’t change your settings or even you will not lose any for your files. The only change will be that there won’t any sync between other devices.
How to change the Windows Live Account to the Local Account in Windows 8.1
- Go to the Start Screen.
- Get the Charms bar from the right edge of the screen.
- Click on the Search option.
- Enter Your Account Settings in the space provided.
- Select Your Account Settings option.
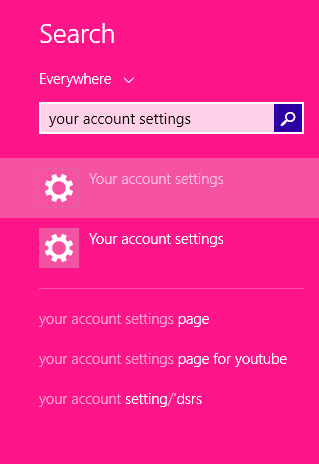
- An Accounts page will be displayed.
- Select Your Accounts.
- Click Disconnect which is on the right side of the page just below your profile name.
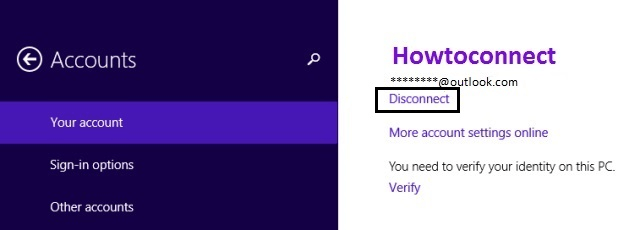
- You will be asked to confirm the Windows Live Account password.
- Enter the current password, i.e. the password of Windows Live Account.
- Click Next.
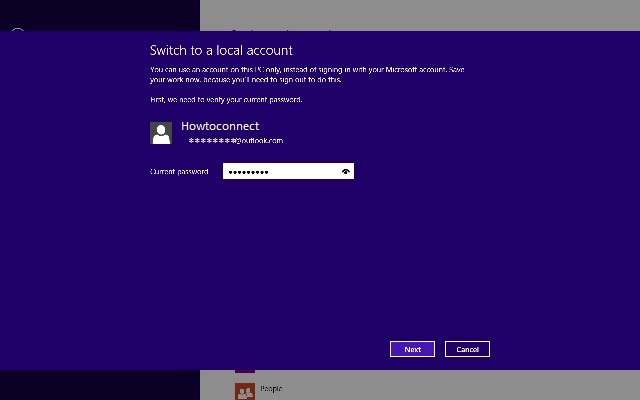
- Switch to Local Account page will appear on the screen.
- Now enter the details of your Local Account.
- Enter the password.
- Provide a hint of your password. This field is also compulsory.
- Click Next.
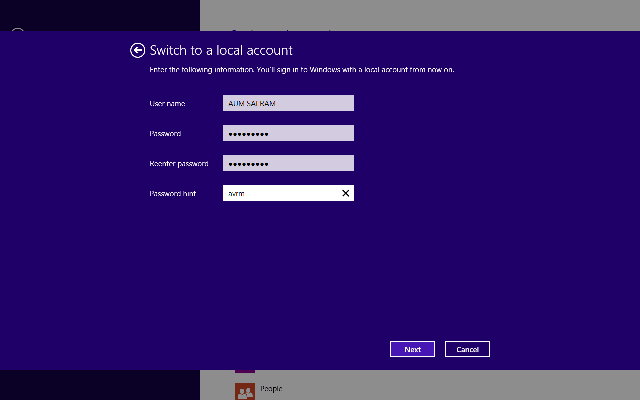
- You will get a page that tells you what it means to switch to your Local Account. If you are not sure then read it carefully.
- Click Sign out and finish.
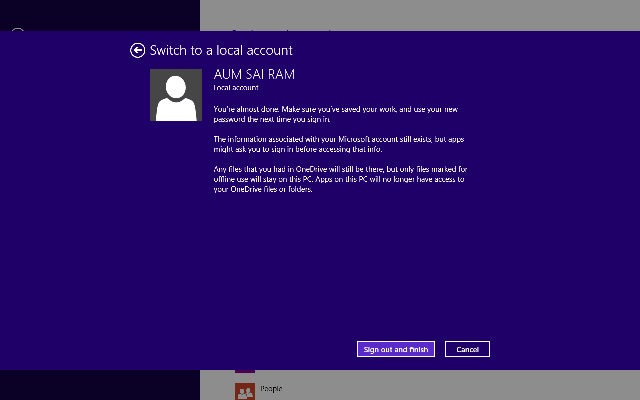
- Windows will log you out from the Windows Live Account and will ask you to login from your newly created Local Account.