Methods and Steps to Change your Info on Windows 10 – Your info category on the latest Windows OS provides you with utilizing an adorable Photo and a great username. This section resides amidst Accounts and you can change the image moreover username from here.
So Your Info on Windows 10 includes Account Picture and username for your Account. Whenever you are administrator then the username can be varied lonely through the online Microsoft account On Windows 10. When you set to changing your Photo on Windows 10, you should know that Your info category offers two methods for this. These are Browse for one and camera located in the Your info. Browse for one option assists using a picture from the folder you have put on your Computer. Never miss one similar info – Windows 10 – How to Give a New Name to your Computer.
Table of Contents
Change Your Info on Windows 10
First of all, learn the procedures for the modification of username from Your info category and later on the Picture.
Change Username
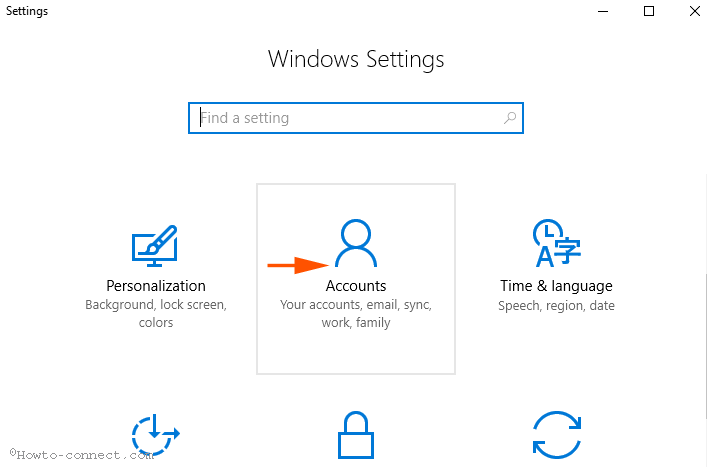
Step 1 – Press Win along with I and then select Account from the Settings Program.
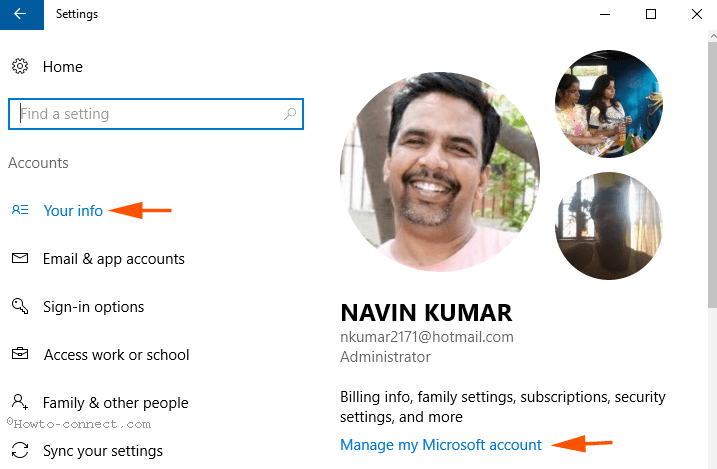
Step 2 – Select Your info in the left pane.
Step 3 – Move ahead to the right pane and click Manage my Microsoft account.
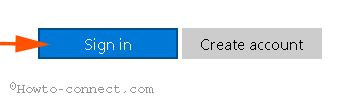
Step 4 – Promptly you attain the Microsoft account login web page, hence, accomplish the formalities for signing into your account.
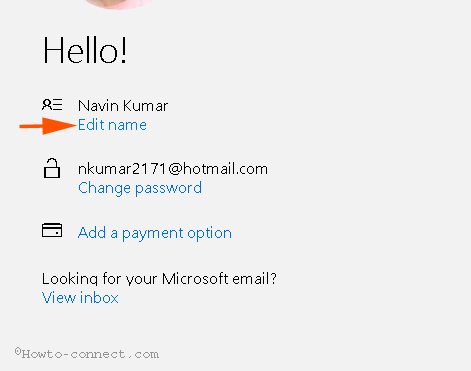
Step 5 – A block shows the particulars of your account, click Edit name.
Step 7 – Type your preferable First name as well as Last name on the Microsoft accounts webpage and click Save.
Return back to Your info section and check whether the name is changed or not.
Change your Picture
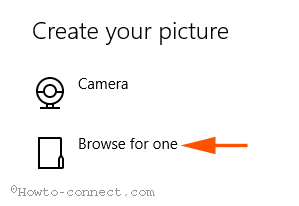
The Your info category allows to change User’s Picture applying 2 procedures on Windows 10.
1. Using webcam
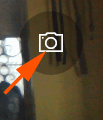
Step 1 – Click Camera icon below the Create your picture.

Step 2 – Camera application will prompt, hence, press its icon and grab a Snap with the Webcam.
Step 3 -Click Apply tick mark to save it.

2. Save a Photo from Computer
If you like to apply a pic available on your system then
Step 1 – Click Browse for one button.
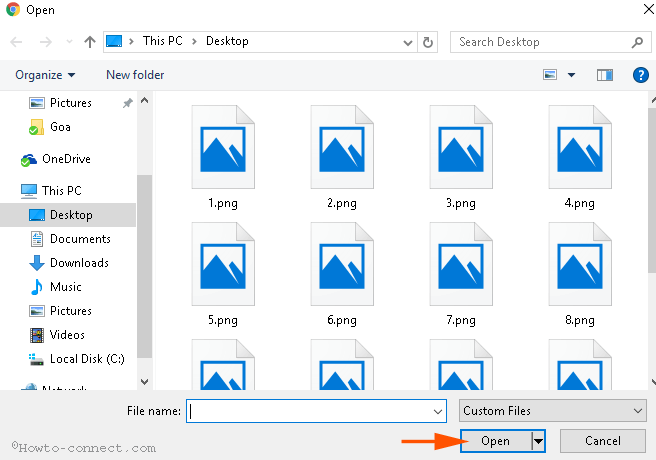
Step 2 – A dialog box will be within views on the screen, pick the image you will utilize further for your Windows 10 Account, and then click Choose picture.
3. Change Your Info on Windows 10 From Microsoft Account
In addition, Your Info on Windows 10 Permits the alteration of the image for your account on Windows 10 operating system From Microsoft web page. Let’s see
Step 1 – Reach the Microsoft web page for your account with the help of the 1st method Change Username.
Step 2 – Click on your image.

Step 3 – Click New picture, choose your preferred from your computer and then press Open.
Step 4 – modulate your photo into the frame and lastly click Save.
Note – This will not change the picture instantly, but when you log out and login you will experience the modification.
Conclusion
Therefore, these are the methods and steps to Change Your Info on Windows 10. Set an awesome pic of your and write a decent Windows 10 account username and cheer up.