Steps to Detect Wireless Display To Force Connect on Windows 10. – Before connecting a PC to either TV, projector, or other media streaming devices, Windows 10 scans for devices in range. When the PC successfully traces out a device, you show media files after setting up a connection between both. Many times, your PC fails to identify the display device despite it exists in nearby and turned on position.
Fortunately, you can Detect Wireless Display To Force Connect the device on Windows 10. Detect a Wireless Display To Force Connect Setting included recently in Windows 10 is a solution for this kind of incidents and efficiently helps you.
If you want to stream media files over multiple displays then Windows 10 allows it with Miracast display dongle. You can watch the activities of your computer on Television, projectors or other screens using Miracast. A previously written guide – How to Establish HDMI TV to Computer Connection in Windows 10 can assist you.
When you put the adapter into HDMI port it starts detecting the Wireless display in the surroundings. for And once you connect the display it keeps in memory and later you can automatically connect to it. But occasionally Windows10 fails to trace out the display in the wireless network and creates an obstruction in establishing the connection. So you will see a guide which will help you to in this concern
Table of Contents
Detect Wireless Display To Force Connect on Windows 10
For identification of the display, you will need to use a Detect button so, let’s see how we get access to the button and use.
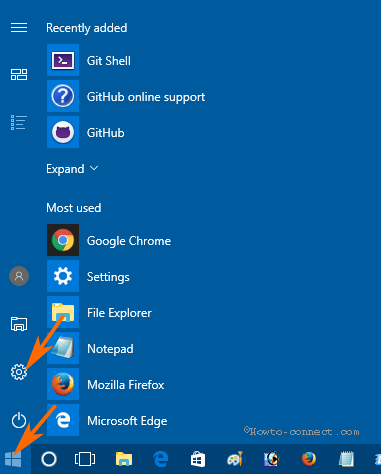
Step 1 – Press the Start button and allow the Start menu to prompt. Once the Start menu appears, click on the Setting cog.
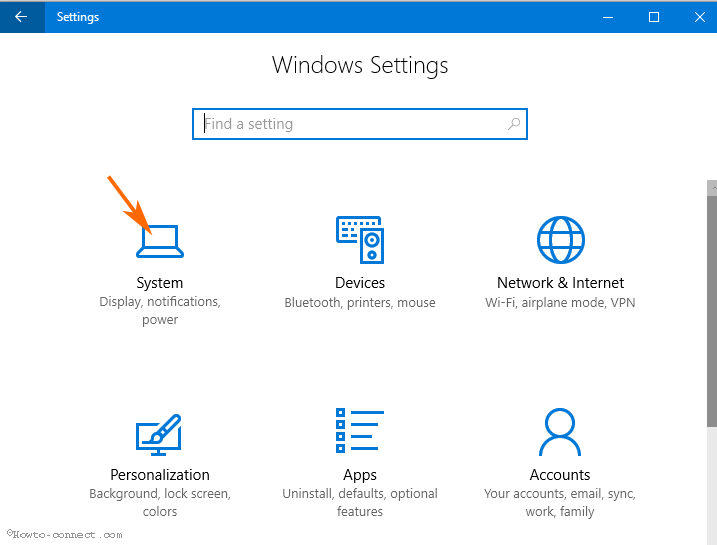
Step 2 – On the Settings program, find System and make a click on it.
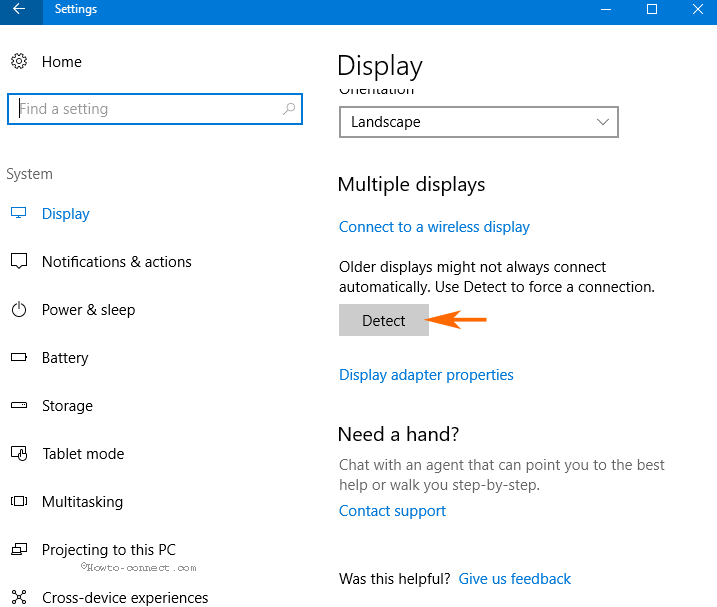
Step 3 – By default the System settings open with Display. Move ahead to the right pane and go downward until you reach Multiple display section.
Step 4 – Here you can see a statement
Older display might not always connect automatically. Use detect to force a connection.
Click on Detect just under this statement and wait so long as you see the device.
After you use Detect, your Windows 10 will forcefully setup the connection between your computer and the Wireless device to stream audio or video files.
In case, you are looking to turn on videos streaming on Xbox one follow this How to Enable DLNA to Stream Video on XBOX in Windows 10.
Conclusion
So this guide for How to Detect Wireless Display To Force Connect on Windows 10 will hopefully help you. And once you detect the device you can project your PC on that one without difficulty. If you have any type of issue during the making the connection and beginning projection kindly let’s know.