Exclude Folders is an awesome feature in File History which lessens the load of the gigantic size of files and folders when you save its copies to either USB, DVD, or Network location. When you start to create a file history on Windows 10 you might have found that the USB you have inserted in the port of your PC have not a sufficient amount of space to save all the files. In this situation, you can efficiently select to Exclude Folders From File History. Using this, you can avoid saving unnecessary files in file history and pretty simply save the space to store more important files to the storage.
In this post, we will write How to Exclude Folders From File History on Windows 10. This is 4-5 steps tips that could ease up you on very important moments.
How to Exclude Folders From File History on Windows 10
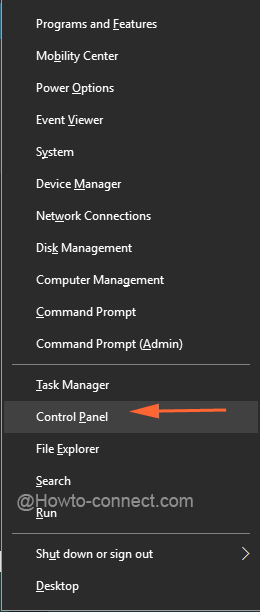
- Click Win+X and move off with Control Panel.
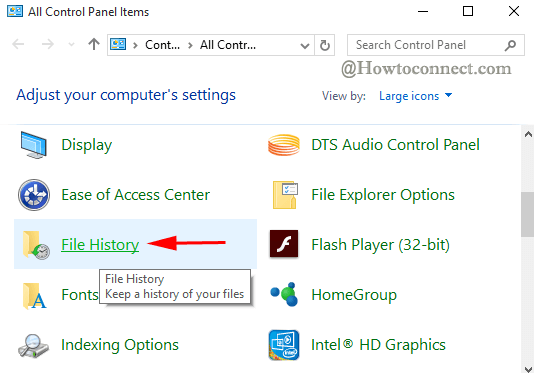
- Hit File History link at the Control panel applet.
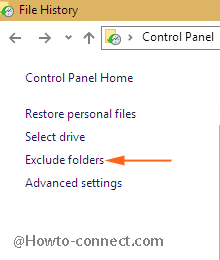
- Click Exclude folder link at the left fringe of File History window.
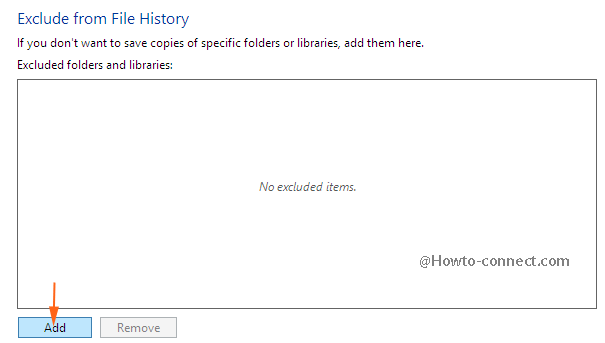
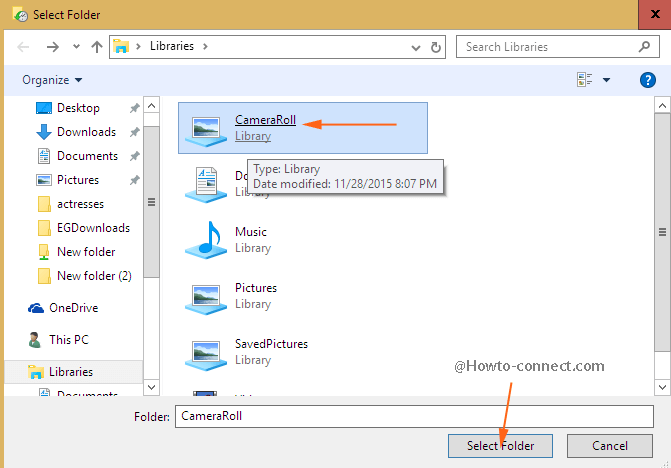
- Click Add button which leads to the emergence of Libraries.
- Hit on the Folder which you intend to exclude latterly on Select Folder button to add the particular one.
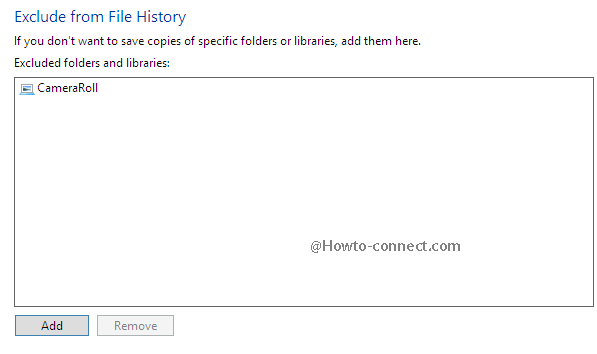
- You will be sent back to Exclude Folders window where the folder becomes present in a box.
- Again click Add if you want to add fresh folders and files to be excluded.
After you Exclude Folders From File History on Windows 10, the folder and the files within this folder will not be reckoned in when you turn on File history and so save a considerable extent of space in the storage area. When you restore the saved file history data the Excluded folder will not be available to be restored.
When you hit the Add button, you are automatically shifted to the libraries directory. But you are independent to pick the requisite folder via Quick Access navigation area in the left fringe of Select folder window.
Once you have added a folder you can dislodge the same pretty simply with the assistance of Remove button. For this purpose, you require clicking a folder and hitting Remove button just underneath the box.
Emi
says:Finally I got I was looking for. thanks