Every now and then, people want to know How to Delete Files in Windows 10. Sometimes, removing an item from the system becomes an annoying task especially when it is locked or running. As a result, you need to access Task Manager or Microsoft tool to make such kind of difficult deletions. So, here, in this article, you will find various conditions and ways to remove the folders/files. Let us move ahead towards the scenarios and their methods in details.
At first, we are giving here a list to easily access the concerned sections and conditions for removing the files –
Condition1: How to Delete usual file or folder
Condition2: How to Delete a File that is in use
Condition3: How to Delete multiple files using Commands
Condition4: How to Delete Files in Windows 10 that Require Administrator Permission
Condition5: How to Delete Files in Windows 10 When Locked
Condition6: How to Delete Files in Windows 10 Permanently
Table of Contents
How to Delete Files in Windows 10 – Stupid Easy Tips
Your system drive always gets packed with the stuff that is not necessary for you such as few embarrassing pictures, unnecessary texts files and so on. But in some cases, users come across situations when they become unable to get rid of them. Moreover, items refuse to remove as the system needs admin permission to do so. However, the problem arises when you are the sole administrator. So, following are the ways that describe all the scenarios and the ways to deal with them.
Condition-1: Delete usual file or folder
When a file is idle and is not running in Windows, you can delete those using following methods.
Way-1: Through right-click option
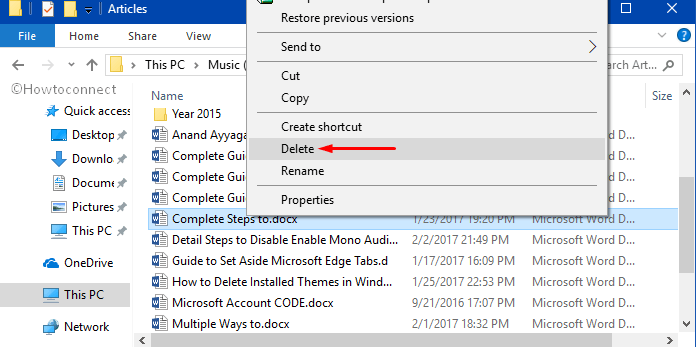
Step-1: Select that specific folder or file using mouse cursor and execute a right-click on it.
Step-2: Click Delete option from the list and go ahead with Yes when system flashes a confirmation message. The selected file will be eradicated and get stored in the Recycle Bin right away.
Way-2: Drag to Recycle Bin
Step-1: First and foremost, select the folder, or a file, or a shortcut of any program that you prefer to do away with.
Step-2: Next hold the item, then drag and drop it into the Recycle Bin that resides on the desktop. Hence the same dragged file will be moved to the Bin.
Way-3: Using Keys
Step-1: On the File Explorer, go to the location where the file that you prefer to remove is stored. When the folder opens up, move to the desired one using “Left-Right-Up and Down” keys.
Step-2: Once you select the specific file, hit the Delete key on the keyboard.
Step-3: When warning dialog pops-up, click Yes to affirm the deletion process.
Every time you move ahead to delete a file or a folder, Windows generally ask for confirmation. However, if you are tired of confirming this, you can stop this and to do so, you need to follow the below series of steps.
Restrict Windows from asking before deleting files
Step-1: Go to the desktop, and then execute a right-hit on the Recycle Bin icon. From the list of options, make a click on Properties.
Step-2: In the Properties pop-up, unmark the option namely “Display delete confirmation dialog“.
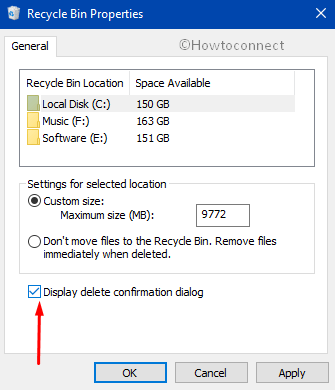
Step-3: Hit Apply button first then Ok with a view to saving the changes.
Condition-2: How to Delete a File that is in use?
Windows cannot remove a file if it is open. In that case, you need to close that respective file first. This is too easy to close a running one. Unfortunately, if the OS gets jammed and you face trouble when closing, you have to access Task Manager. From there, you need to end (shut down) the file and then only the removal process would take place without any hindrance. Here are the guidelines on How to Delete Files in Windows 10 especially when it is working.
Step-1: Conduct a right-click on a vacant area on the taskbar. Click Task Manager from the menu that pops-up.
Explore more ways to Open Task Manager in Windows 10.

Step-2: Reach out to the running file and put a right click on it.
Step-3: Choose the option End task from the list. Alternatively, select the specific file and hit the End task button from the bottom of Task Manager.
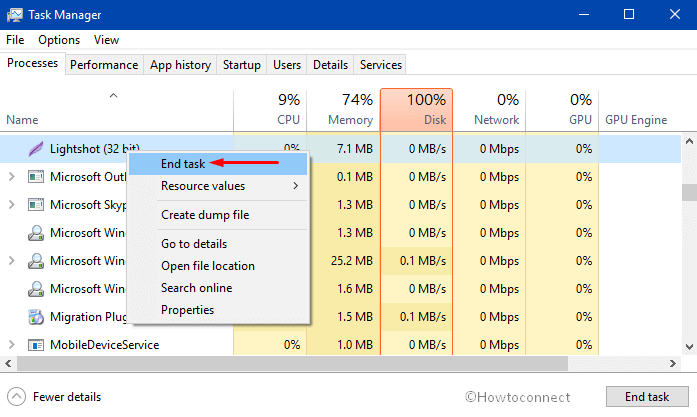
Step-4: Leave the Task Manager and delete the file normally using any of the method discussed above.
Condition-3: Delete multiple files using Commands
If you are well expert in applying commands, it’s a lot easier for you to take help from Command Prompt when it comes to multiple files.
Step-1: Head to the Search box at the taskbar and type cmd in it.
Step-2: Hit right-click on Command Prompt when the result shows it and select “Run as Administrator“. Click Yes when you come across the UAC prompt.
Step-3: Insert the given command and press Enter to execute it –
del /fX
Note – Here, replace X with the file name you opt to delete. In case of multiple files, write all the file names together in place of X using a comma.
Step-4: In case of deleting a whole folder, type following command and hit Enter key –
RD /S /Q <Folder Path>
Note – Folder Path in the above command represents the address that shows in File Explorer when you navigate to a destination folder that you wish to remove.
Condition-4: How to Delete Files in Windows 10 When Locked
Sometimes, you may find some files, as well as folders, locked because of some reason. However, in such cases, Windows doesn’t allow to move, copy or delete them without the password. Looking for the password is completely an unwise task since you never locked it intentionally. Fortunately, Microsoft has dedicated software in order to delete such items. An application names Process Explorer is the best aid that Windows offers you. See following guidelines on How to Delete Files in Windows 10 when it is locked.
Step-1: Visit Microsoft’s official website of Process Explorer. Hit Download Process Explorer and click Ok when asked to initiate the download activity.
Step-2: Once download finishes, make a right-click on this file and select Extract all from the popup.
Step-3: Now, open the folder that contains its contents and double-click the file procexp64.exe. When “Open File Security Warning” comes into view, click Run.
Step-4: Finally hit Agree from T&C of the license agreement.
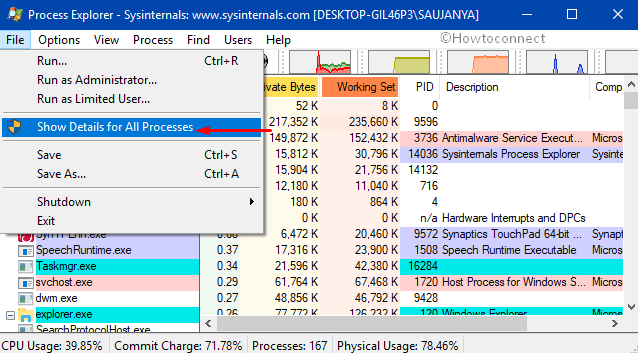
Step-5: On the application window, click on File and select Show Details for All Processes from the list (see snapshot). Upon the prompt of UAC to make changes, click Yes button.
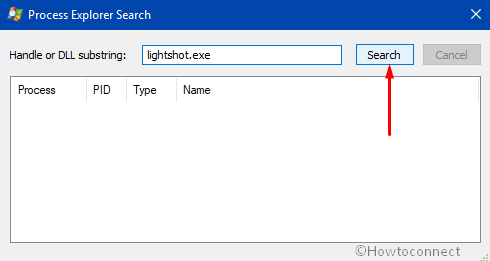
Step-6: From the Process Explorer window, put a click on Find menu from top followed by choosing Find Handle or DLL.
Step-7: In the provided text box on the pop-up, type in the locked file name and click the Search button.
Step-8: Once the file appears on screen, make a right-click on it and select Close Handle from the list.
Step-9: Leave the application and proceed to the locked file. You can delete this normally using any conventional method.
You may also like to pursue our similar tutorial on How to Forcibly Delete Files on Windows 10.
Condition-5: How to Delete Files in Windows 10 that Require Administrator Permission
Many times, you are denied to remove a file/folder because it needs administrator approval. But in most cases, it becomes annoying because you are the administrator of the account. Therefore, to get rid of this stubborn items, you have to take ownership of them and assign permissions accordingly. Hence, to make it happen, observe the below sequence of steps correctly.
Step 1 – Launch File Explorer, locate the item you wish to do away with it. Next, make a right-click on it and reach out to the Properties option.
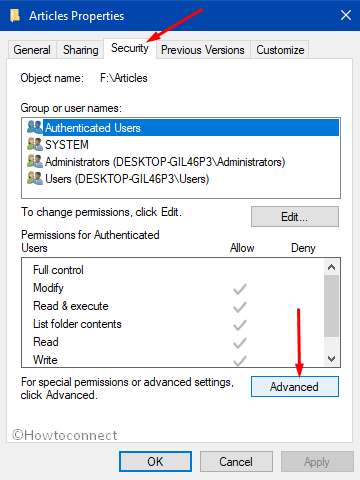
Step 2 – Switch to the Security tab, click the Advanced button as depicted in the picture below.
Step 3 – On the new window, click Change that shows next to the Owner. This will take you to the “Select user or group” dialog.
Step 4 – Here, under the box that appears just below the title Enter the object name to select, type the username or object or group. To confirm it click the Check button on the right side. If it is correct then click Ok ( see snapshot).

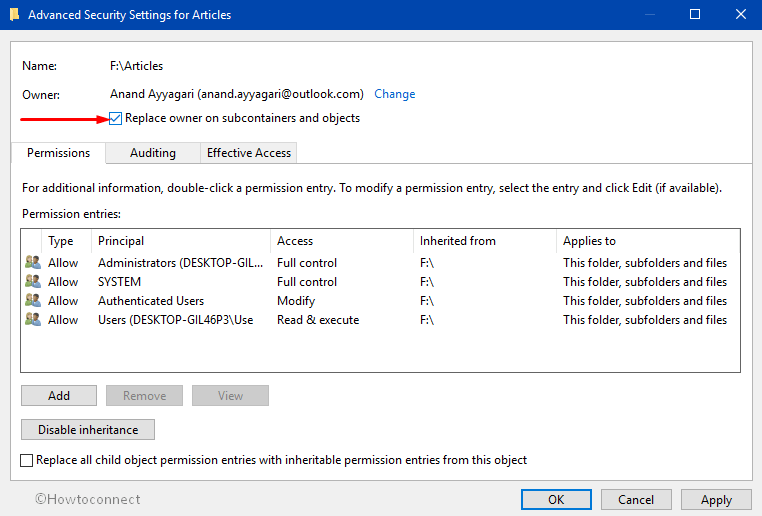
Step 5 – Moving ahead, if you prefer to undertake the ownership of every folder or file, ensure to checkbox the box next to “Replace owners on subcontainers and objects“. Lastly, click Apply and Ok buttons one after the other to implement the modifications.
Step 6 – Now, you have to provide a full access so that you can interact with the file/ folder as per wish. So, again follow Step 1 and 2 from above and click the Add button.
Step 7 – Click Select a principal as shown in the below screenshot.
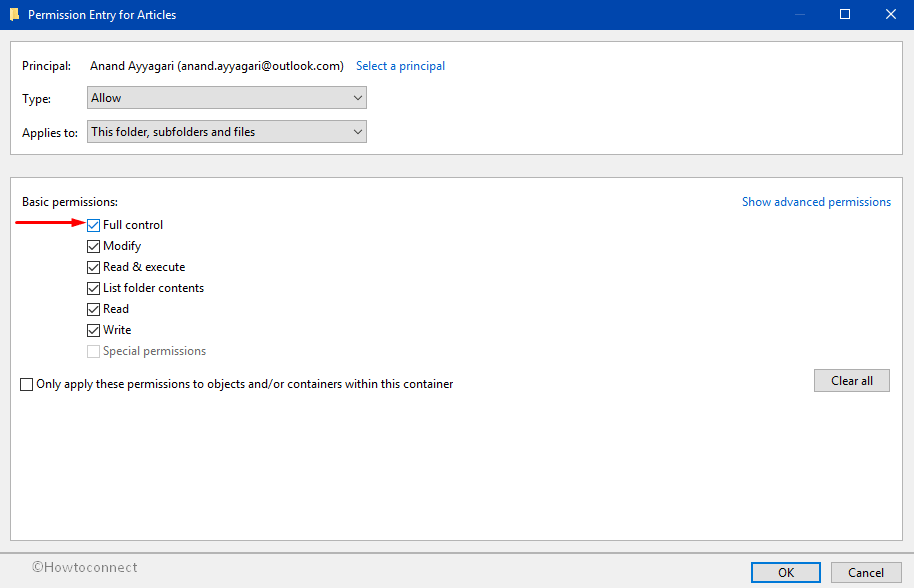
Step 8 – Select the box next to the option namely Full Control followed by a click on the Ok button. By doing so, you are permitted the parent object to substitute the settings on all its descendants. Finally, conduct a hit on Apply as well as Ok buttons to make the changes effective immediately. Now, delete the folder/file by using any of your preferred ways.
For reference, you may like to follow How to Change File Permission to Grant Ownership in Windows 10.
Condition-6: How to Delete Files in Windows 10 Permanently
You often come across locations on your hard disk that contains unnecessary items. So, you may always prefer to keep that drive clean and tidy by removing the unwanted files. However, merely deleting them does not free up a substantial amount of space on your system drive. This is because all the deleted files are again piled up in the Recycle Bin. Therefore, if you are sure about the drives whose contents you wish to delete permanently, then pursue the given steps.
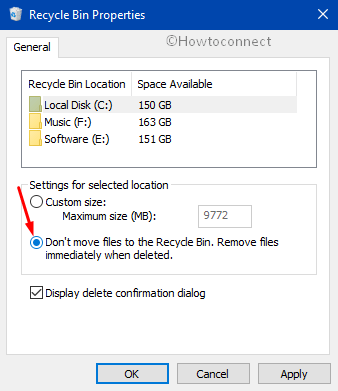
Step 1 – First of all, execute a right click on the Recycle Bin icon that exists on the desktop. When you see a menu, click on Properties.
Step 2 – Here, you can see all the drives of your system. Choose the drive whose items you don’t wish to store in the “Recycle Bin”. Proceeding forward, select the option namely Don’t move files today the Recycle Bin. Remove files immediately when deleted (see snapshot).
Step 3 – Do the same for all the drives you prefer to. Once you are over with the settings click Apply as well as Ok buttons on the dialog box.
Note – As an alternative, use the hotkeys shift and delete to remove any item without storing it in the Recycle Bin.
Read more about this condition in details – Delete Files Without Moving to Recycle Bin in Windows 10.
Wrapping Up
Deleting a file, folder, program irrespective of all types is easy and one doesn’t really need any help doing so. But whenever a condition is involved, no one will call you foolish after asking How to Delete Files in Windows 10. Scenario and conditions make easier things difficult for all. Hence, getting rid of items in Windows is not an easy task always. However, all these ways will be helpful when you proceed to delete a file. If you have more such tips on removal of files, please do write them in the comments section below.