OneNote Windows 10 app is a place for writing where all the devoted writers pen down their multiple notes or rough drafts. Many users get confused with the two forms of OneNote. One is a classic desktop form which is a member of Microsoft Office whereas, the other one is a universal app, whose live tile is observable at the Start Menu of Windows 10, Here in this article you will read OneNote Windows 10 – An Ultimate Guide to Work with different tools within this app.
Table of Contents
Launching OneNote Windows 10 App
- Widespread the Start Menu and on the right sidelong of the existing tiles, peek for OneNote.
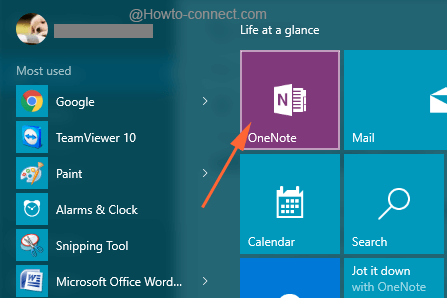
- Administer a click on it to open.
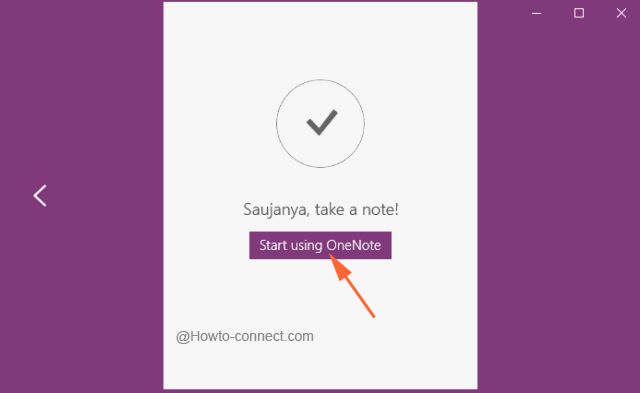
- Few guidelines of the app will be introduced. After the completion of the same, administer a hit on Start using the OneNote button.
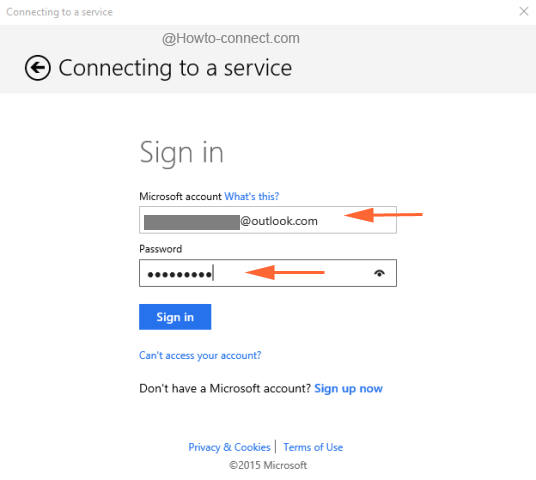
- This will fetch a separate box where you must have to type and submit most recent credentials of your Microsoft account.
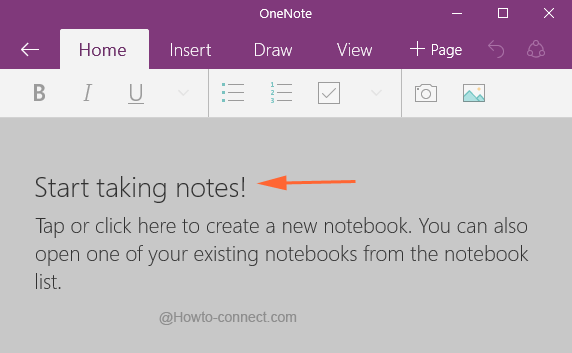
- Soon, the main app will be observable on the screen.
First Note in the OneNote Windows 10 app
- Presuming this to be the first experience with the app, the moment your account is linked with the app, OneNote will be openED up displaying its Home tab.
- You will be shown a text that reads as “Start taking Notes“. So to begin your journey with the app, administer a click anywhere in the center of the vacant space.
- The moment the above act is performed, a separate bar from the left fringe of the app will appear on the screen.
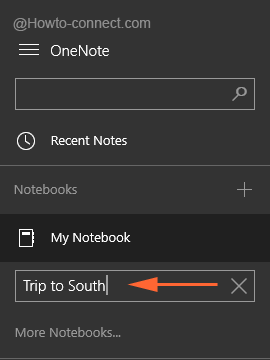
- On that very bar, various options can be witnessed. Administer a click on the + sign beside the Notebook part.
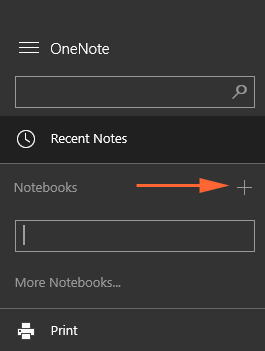
- Provide a name for the notebook and hit Enter key.
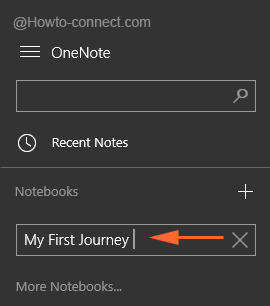
- You will be fetched to the Home view of the app where on the right empty area, you can list down your notes.
Create another Note
- When you prefer to set up another note, administer a click on the Show navigation button, the three horizontal lines beside the Home tab.
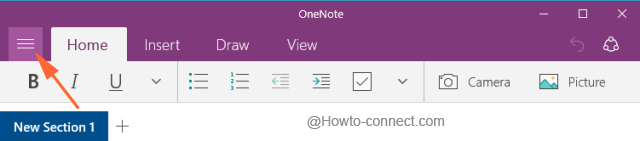
- It will pull over a connected bar from the left rim of the app.
- Conduct a click on the “+” sign, associated with Notebook option.
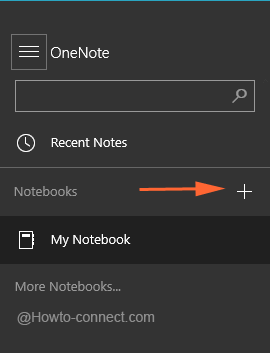
- Name your notebook as per your desire and click Enter.
- Get back to the Home tab and start making your note.
OneNote Sections
- Being into the Home tab one witnesses many other sections or parts along with the editing tools.
- The Home view of the app showcases Sections, just below the editing tools. To add a separate section for your note, click + button.

- This will bring up a new section. So, the sections can be added as per requirement.
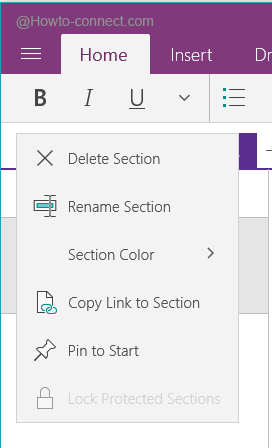
- Each Section of the notebook represents various options like the removal of a particular section, alter its name, pin to start. These options are accessible after the right click on the Sections.
OneNote Pages
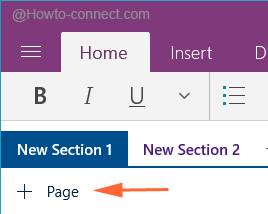
- Exactly underneath Section 1 of the Home view, + Page button is seeable.
- When a click on + Page button is executed, a page is added to the note. Depending on the note, the pages can be added accordingly.
OneNote Editing Tools
- Just like other prevailing word documents, this app also carries the standard editing tools.
- There are four separate tabs listed at the top fringe of OneNote Windows 10 app. Each tab consists of distinct editing elements. The tabs are specified as Home, Insert, Draw and View.
- The further section of the article will concentrate on the details of all the tabs.
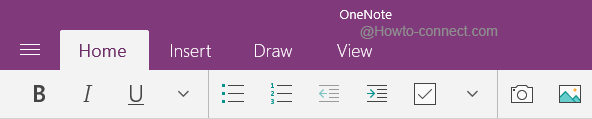
Home tab: This is the general and the crucial bar that serves most of the editing tools. The primary revising elements here are the basic ones like to alter the display of the fonts followed by options to maintain the indents of the content.
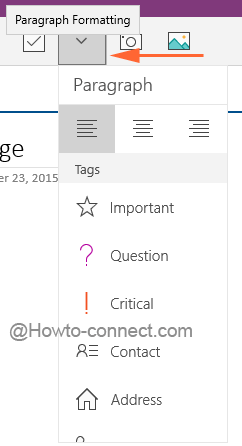
The “Paragraph permitting” arrow allows the user to classify the content using any of the label options. Depending upon the content of the OneNote, users can use the labels. This makes the content easier to recognize with its classifications.
The “Camera and Picture” symbols refer to insert an image with the aid of the machine’s camera or from any stored folder.
Insert tab: This tab serves you the purpose of including any outer stuff. The tab showcases various symbols where each of them is assigned for different types. Table symbol assigns to put an outside table to the app. Similarly, all the symbols are for specific stuff.

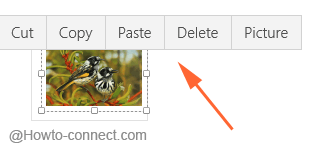
When you include an image, you have the choice to perform the basic editing like cut, copy, paste, delete and picture.
Suppose a text is added to the note and depending on its size it is restrained in a box. If the box appears to be too small, use its top-right slider to adjust it.
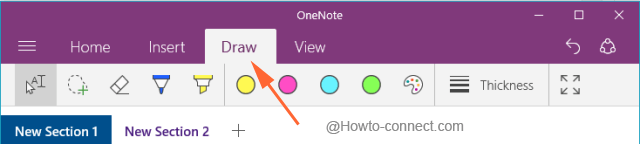
Draw: It provides the primary tools that are required for sketching. The important words of the text can be emphasized, objects can be specified or texts can be typed. Any error in the note while sketching can be wiped off using an eraser.
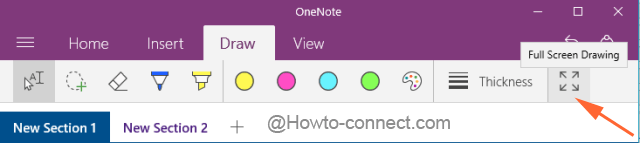
“Make a full-screen drawing” and spread out the entire drawing board on screen.
View: This is the last tab and happens to be the less loaded one. The rule lines will make the page look as a text copy of the school days, the zoom in and out are the self-explanatory tools.
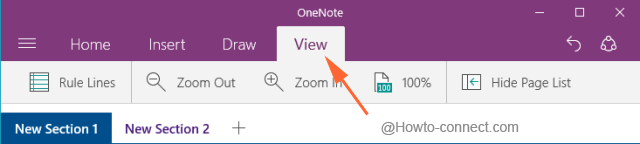
The Hide Page List wipes off the page list from the left fringe of the app.
Settings of OneNote Windows 10 App
- Keep the app open and further execute a click on the Show navigation symbol and appoint a click on Settings symbol.
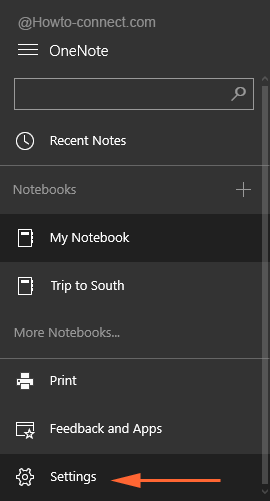
- The right fringe of the OneNote Windows 10 app will now display the Settings bar.
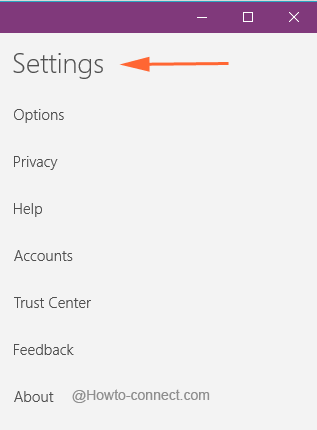
- In the further section, we will focus on the vital areas of Settings like Options, Privacy, Accounts and Trust Center.
Options: The Options section is itself divided into separate sections. The first half shows the OneDrive account where you notes are being synced. Whenever the note undergoes a change, the content will be synced to the cloud.
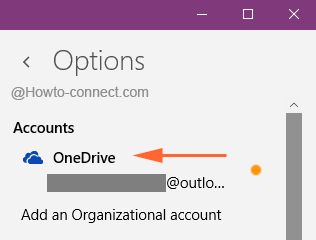
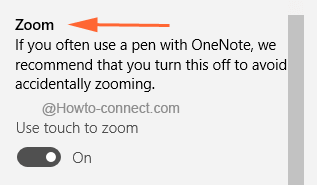
- The Zoom portion says to keep the slider off if pen is being used in the process to avoid self-regulate zooming.
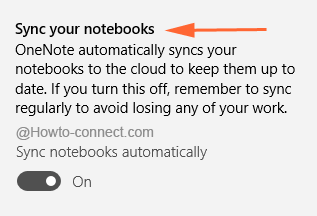
- Moving down, keep the “sync your notebooks” activate to the cloud so that the notes are always up to date.
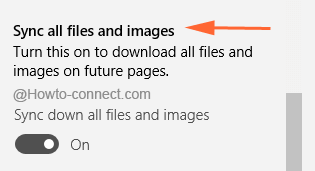
- The final option of this section is Sync all files and images. The files from a separate system are launched swiftly when it is left activated.
Privacy: This is the second and significant area of OneNote Settings. When you engage yourself in the Customer Experience Program, Microsoft tracks each and every activity of your mouse that travels on application. So, to send so much information to them is not always safe as they travel through servers, so it is advised to keep it off, always.

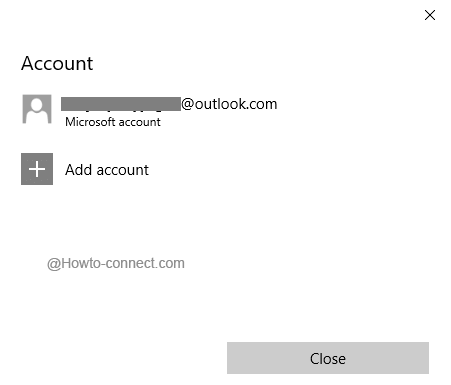
Accounts: Manage the Accounts of OneNote Windows 10 app using this piece of setting. A separate window will emerge displaying the existing linked user. And also displays an option to attach another user.
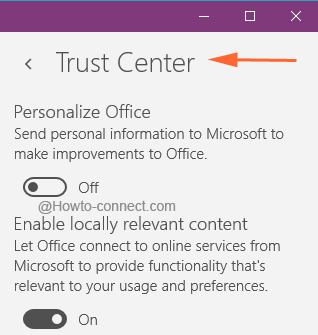
Trust Center: Microsoft has not shared any facts about the options that are served in this section. Until and unless there is much need of these options, it is good to keep them deactivated.
OneNote Sharing
- The notes are not yet finished until you share your creativity with others. The top bar where the tabs are listed also displays the Share symbol at the extreme right end.

- The apps owned from Store will now be listed to share the notes.
- Also, any page or notebook of the app permits you to pin it to the Start. Right click on the page or notebook to choose Pin to Start.
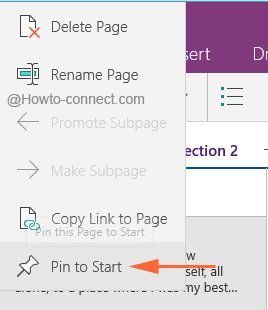
- Soon, it will find its place on the Start Menu.
OneNote Windows 10 app is definitely equipped with lots of features and elements to work on. Starting from creating notes to adding sections to pages are all possible with one app. Also, the editing elements are of the high standard because it permits to appoint favorite color on the sections and many more. I Hope, you will give it a shot and we are waiting for your experiences to be shared with us. Till then, happy noting!!!!