Way to Scan High Resolution image with HP Deskjet Scanner on Windows 10. – While scanning a loving Photo you like to keep it in High resolution. You want to store or send it to someone with perfect effect, color, and contrast. But Scanner scans photos and documents using the built-in Settings until you make changes. These settings commonly include 200 dpi resolution. This value doesn’t provide the look of the scanned photo so cool. So you need to customize the settings for getting the scanned copy the photos with the desired resolution. If you are a newbie and don’t have much knowledge about scanning then follow How to Add a Scanner to Windows 10 PC.
So in this guide, you will see How to Scan High Resolution image with HP Deskjet Scanner in Windows 10. Once you change, the Printer or scanner rescans the image in the new set Resolution. See the whole method – See a guide How to Change Screen Resolution From Graphics Cards in Windows 10.
Table of Contents
Scan High Resolution image with HP Deskjet Scanner in Windows 10
Step 1 – Click on Scan a document or photo under the Scan Section on the HP Printer Assistant.
Step 2 – Once the Scan dialog appears, Click on the Resolution drop-down and select the resolution that suits you. I commonly select 1200 value.

Step 3 – Select Scan button to start the scanning process. You can see the real time view of the process.
Step 4 – After the scanning gets completed and you can see the scanned image, click on Save. The scanner will start rescanning the same photo with your selected resolution.
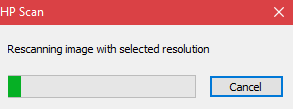
Step 5 – The scanning will take a long to complete the process as you have selected the resolution value greater. The time commonly depends on the DPI Value of resolution and higher the DPI more the time. So sit back patiently and wait until the scanning gets over. Finally, click on Done and collect your Photo.
Pursue an article How to Enable High-DPI Support For Application on Windows 10.
Conclusion
In this way, you Scan High Resolution image with HP Deskjet Scanner in Windows 10 with a slight change in setting. As you choose high dpi so the photo you are scanning will have more size. When you choose 2400 dpi, it creates a gigantic size image. So 1200 is a moderate value and gives a pretty look of the photo. So follow this guide and enjoy.