How to Turn off AutoPlay in Windows 10 – In Windows 10 operating system, you must have noticed one action. Whenever you interpolate a DVD or any USB flash drive into a system – The drive’s directory spreads on its own. And this is there where AutoPlay plays its role.
It is one of the most irritating features of Windows 10. The AutoPlay automatically opens up the drive directly which causes in spreading the viruses and is the main root cause of damaging the system. And by default AutoPlay is enabled in Windows 10. In order to keep your system safe from the malware attacks caused by the drives, you must Turn off AutoPlay option.
We have a solution that we will share with you in this post of Windows 10 and it will help you in protecting your system from further damage by disabling AutoPlay.
Table of Contents
How to Turn off AutoPlay in Windows 10
1. Through Settings Program
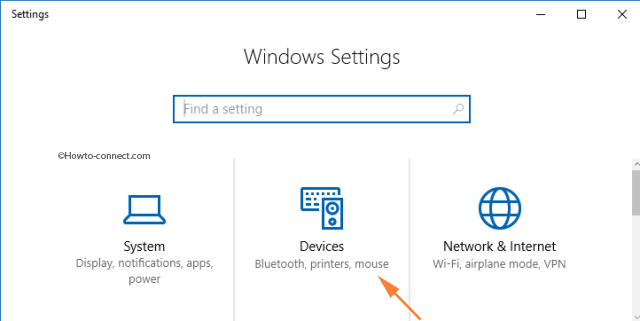
Step 1 – Jointly tap Win & I keys to widespread the Settings program.
Step 2 – Hit on the Devices.
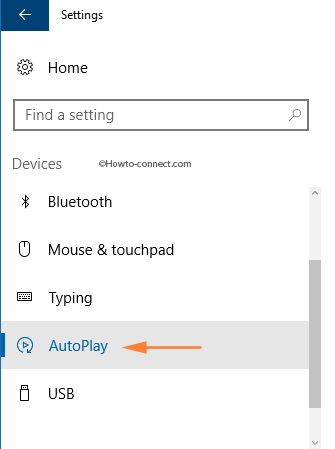
Step 3 – Click or hit AutoPlay segment, visible at the left sidebar.
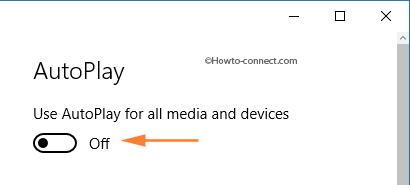
Step 4 – Moving to the right, a setting entitled Use AutoPlay for all media and devices is visible. In order to Turn off AutoPlay in Windows 10, Drag the slider towards Off position.
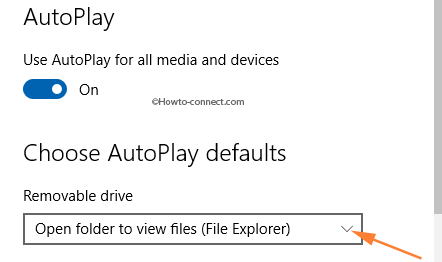
Configure AutoPlay defaults
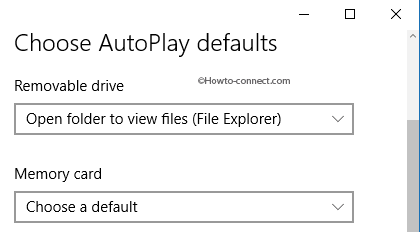
In a circumstance, if you decide to have the AutoPlay On, you can set up the manner it functions. Variant settings are bestowed for Removable drives as well as Memory cards which are visible beneath the title that read as Choose AutoPlay defaults.
Removable drives
Step 1 – Hit the drop-down visible beneath Removable drives.
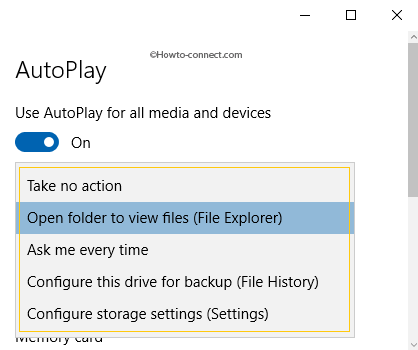
Step 2 – Amongst the five different choices, pick up the preferred one. The choices are –
1. Take no action – Inserting a removable drive will not exhibit any reaction from the system. Manually travel to File Explorer and view the files piled on that drive.
2. Open folder to view files – This is the most commonly adopted choice. Inserting a removable drive will straightway bring that drive on the screen.
3. Ask me every time – The system will always question what you desire to do. This is mostly accepted as default as you execute different activities for different removable drives.
4. Configure this drive for backup (File Explorer) – Assign this drive as the storage location for backup regarding File History .
5. Configure storage settings (Settings) – Allows you to pick up what type of files you prefer to store on the inserted removable drive. It launches the Storage segment of the Settings page for you.
Memory Card
Step 1 – In order to configure the defaults of Memory card, hit its drop-down box.
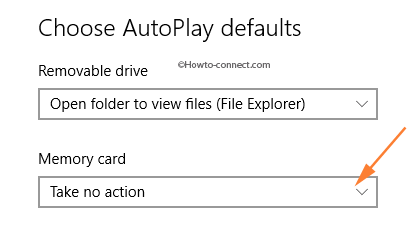
Step 2 – Depending on the installed apps, you will see default settings. However, these are the common for every machine –
1. Import photos and videos (Photos) – First of all, Photos app will get outspread. And then it imports any images kept on the card straight away to your photo library.
2. Play (Windows Media Player) – This is the second alternative. It launches the media player to play any track that is kept on your memory card.
3. Take no action – No reaction will be taken by the system. Manually travel to File Explorer and view the files stored on the card.
4. Open folder to view files – Mostly opted default choice. Insert a memory card and perceive its content on the screen within no time.
5. Ask me every time – Inserting memory will compel the system request what you want to do.

2. Through Control panel
Step 1 – Open control panel (Click this link – open control panel if you don’t aware of and find yourself in trouble).
Step 2 – Locate Autoplay link on the control panel and click on it.

- Once Autoplay window emerges on the screen, uncheck the square shaped tiny box before Use Autoplay for all media devices. Lastly, gently press the save button residing at the bottom part.

Performance
says:As well as interesting, You are an extremely competent blog writer. I’ve joined up with a person’s feed and turn into in place intended for in the track down additional of your superb submit.. Performance Likewise, I have got distributed your internet site within my web sites