Blue Screen SYSTEM LICENSE VIOLATION, is a Windows 10 error, occurs mainly at the time of starting a program or ending. The issue is really perilous since it crashes Windows 10 and restart your PC in order to prevent damage. Along with this stop code, the affected devices also shows a bug check value 0x0000009A. These types of issues are especially common in Windows 10 and found to cause devastating damage. In addition, the computer also faces random reboots in order to reduce the effect of damage to the OS.
The error needs an immediate resolution and we are here today to eradicate the issue accordingly with proper workarounds. Major causes behind SYSTEM LICENSE VIOLATION blue screen error are outdated and incompatible drivers. In addition, some other reasons are also responsible to cause this issue. For instance – the presence of similar applications, memory issues, poor disk area, malware or virus causes BSOD as well. Here, in this article, we will explain the effective resolutions to fix the blue screen Windows 10 error. For your easy navigating to them, they are listed below –
SYSTEM LICENSE VIOLATION Error in Windows 10 Solutions
Here is how to fix SYSTEM LICENSE VIOLATION Error in Windows 10 –
1] Update Problematic Drivers to fix SYSTEM LICENSE VIOLATION
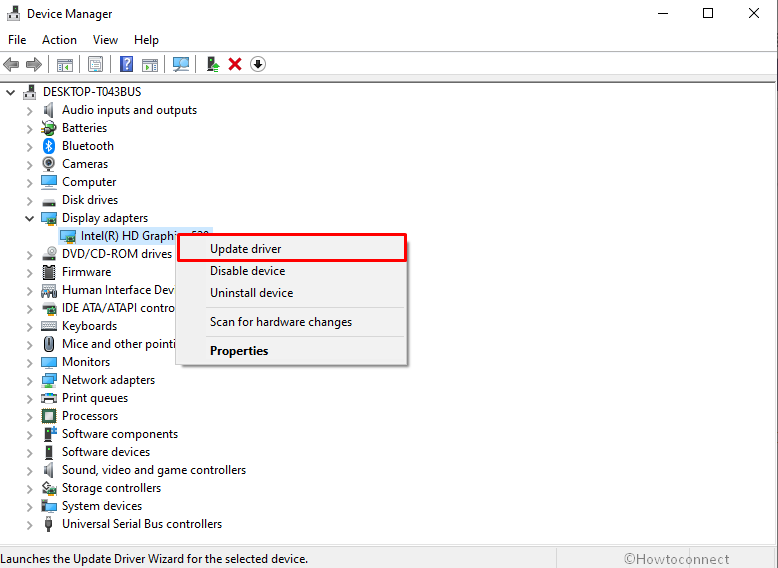
Microsoft experts regularly try to keep your device up-to-date with the changes and security patches. Microsoft Partner company Driver’s updates are installed automatically and deprive you of choosing whether which one is essential. In rare cases, a specific driver might temporarily cause issues that affect your device and cause BSOD SYSTEM LICENSE VIOLATION. So, it is a good idea on your part to open Device Manager and find out all the software that is creating a mess. Tracing them is quite easy as they display a yellow exclamation sign just next to items. Let us see how to carry out this task in details –
- Press Win + R to open Run dialog box.
- Input the command devmgmt.msc in the text field and click OK.
- Once the console shows up, locate the devices that display a yellow exclamation sign.
- Expand the sections and right-click the drivers one by one.
- Choose the Update driver option from the menu that comes into view.
- Upon the prompt of the update wizard, select Search automatically for drivers.
- Finish the installation process by following the directions of the wizard.
2] Execute BSOD Troubleshooter
The company offers Blue Screen troubleshooter, a built-in tool that detects and makes an attempt to fix the areas that cause the SYSTEM LICENSE VIOLATION error. Introduced settings app in the Fall Creators Update edition, this utility is efficient to deal with these kinds of problems. Follow the below series of steps to get rid of this annoying stop code –
- Press Win + I hotkeys together to open the Windows Settings app.
- Once into the UI, navigate to the Update & security tab.
- Reach out to the Troubleshoot section that is available in the left sidebar.
- On the right pane, scroll and locate the Blue screen option.
- Select it and click on the Run the troubleshooter button.
- This will start detecting the possible reasons that are creating a mess on the system
3] Restore Corrupted Windows System Files
When your PC crashes with a BSOD SYSTEM LICENSE VIOLATION, it might be because of missing or corrupted system files. This mainly happens if you have personalized the OS, modified certain Registry keys, or mistakenly replaced any system files. Therefore, you have to execute System File Checker to restore them because this is one of the most common applications when it comes to resolving the BSOD issues.
- Press Win+X together and select the Run option.
- In the void, type cmd press “Ctrl+Shift+Enter” to directly Open Command Prompt as Admin From Run Dialog.
- When UAC prompts on the screen, click the Yes button.
- On the following screen, type the below command line and press Enter to start executing the scan.
sfc /scannow
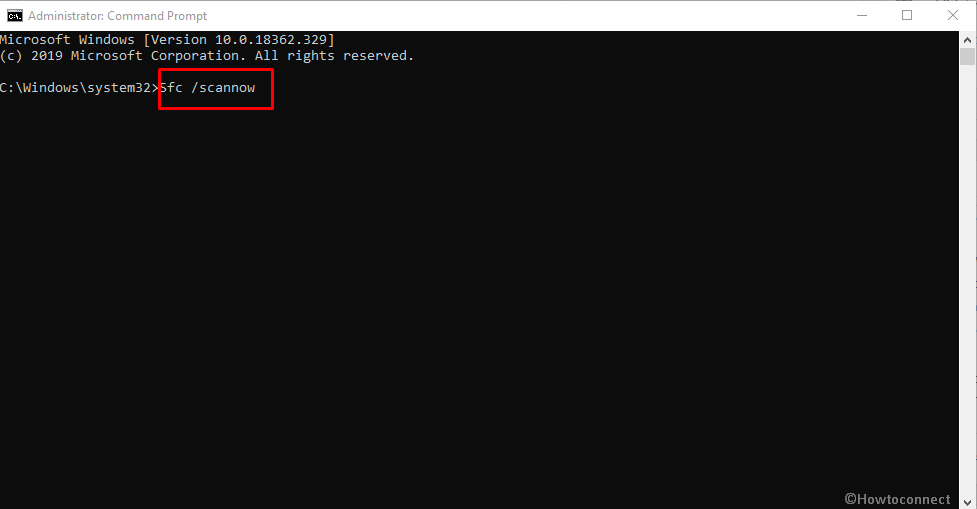
- The tool will detect the missing files and take some time to restore them from the cache folder.
- For better outcomes, reboot the device after the scan gets over.
4] Uninstall 3rd Party Antivirus Tool
Installing antivirus software from an outside source makes certain changes in the integral components of the system and in the registry as well. Sometimes, these modifications show opposite effects and result in unwanted issues like SYSTEM LICENSE VIOLATION. Therefore, you should not depend on any 3rd party antimalware solution that does not suit your PC. So, if you are using any such program, first remove it completely from your device. Also, ensure to delete all the settings that it made during installation.
- Right-click on the Start button and click the Apps and features option.
- On the right side of the Apps settings page, scroll to view the installed applications.
- Find out the antivirus tool which you have to remove and then select it.
- Click the Uninstall button and then go through the given instructions.
- Reboot the device and check for the occurrence of the BSOD error.
5] Turn OFF Automatic Restart Feature
As per Microsoft technician, when a PC is diagnosed with a BSOD error, the system automatically slips into the reboot mode. This behavior of the operating system is just to protect the device from further damage or system failure that the error SYSTEM LICENSE VIOLATION can cause. It is somewhat disturbing as the affected user cannot take certain actions for possible fixes on the Internet. Hence, you have to first disable the auto-restart feature in order to carry out other workarounds.
Step-1: First of all, press Win+D together and head to the desktop.
Step-2: Open the File Explorer using Win+E hotkey.
Step-3: Right-click on This PC icon and choose Properties from the list of options.
Step-4: On the following page, click Advanced system settings link available on the left side.
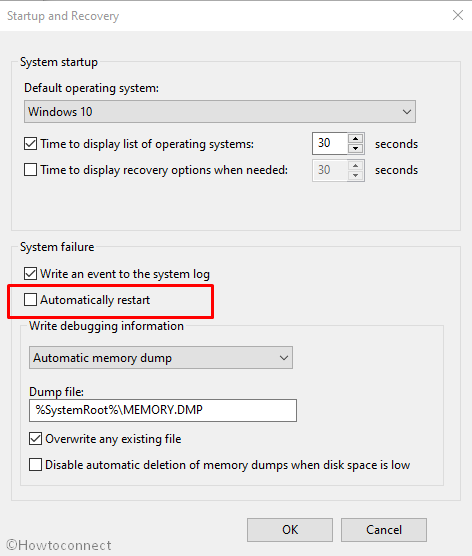
Step-5: Go to the Advanced tab, proceed to the Startup and Recovery one and do a click on Settings.
Step-6: Now, uncheck the box next to the item namely Automatic restart.
Step-7: Click OK and then Apply buttons to disable this auto-reboot feature.
6] Resolve SYSTEM LICENSE VIOLATION by Scanning for Malware
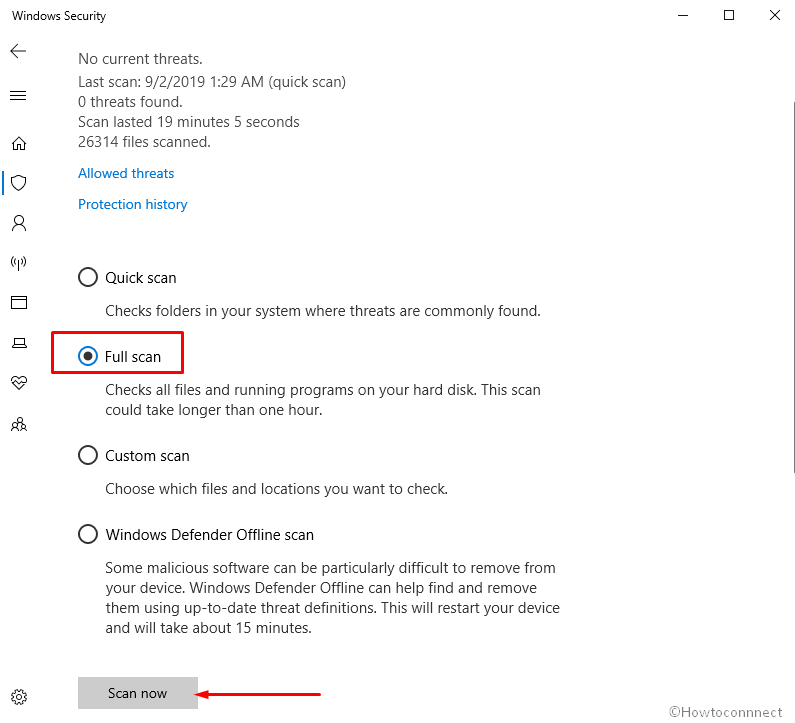
Usually, Windows users experience malware or virus attacks by some of the other means sooner or later. By the way, a large number of 3rd party antivirus solutions are available in the market, but they will not clean your system perfectly. Therefore, Microsoft provides you Windows Security app that can help you in eradicating all the threats. Once you conduct a full PC scan, whichever malware is causing SYSTEM LICENSE VIOLATION will be diagnosed and removed.
- Right-click on the Start button and select the Settings option.
- Open the Update & Security category.
- From the left pane, select Windows Security.
- Go to the right side and explore Virus & threat protection.
- Click Scan options link on the right pane of the consequent page.
- Here, chooseFull scan and to initiate the procedure click Scan now button at the bottom.
- This will take a few times, as this will scan each and every component of the system.
- Therefore, wait for a while and let the app make your device virus-free.
7] Check for Updates
To keep your PC healthy, the operating system should be always up-to-date and the company provides updates at a regular interval of time. They are in the form of cumulative updates or preview builds that contains fixes for several bugs and problems. In addition, the team also introduces new features, releases updates for drivers and more to help users gain a better experience. So, when your computer is isolated with such an important factor, you will definitely encounter issues including SYSTEM LICENSE VIOLATION. Therefore, ensure that you are not one of them whose PC is not running an updated version of Windows 10. Follow the instructions through the below steps –
- Press Win key from your keyboard and select the gear icon.
- Once Windows Settings comes into view, go to Update & security.
- Click Check for updates button on the right pane of the following page.
- The system will detect and list down all the available ones.
- Hit the Download button to grab them.
- If the updates ask for a reboot, do it and follow the guidelines of the update and finish the installation.
Note – Ensure to have a proper internet connection otherwise it may end up in installation failure. Also, while using Mobile Hotspot, turn off the Metered connection feature.
8] Repair Windows Image Files
On Windows 10, the team designed the DISM tool, which is mainly used to repair system images, including the Windows Recovery Environment, and more. However, you can also use Command Prompt which is still a powerful tool to settle down various problems. Usually, when your computer is experiencing performance issues then SYSTEM LICENSE VIOLATION will be pretty common to occur. Hence, once you put the DISM application into operation; it will rectify the damaged files instantly. Go through the below series of steps to execute this utility effectively –
- Do a right-click on the taskbar, select Task Manager from the context menu.
- Click File on the menu bar and then select Run new task.
- Type in the command cmd and ensure to check mark the option “Create this task with administrative privileges”.
- Click the OK button and let launch the elevated command prompt directly.
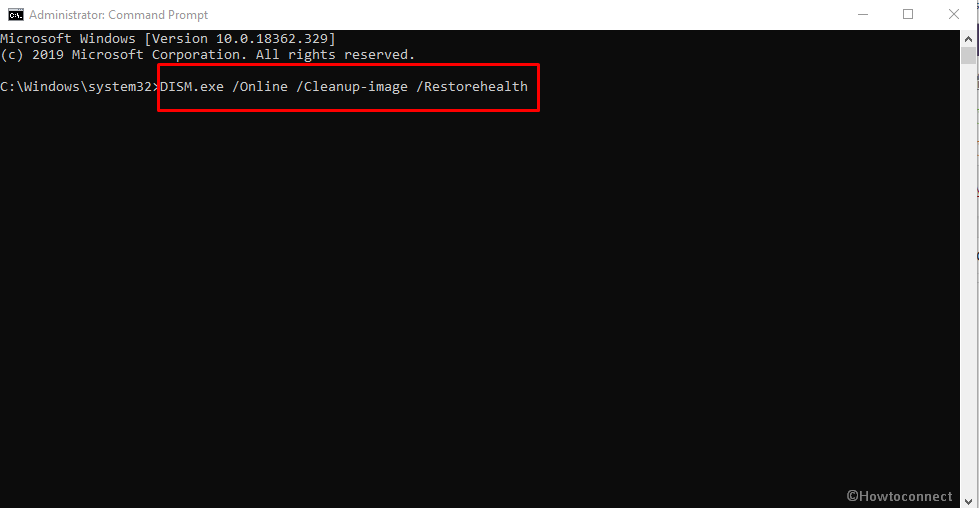
- On the following page, type the following command and press Enter.
DISM.exe /Online /Cleanup-image /Restorehealth
- The scan for the defective image files in the operating system will start immediately and might take a little time to complete.
- Once it gets over, restart the device and check for the error during startup.
9] Detect RAM issues
If your machine is producing a constant beep sound on startup, then there’s a higher likelihood of being a memory issue. An outdated or faulty RAM puts an obstacle in the smooth functioning of an OS. So, if your PC has a bad memory, you need to replace it immediately to get rid of the SYSTEM LICENSE VIOLATION error.
- Press Win + S hotkey and let the Taskbar search appear.
- Type ‘memory‘ in the text field and hit Enter to open the Windows Memory Diagnostic tool.
- Once its wizard is visible on the screen, select Restart now and check for the problems (recommended).
- This will make the PC screen completely blue and will start detecting the RAM issues.
- The utility will make an auto-reboot and upon startup, you can view the results in the system tray.
- If it detects a problem in the memory, you need to take an expert help immediately and get it fixed.
10] Clear out the Junk to Fix SYSTEM LICENSE VIOLATION
The hard drive should always have enough room to improve Windows 10 performance successfully. The continuous accumulation of temporary files, browser cache, in the system drive is not healthy for a PC. So, the lack of space in the system also leads to various types of issues. Therefore, the most reliable way to manage these situations is clear out the junk by using Disk Cleanup –
- Use the combination of Win + R hotkeys to access Run dialog.
- Insert the command ‘cleanmgr’ and click OK to proceed.
- Choose the drive letter (C:) that contains the OS.
- When Disk Cleanup wizard shows up, click Clean up system files.
- Again select the same drive and checkmark all the boxes except Downloads.
- Click OK and the tool will start removing the files right away.

11] Repair Bad Disk Areas
Continuous usage of hard disk frequently leads to bad sectors in it which further ends up in the disturbance of the operating system. However, there’s no need to be panic as these segments can be repaired using a built-in tool. Therefore, if your hard drive is encountering this issue, you should always keep patience and follow this guide to get them repaired –
- Go to the Windows search area and type cmd.
- Right-click on the Command Prompt result and choose Run as administrator.
- Give approval to the UAC prompt by hitting the Yes button.
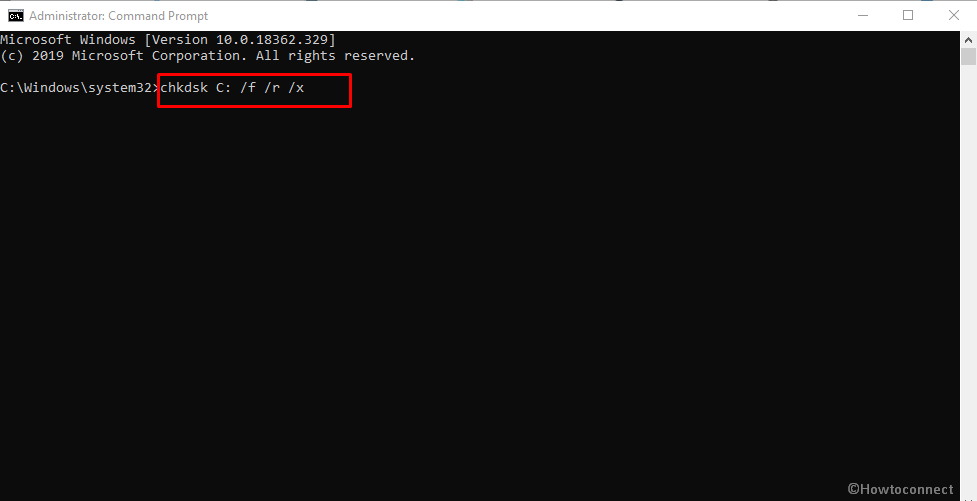
- On the following page, input the given command line and hit Enter to execute it.
chkdsk C: /f /r /x
- This will let you know the status of the disk only but to fix up the bad areas you need to add more prefixes to the command – /f /r /x
The letter “f” will execute the command to mitigate the trouble from the volume.
Alphabet “r” will detect the poor areas in the Hard Disk.
And, finally, the “x” notation will make the whole volume to dismount before moving on.
- Accordingly, now, the entire command will be –
chkdsk C: /f /r /x
Note – The alphabet C: in the above command is the drive letter where the OS is installed. In case you are using another drive letter, kindly substitute it with C.
12] Delete Faulty Update Files
There are wide range of reasons where the installation of update files fail which eventually ends up in creating BSODs like SYSTEM LICENSE VIOLATION. If you have a poor internet connection, lack of disk space and more such problems can cause obstacles while installing the update files. It further creates a mess in the integrity of the system and thus you need to remove them immediately. To do so, follow the guidelines given below –
- Launch the built-in Windows Settings application via any of your preferred ways.
- Once you are into it, click the Update & security icon.
- On the following page, move to the right side and select View update history.
- Click Uninstall updates the link as shown in the below picture.
- From the following option, find out the latest update that you carried out.
- Once you get it, select and click the Uninstall button from the menu bar.
- If it asks for a restart, do so and then check for the error.
13] Remove Similar Programs
While customizing your Windows 10 PC, you may use several applications either from Microsoft or from outside sources. But many times, it happens that these apps contain similar purposes which try to change the same components of the system. Now, this behavior creates conflict in the smooth operation and ends up in several errors like BSOD SYSTEM LICENSE VIOLATION. Therefore, simply uninstall these programs along with its settings and see whether this fixes the problem.
- Do a right-click on the Start icon and choose Apps and Features from the menu that comes into view.
- When into the Apps settings page, locate and select the programs with similar functions.
- Click Uninstall and carry out the deletion procedure as the app instructs.
14] Do System Restore to Resolve SYSTEM_LICENSE_VIOLATION
One should always create a restore point which works as a savior during major issues. In case you created one, then this will help you to come out of the BSOD like SYSTEM LICENSE VIOLATION. Carrying out this workaround will take your device back to the situation when everything was functioning properly.
- Open the taskbar search as we explained above.
- In the void, type rstrui and hit Enter.
- When System Restore wizard becomes visible, click Next to view all the available restore points.
- Choose the latest one from the list and click Next to proceed further.
- Lastly, do a click on the Finish button and the restoration will begin.
- Once you roll back to the previous point, we hope you will not experience SYSTEM_LICENSE_VIOLATION error anymore.
15] Disconnect External Hardware to Fix SYSTEM LICENSE VIOLATION
If you connect any external hardware to your device running Windows 10, then there are likely risks of their incompatibility with the OS. Therefore, if you are experiencing the BSOD error SYSTEM LICENSE VIOLATION after connecting any such hardware, try to detach it. Remove all the accessories, Restart Windows 10 PC and upon startup see whether you are getting the error or not.
In addition, If no such issue arises, connect the external devices one by one. If the problem appears again after attaching any specific accessory, then you will get the actual culprit.
16] Windows 10 Reset
As your computer is not working well and continuously throwing SYSTEM LICENSE VIOLATION error, resetting might help. Using this technique, you will get two options – either to remove everything or to keep the personal files. Once you opt for the preferable one, it will reinstall Windows completely.
- Press Win+X hotkeys and select the Settings option.
- Go to the Update & security category.
- Reach out to the Recovery subsection on the left sidebar of the next page.
- Switch to the right pane and you will find out a few sections including Reset this PC.
- Click the Get started button and let the re-installation procedure begins.
- Carefully read out the instructions and finish the workaround.
17] Do an Automatic Repair
If the entire above workarounds do not help you in resolving the SYSTEM LICENSE VIOLATION error, then try out the automatic repair feature. Though it is not recommended for every user, you still give an attempt to it as it would be one of the last options.
- Press Win+A hotkey and let expand the Action Center, choose Settings.
- Select the Update & security category once the app shows up.
- Navigate to the Recovery subsection on the left pane of the following page.
- Shift to the right side and locate the Advanced startup section.
- Click Get started button that appears underneath it.
- Let the device reboot and upon startup, navigate to the following path, Troubleshoot => Advanced options => Startup repair.
- This will take you to the Automatic repair where you need to provide your Microsoft account credentials.
- Enter the required details correctly, and then click Continue to start the repair.
- Once it gets over, check for the occurrence of the BSOD stop code.
Methods:
1] Update Problematic Drivers
2] Execute BSOD Troubleshooter
3] Restore Corrupted Windows System Files
4] Uninstall 3rd Party Antivirus Tool
5] Turn OFF Automatic Restart Feature
6] Scan for Malware
7] Check for Updates
8] Repair Windows Image Files
9] Detect RAM issues
10] Clear out the Junk
11] Repair Bad Disk Areas
12] Delete Faulty Update Files
13] Remove similar Programs
14] Do System Restore
15] Disconnect External Hardware
16] Windows 10 Reset
17] Do an Automatic Repair
That’s all!!