To establish a custom power plan is a provision provided by Windows since ages for its users. With the already existing plans, you can pick up anyone as your base plan and then create a custom power plan in Windows 10. The method is not at all complicated with very few easy steps. So, for the users who prefer to create their own plan, we bring you this article with all possible steps of how to create a custom power plan in Windows 10.
Related:
How to Optimize Battery Saver Settings in Windows 10 to get Utmost
Power plan or power scheme is a compilation of hardware and system settings that ensure to provide you the maximum performance of the system with minimal usage of energy to give a long battery life. Well, to establish your own power plan, you need to choose one of the existing plans as your base to proceed further. By the nature of Windows, it provides you three plans. Hence, let us start with the steps and see how to create a custom power plan in Windows 10.
How to Create a Custom Power Plan in Windows 10
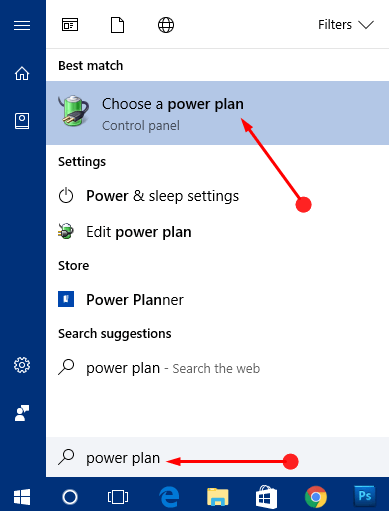
- You need to launch the Power Options window on your screen. The easiest way is by typing power plan on Cortana and selecting Choose a power plan that comes up as the result.
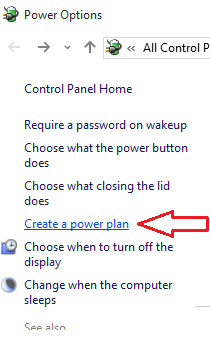
- After the emergence of Power Options window on your screen, click Create a power plan link on the left bar of available links.
- This takes you to the Create a power plan window where you can see three available plans of Windows. You need to pick up so that it will act as a base plan for your new plan.
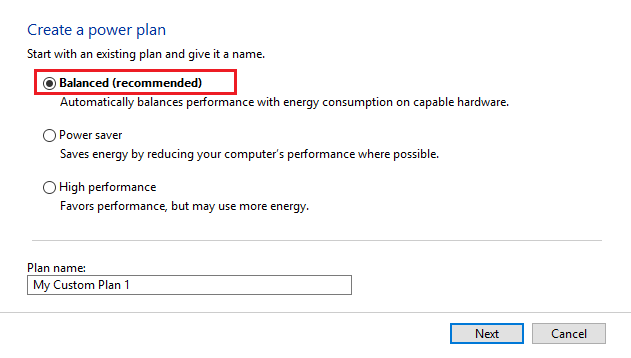
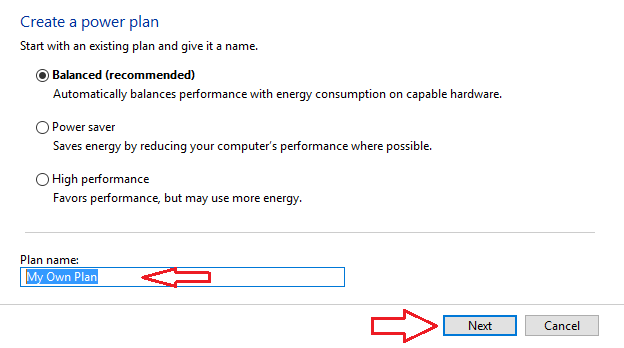
- After choosing one plan, provide a name for the new plan in the field called Plan name followed by a click on Next button.
- In the following screen, you can see the values of the settings are of the base plan. Do, the changes as per your requirement.
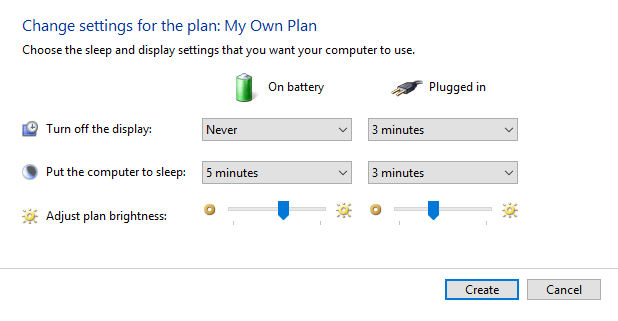
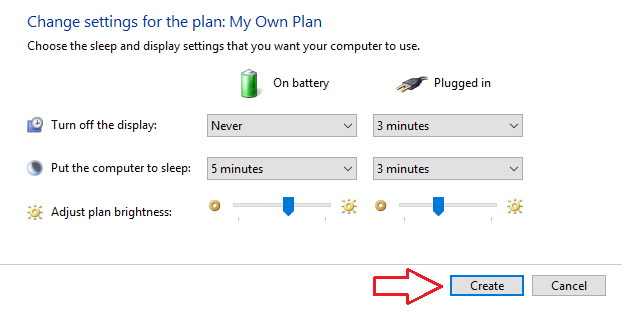
- Once you are done with the modifications, click Create button.
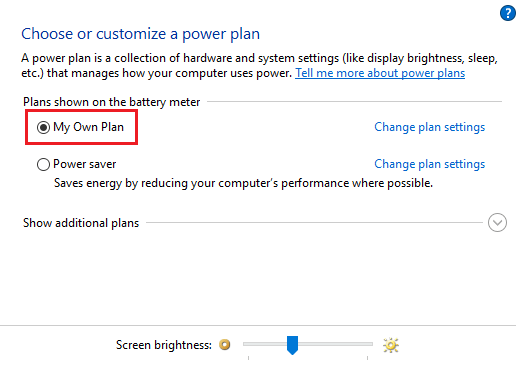
- Now, you can see the newly established power plan as the active plan for your system.
You should always try to work with the new settings especially when they can meet your needs and improvises your system’s performance. Hope we have provided you all the required details. Give it a shot and let us know if you stuck somewhere. We are always at your service.