Windows SmartScreen is a security tool on Windows 10 got from its earlier editions like Windows 7 and 8 to run your computer smartly. When you run Internet on your machine, numbers of websites try to install apps and codes. SmartScreen provides you the tool using which you can prevent these apps from installing from the web and running on your PC as well. After you enable this security tool, you are asked prior to the installation of an unrecognized application whether you confirm to run this or not.
You can use Windows SmartScreen for better security prospects and restrain and control harmful applications from running on your Windows 10 PC.
How to Enable / Disable SmartScreen on Windows 10
We are describing here 2 tips to Enable / Disable SmartScreen on Windows 10 PC below.
1] Via Windows Security app
This is a Short Process and you can enable Windows SmartScreen more easily and quickly by using this process.
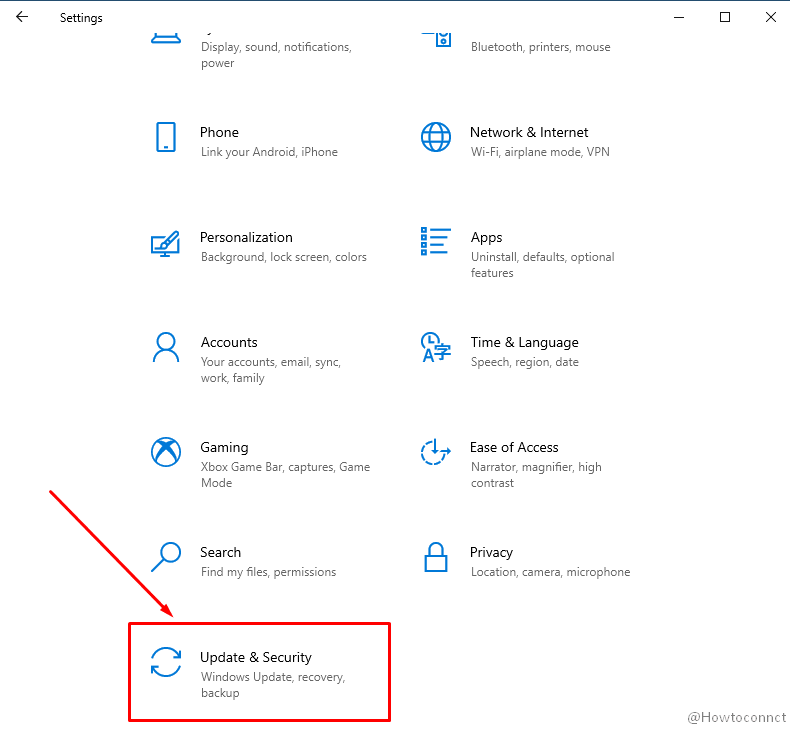
- Press – Winlogo + I.
- Select – Update & Security.
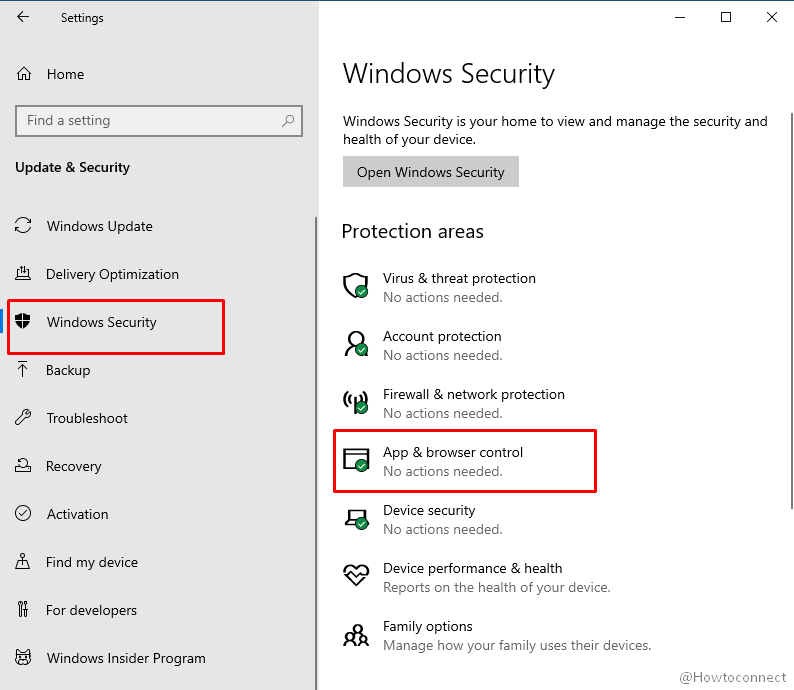
- Click the – Windows Security from the left pane.
- Go to the right and click – App & browser control.
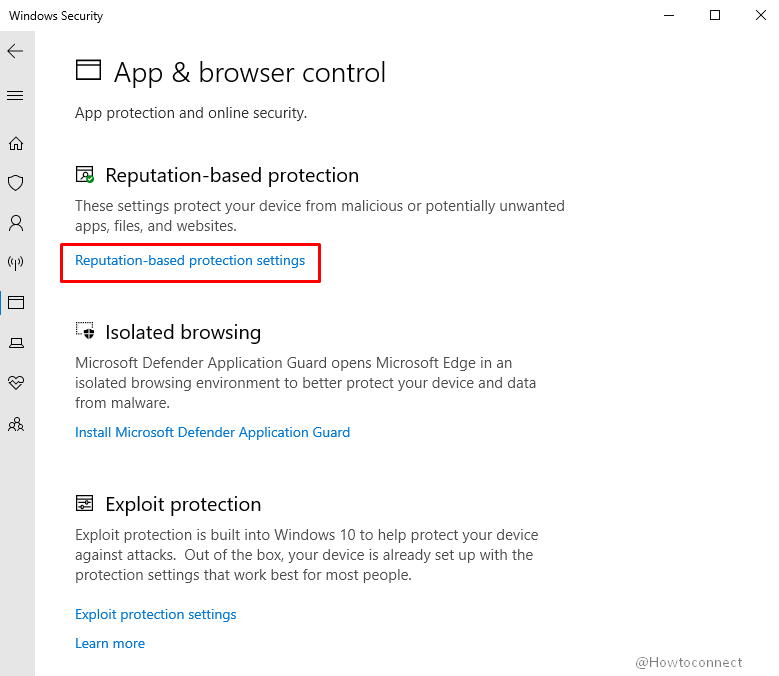
- A separate Windows Security app will prompt up, click – Reputation-based protection settings.
- To perform Windows SmartScreen disable method, you need to turn off Potentially unwanted app blocking.
- So, click on the toggle switch in this section.
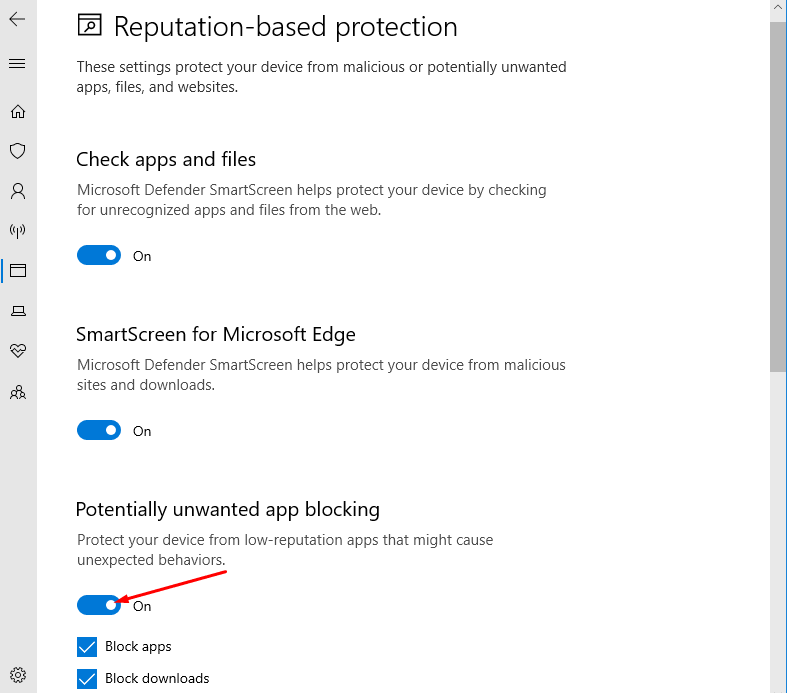
- A User account control dialog will appear, select – Yes.
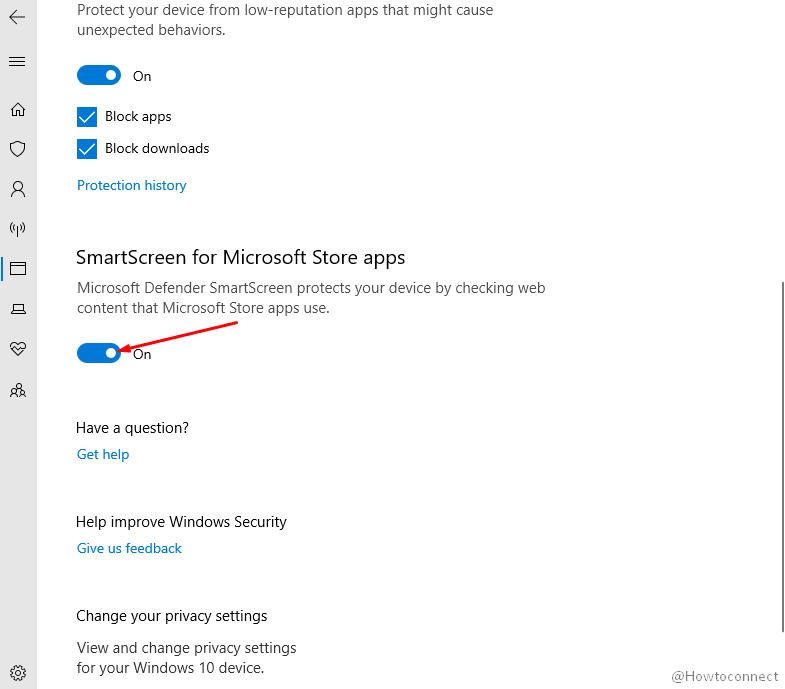
- If you want to enable or disable the SmartScreen for Microsoft Store then use the toggle there.
- For Apps and files checking turn off the SmartScreen through the first section.
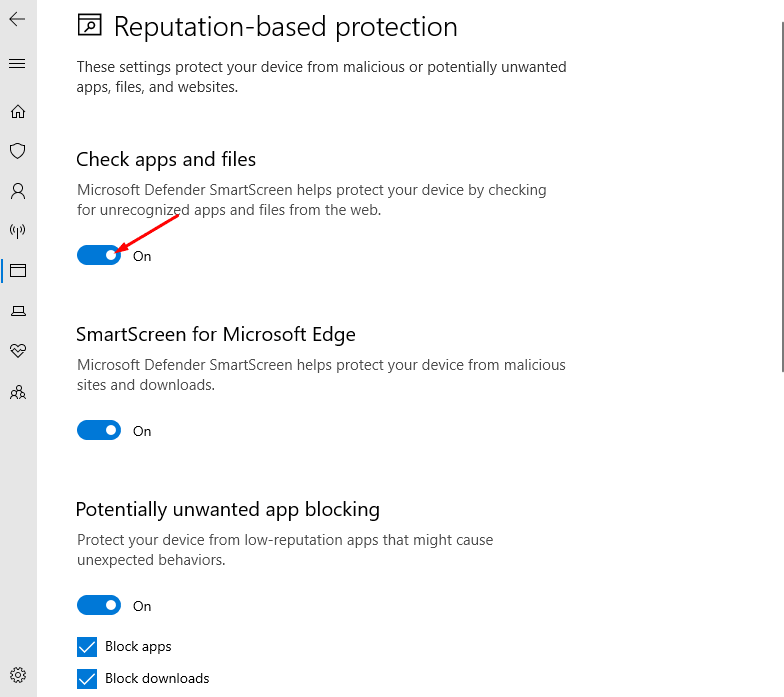
- Similarly, disable the filter for Microsoft Edge from here.
2] Disable Windows SmartScreen through Gpedit
- Click the – Start.
- Type – Gpedit.
- Hit the – Enter.
- Navigate to –
Computer Configuration / Administrative Templates > Windows Components / File Explorer
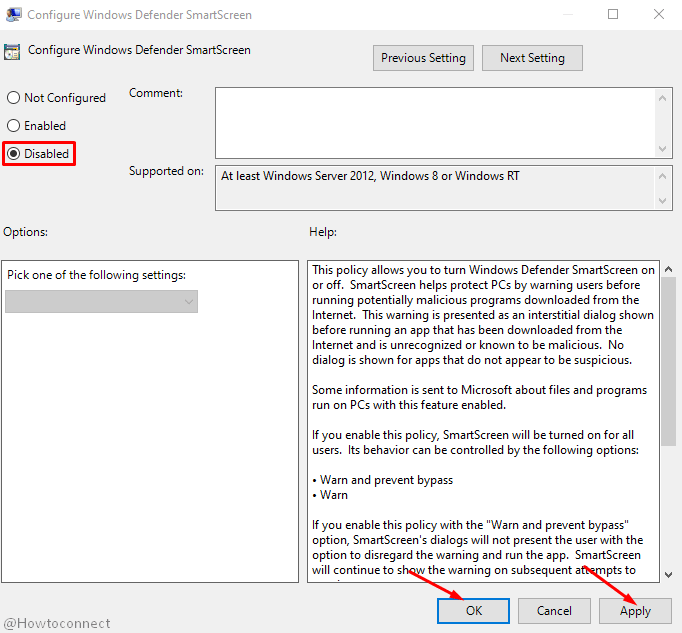
- Double click – Configure Windows Defender SmartScreen.
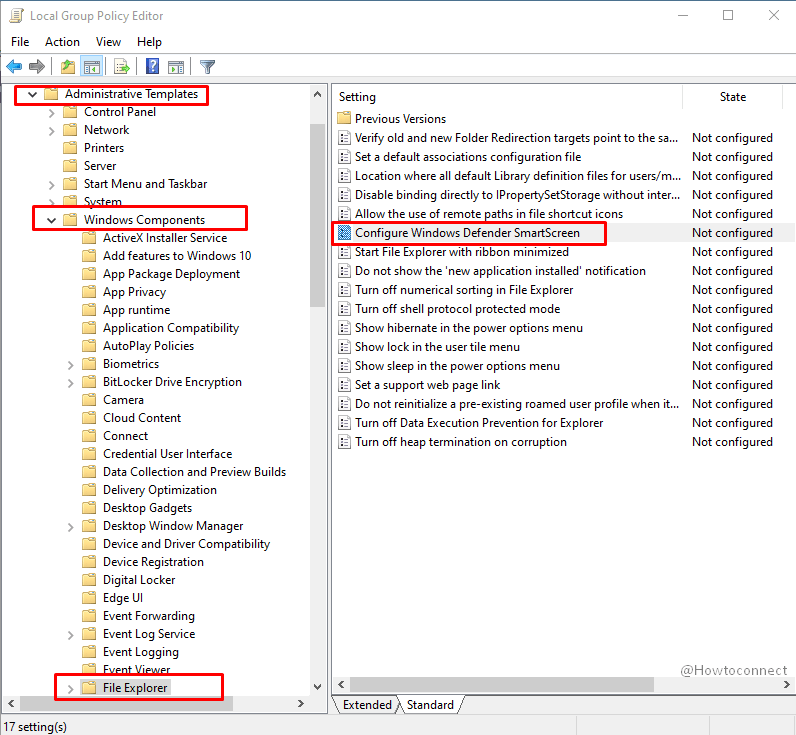
- A separate window will appear, select – Disabled. To Enable,
- Click – Apply and – OK.
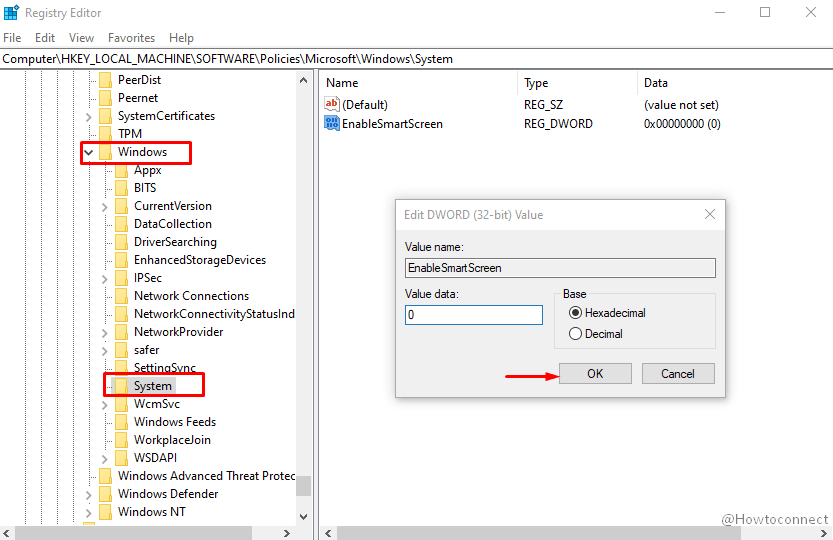
3] Windows SmartScreen disable via Regedit
- Press – Windows key.
- Type in – regedit.exe.
- Once the Registry Editor appears, go to
HKEY_LOCAL_MACHINE\SOFTWARE\Policies\Microsoft\Windows\
- Right-click on Windows and select – New > Key.
- Name this one – System.
- Go to the ‘right’, right click, and select – New > DWORD (32-bit) Value.
- Name this value – EnableSmartScreen.
- To enable set this value 1 and to disable change it to 0.
Methods:
1] Via Windows Security app
2] Through Gpedit
3] Via Regedit