Partition is a separate local disk drive on Windows 11 PC allowing you to store data. This is the volume or virtual section where you install the operating system and place files folders, and backup. Each partition is independent storage that typically assigns a drive letter making it easy to work with. Let’s see How to Create Partition in Windows 11 with multiple methods.
Basically, the volume is easily created through Disk management, however, you can use command prompt too for the same. See the ways and find the simplest one for you.
Create Partition in Windows 10
Here is How to Create Partition in Windows 11 –
Way-1: Via Disk Management
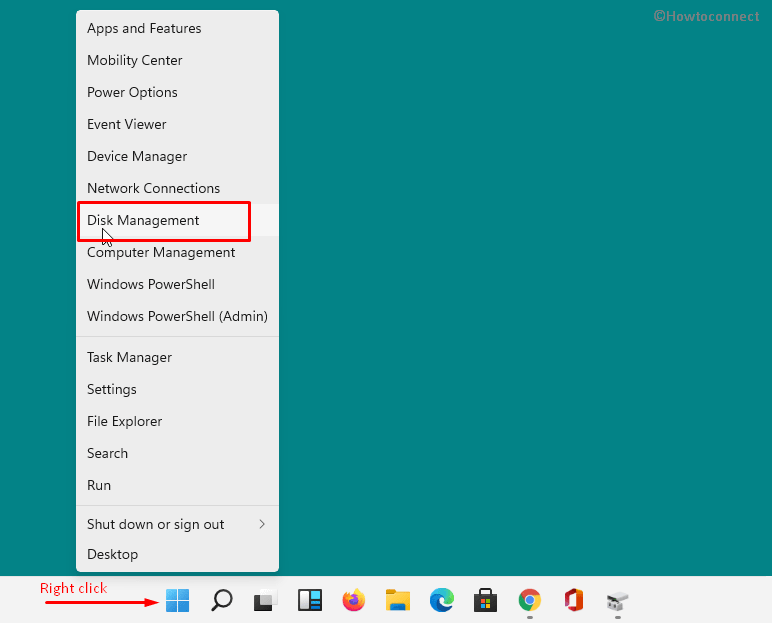
- Right-click on – Start.
- Select – Disk Management.
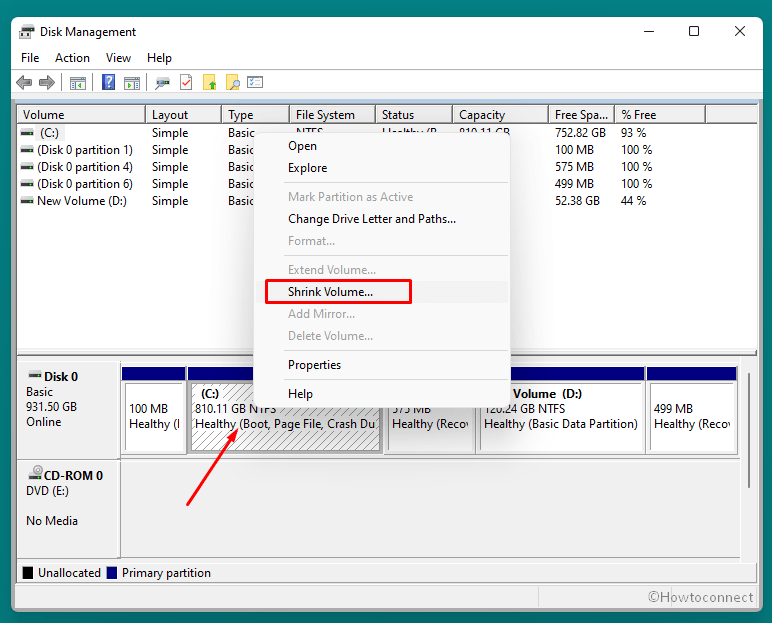
- From the Disk Management window, right-click the drive you want to create partition.
- Choose – Shrink Volume.
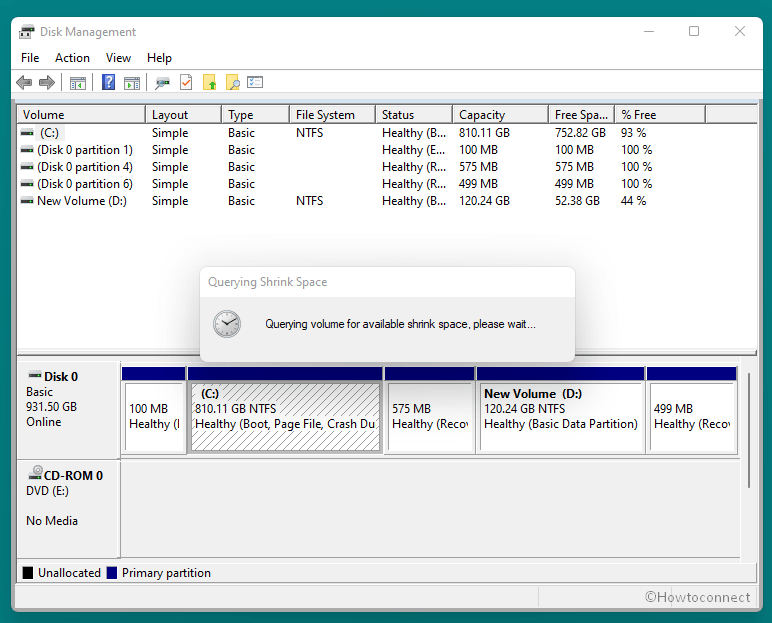
- You will see a dialog “Quering volume for available shrink space. please wait for a while” as below screenshot. Wait for a little time –
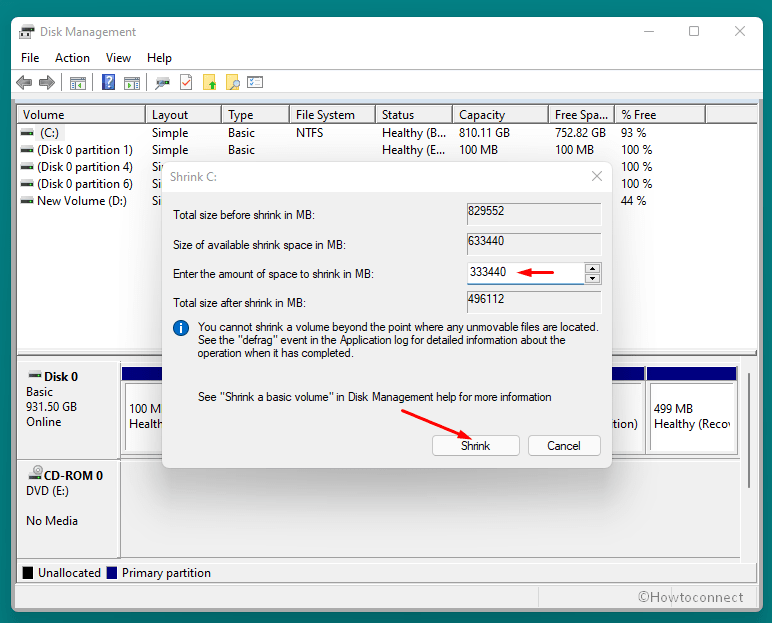
- On the window that appears, enter the amount of space you want to shrink in MB. This will be the maximum size of your coming partition.
- Click – Shrink.
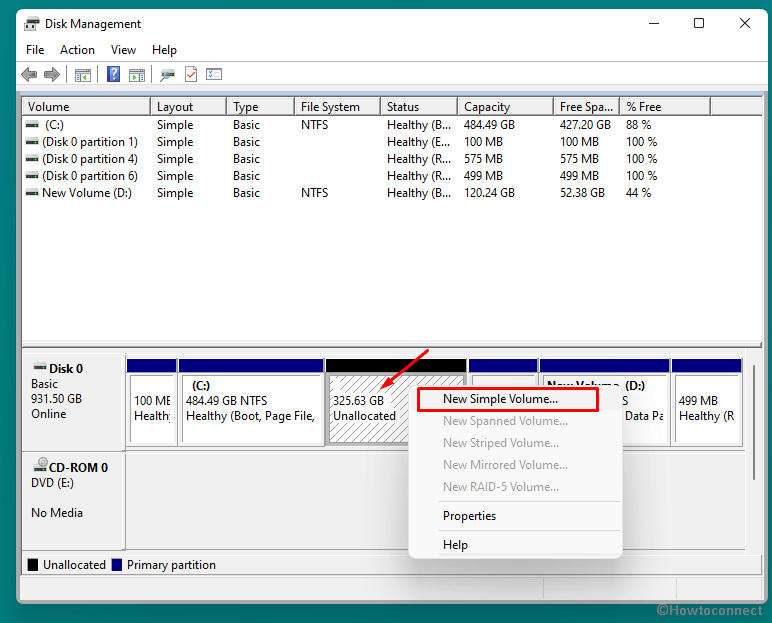
- Now, right-click on – unallocated.
- Choose – New Simple Volume.
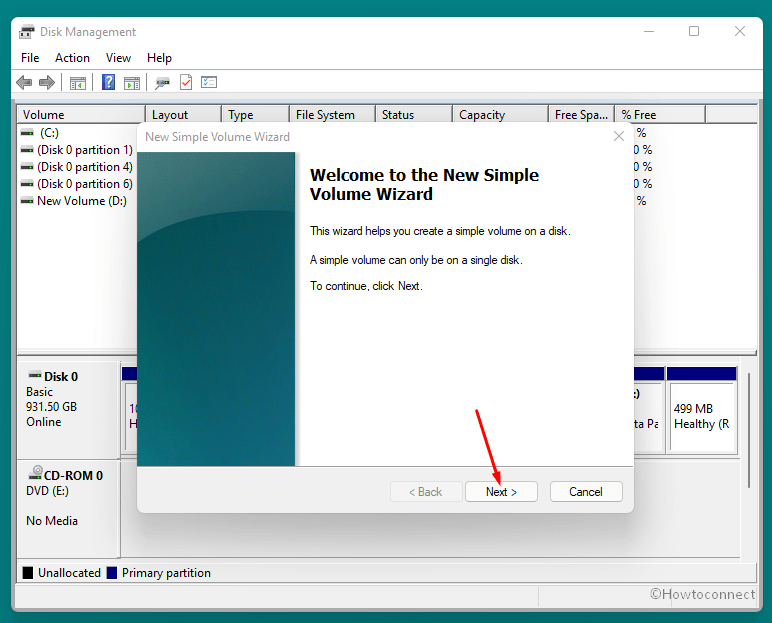
- When a window appears, click – Next.
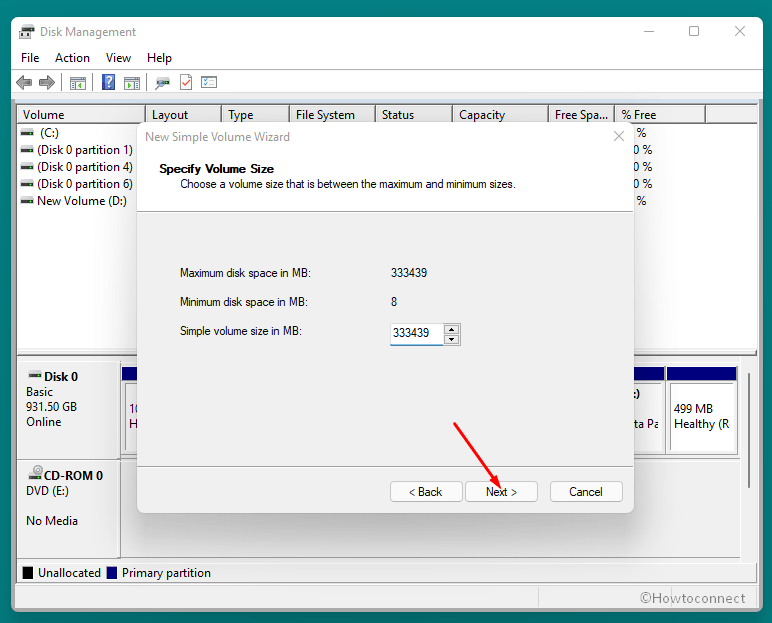
- Specify simple volume size and hit – Next.
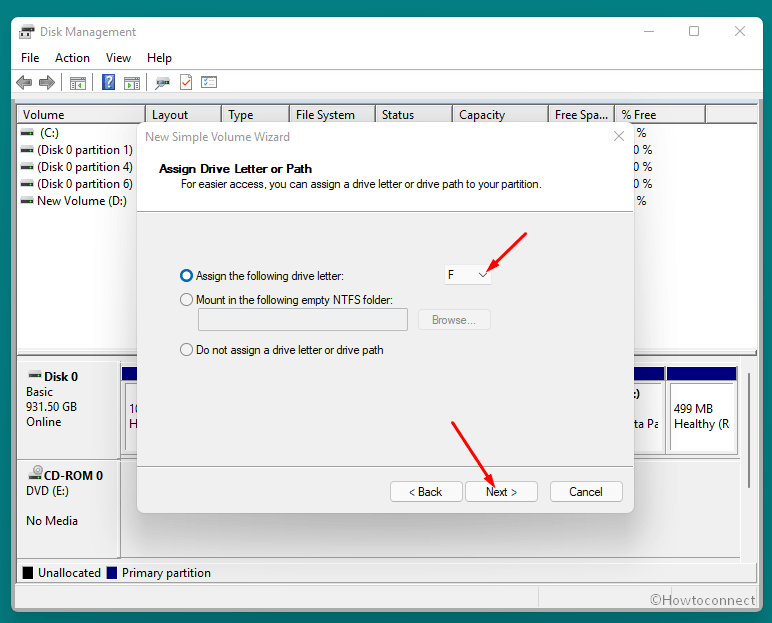
- Choose the drive letter you prefer and then click – Next.
- Make sure NTFS is selected as file system.
- Click – Next.
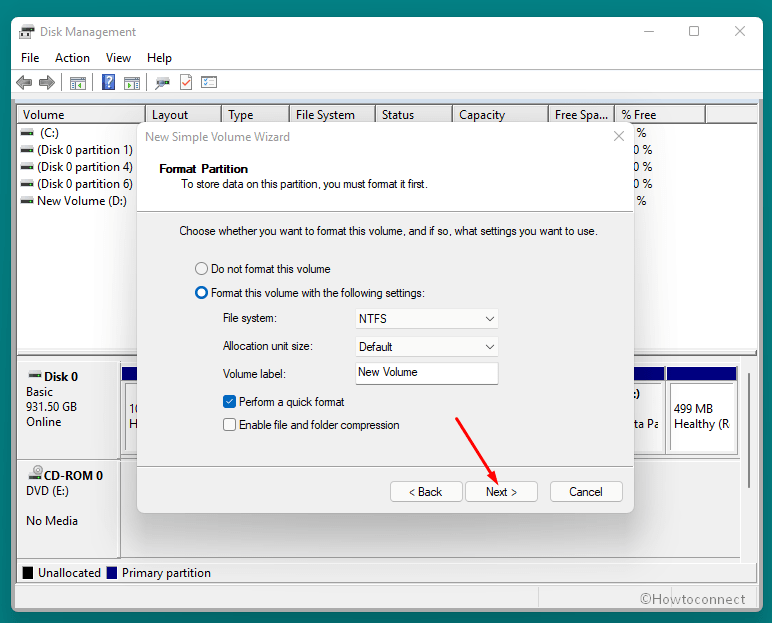
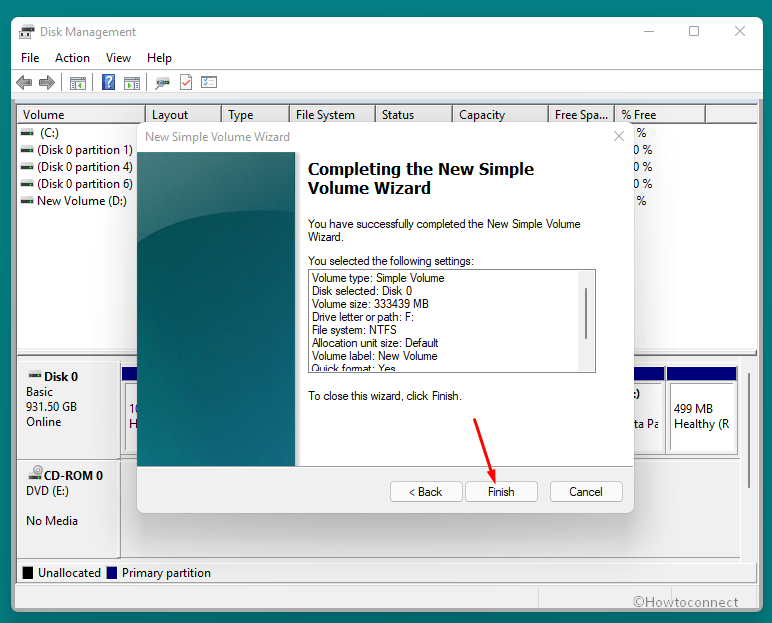
- In the end, hit – Finish.
- Here is your just created partition in Disk management –
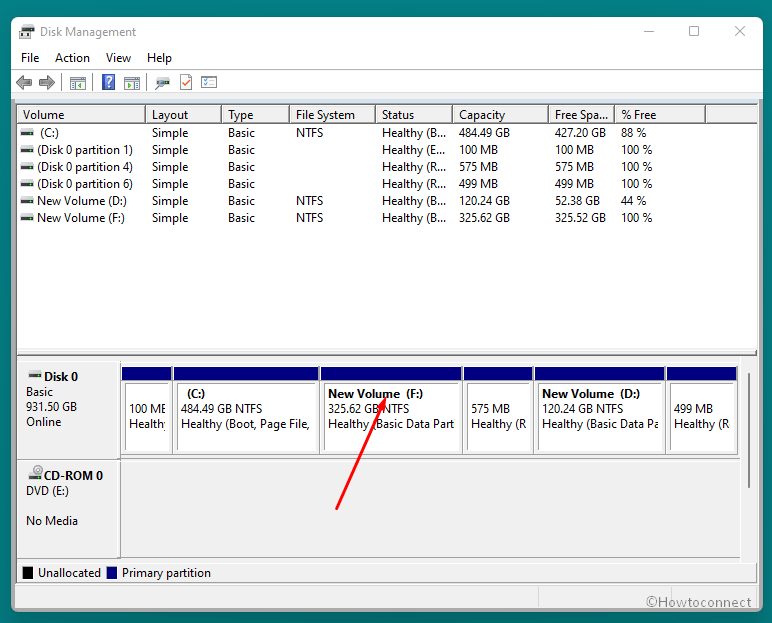
You can create more partitions by repeating the above steps and manage those partitions for personal files and folders. Now you’re doing great in organizing your Windows 10 laptop or PC smoothly and efficiently.
Way-2: Create Partition in Windows 11 using CMD
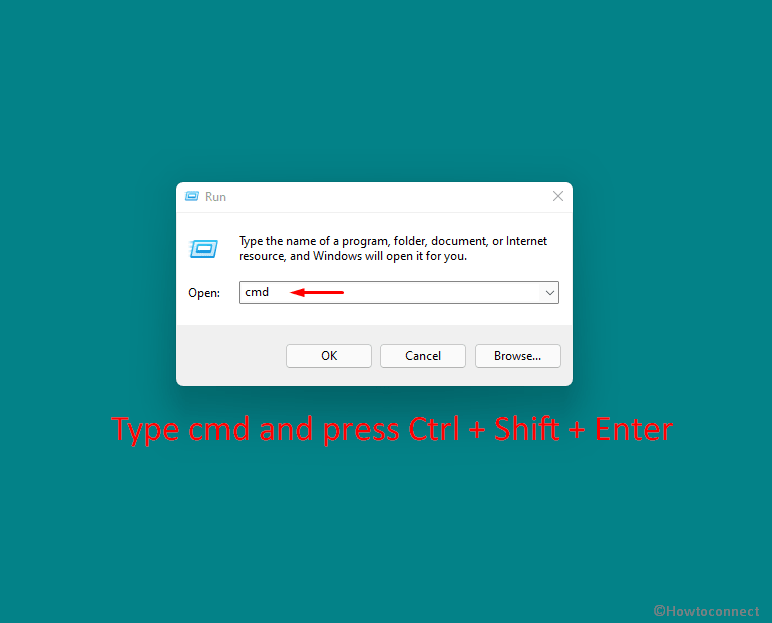
- Press – Win + R.
- Type – cmd.
- Hit – Ctrl +Shift + Enter.
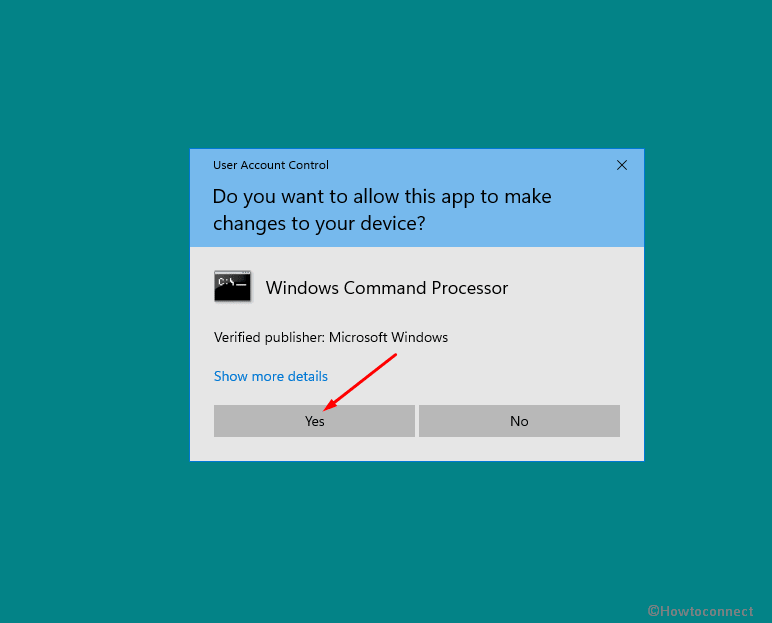
- For User Account Control, click – Yes.
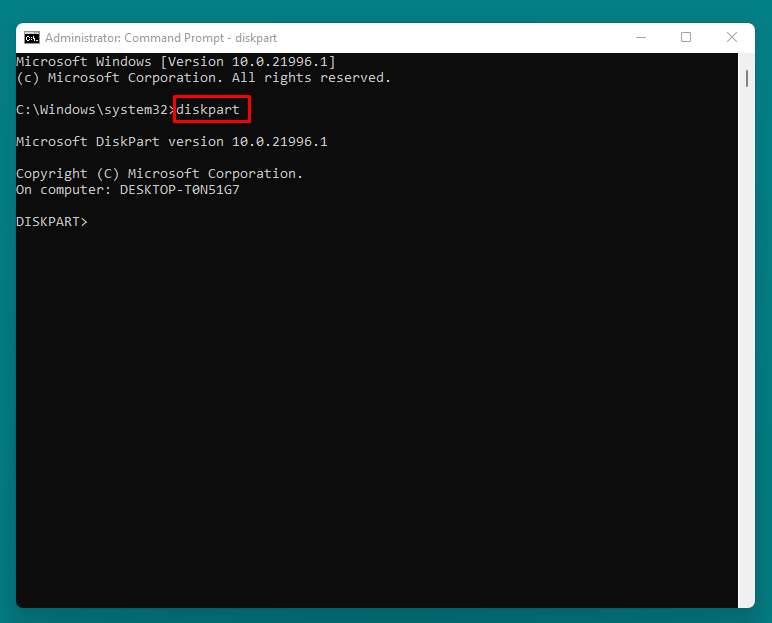
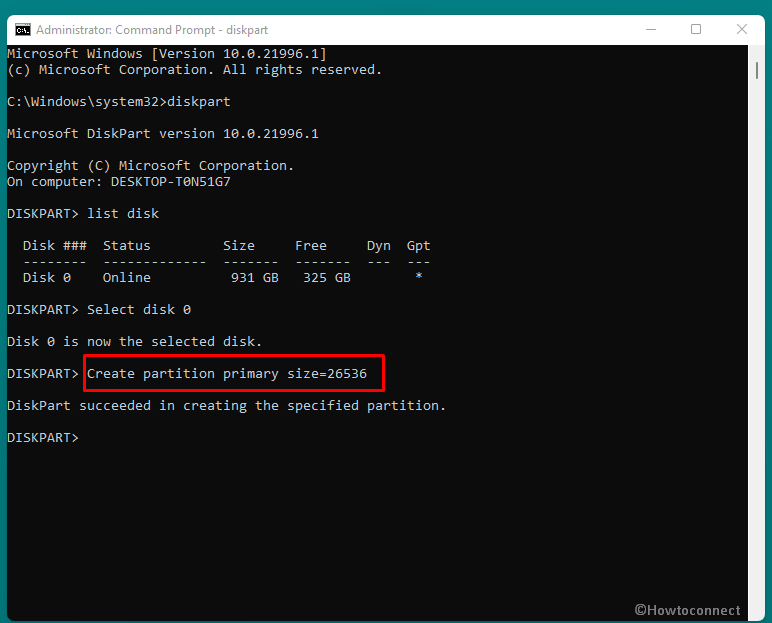
- In the Command Prompt, insert – diskpart.
- Press the – Enter key.
- In the appeared window, put in – list disk. Press – Enter.
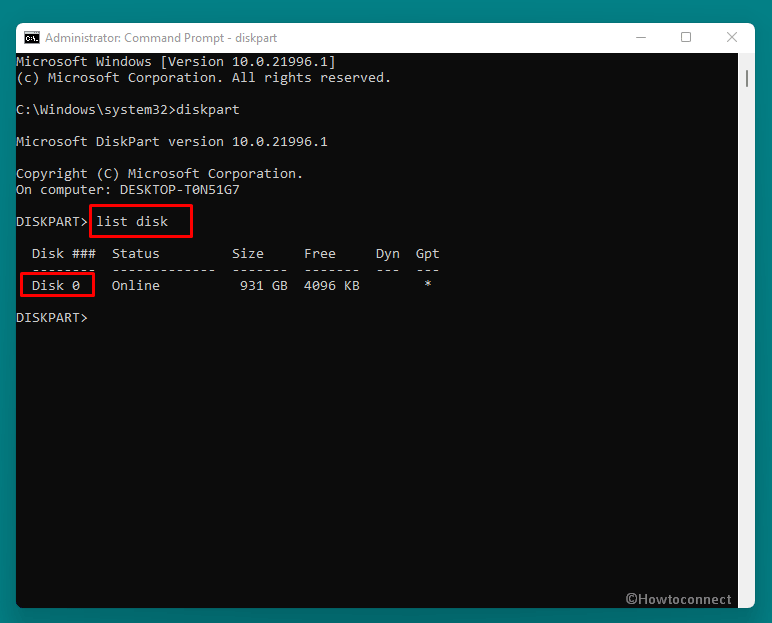
- Remember the value under Disk ### (In my case it is 0 as shown in the screenshot).
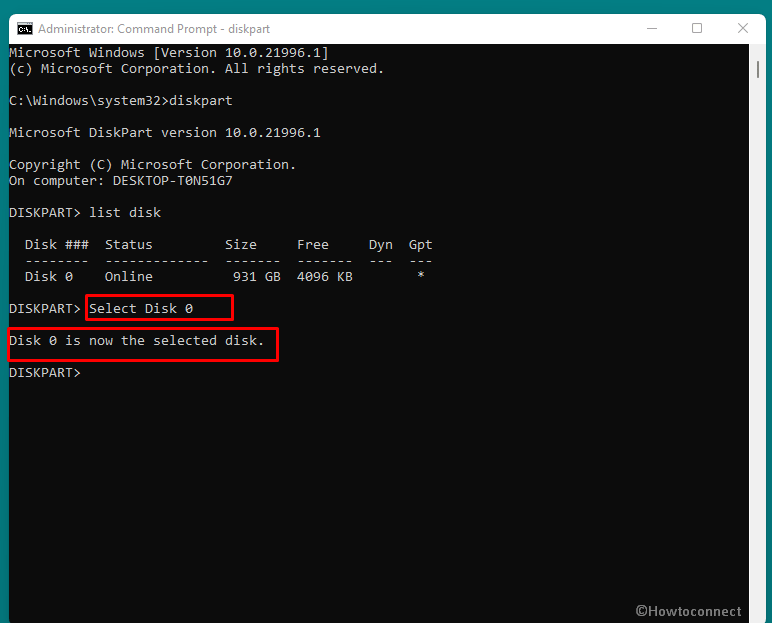
- Type – Select Disk DiskNumber (Replace DiskNumber with the value you saw in the previous step).
- Copy and paste – Create partition primary size=PartitionSize (Change PartitionSize with the value as per your need). Hit – Enter.
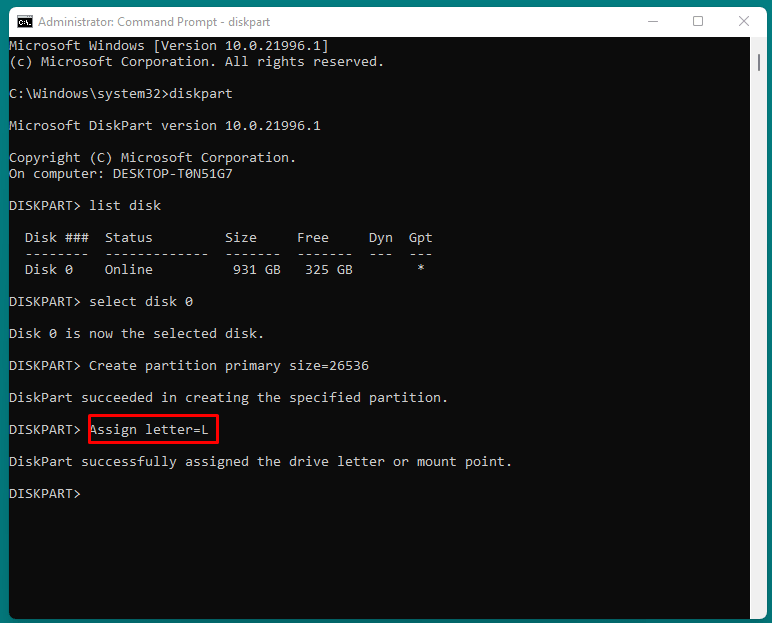
- Write – Assign letter=DriveLetter (Replace DriveLetter with a letter that is not already used).
- Lastly, enter – Exit.
Methods list:
Way-1: Via Disk Management
Way-2: Through cmd Command
That’s all!!