We expect that you would be aware of the fundamentals of VPN we begin to write the process to create Virtual Private Network Connection in Windows 8.1 right now.
Here are two methods, the initial is with the help of PC Settings and the next one through Control Panel. Have a look.
How to create Virtual Private Network Connection in Windows 8.1
Using PC Settings
- Bring your mouse pointer to the left corner to unfold Charm bar.
- Hit on Settings.
- Charm bar emerges, Tap on Change PC Settings.
- Click on Network from your left panel.
- Click on Add a VPN connection appears on your right panel.
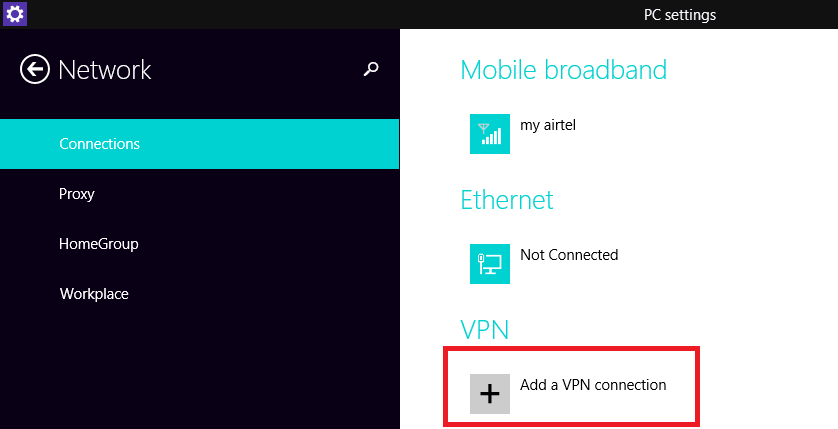
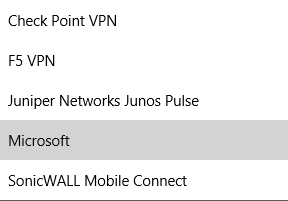
- Single out the VPN provider. Here I have selected Microsoft for generating a native Windows VPN client. You are free to decide according to your necessity.
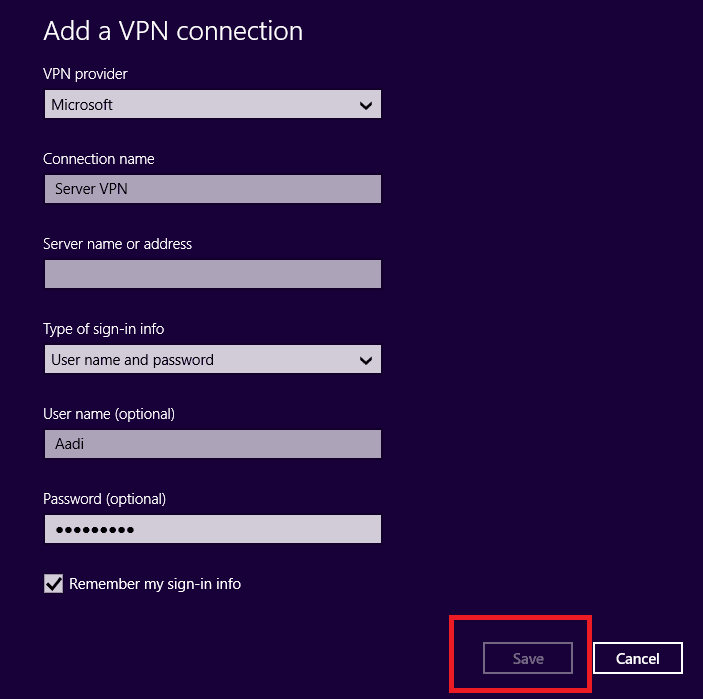
- Type the Connection name. Here I write Server VPN but, you can write what you like.
- Type the Server name or address. Write the remote Access VPN server which you want to connect.
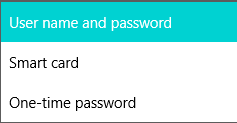
- Select the Type of Sign-in info. Here I prefer you to choose the Username and password option. This option will maintain your security and privacy.
- Now type your desired Username and Password.
- Now check or uncheck Remember my sign-in info option. If you check it then it will not ask you for the sign-in information for further connection attempts after the first successful connection.
- After then Save. In this below screenshot I do not add my Server name or address for the purpose of privacy but, you will have to write Server name or address before clicking on Save button.
- Now open your Network connections list and try to connect to your new added VPN.
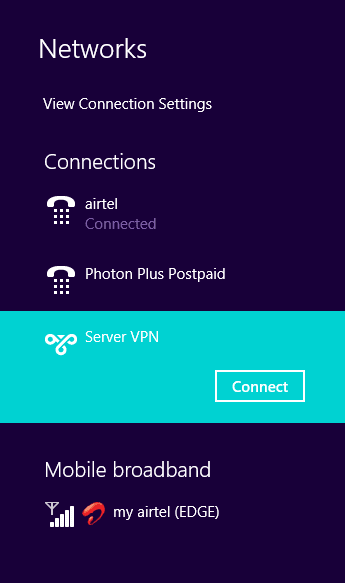
It will ask you for Username and Password, provide it. It will connect you to the network. By default your newly created VPN connection profile will be visible to the user who created it. Another user will not see that VPN.
Recommended:
Guide to Create Shared Folder Shortcut on Windows 8
Windows 8 Tips – How to Rename Networks
Using Control Panel
- Access Control Panel.
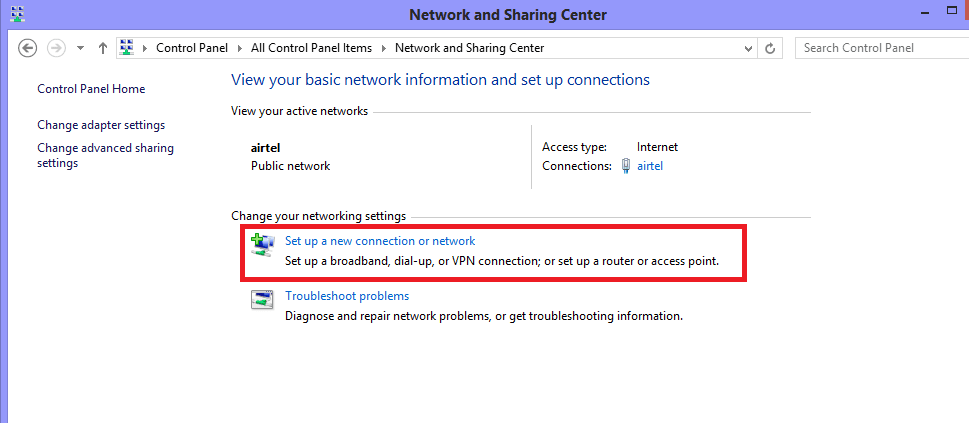
- Click on the link Network and Sharing Center on the all control panel items window.
- Click Setup a new connection or network, the uppermost choice, on the right side.
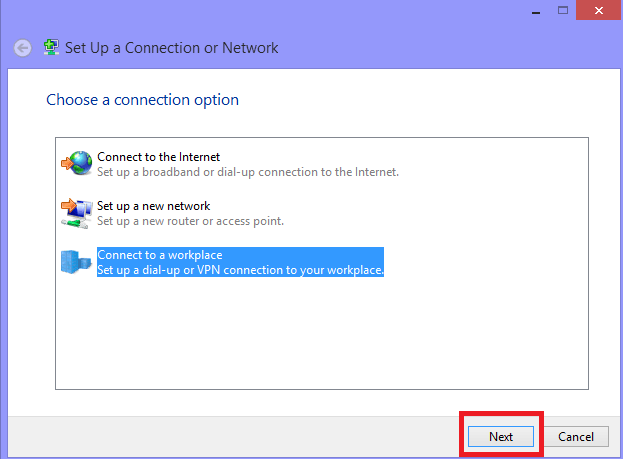
- Click on Connect to a workplace.
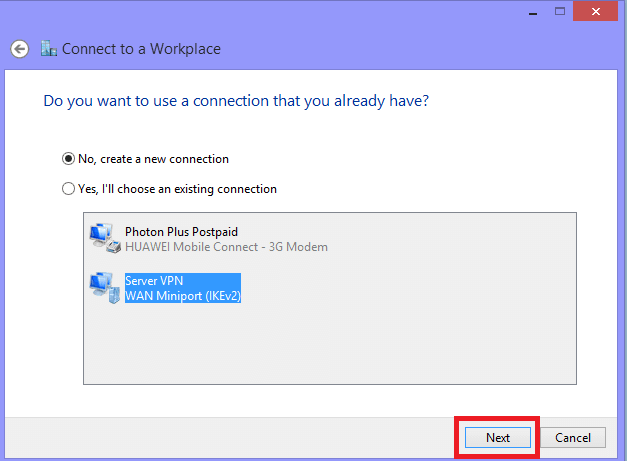
- Select No, create a new connection and press Next button.
- Now click on Use my Internet connection (VPN)
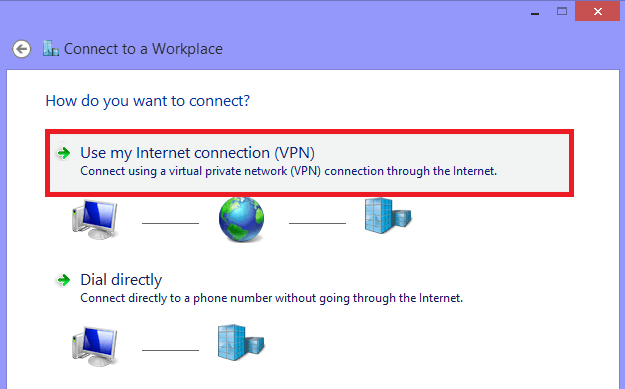
- Now put down your Internet address as well as IP or domain address of the Remote Access VPN server which you are going to connect.
- Write down a Connection name which you desire in the Destination name.
- If you want to use Username and Password then uncheck the Use a smart card box. If you want to use a Smart card option to sign-in to the VPN connection, then check the Use a smart card box.
- Now select or deselect Remember my credentials. If you tick it then it will not inquire about the user id and password further when you go for the first successful connection.
- Check or uncheck the Allow other people to use this connection according to your need.
- Finally, click on create.
- Open your Network connections list and try to connect to your new added VPN.

