Windows quality and security updates are great when it comes to keeping the system secure. They even fix up loopholes in the current operating system as well as occasionally bring out new features to make our lives easier. However, they can get annoying at times, especially for people who continuously have to work on computers. Furthermore, several users don’t like to receive updates to avoid the chance of getting bugs and errors. So here you will find 7 ways to disable Windows 11 update permanently.
In case your system is not compatible with the most recent Windows updates, it can often crash the PC, thereby interrupting the work and even erasing any unsaved data. If you ever got stuck that way, or generally like to just do manual updates at your own convenience, this article is for you.
Disable Windows 11 updates
Here is how to disable Windows 11 update permanently –
Way-1: Using Regedit or Registry Editor
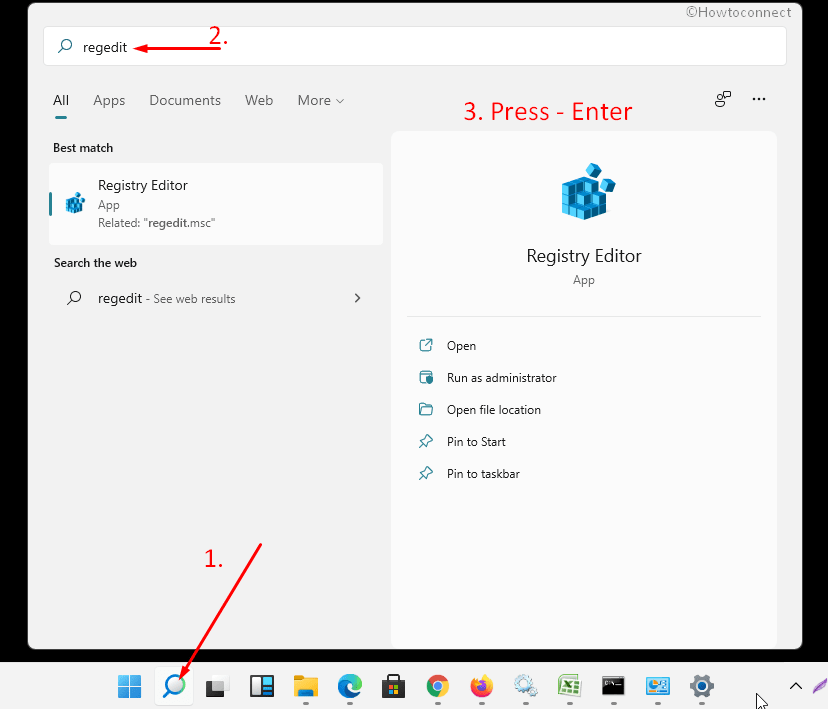
- Click the – Start.
- Type – Regedit.
- Press – Enter.
- When User account control prompts up, select – Yes.
- Copy the following string –
HKEY_LOCAL_MACHINE\SOFTWARE\Policies\Microsoft\Windows- Paste in the address bar of Registry Editor and hit – Enter.
- Right-click on – Windows.
- Select – New > Key.
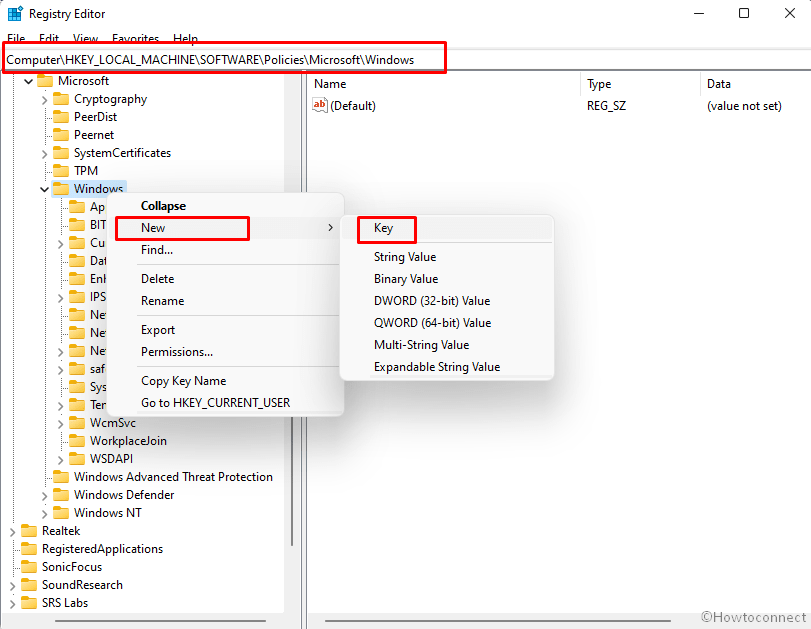
- Name the key – WindowsUpdate.
- Now, right-click on “WindowsUpdate” and choose – ‘New > Key’.
- Replace New Key #1 with AU. (Note: “AU” indicates Automatic updates).
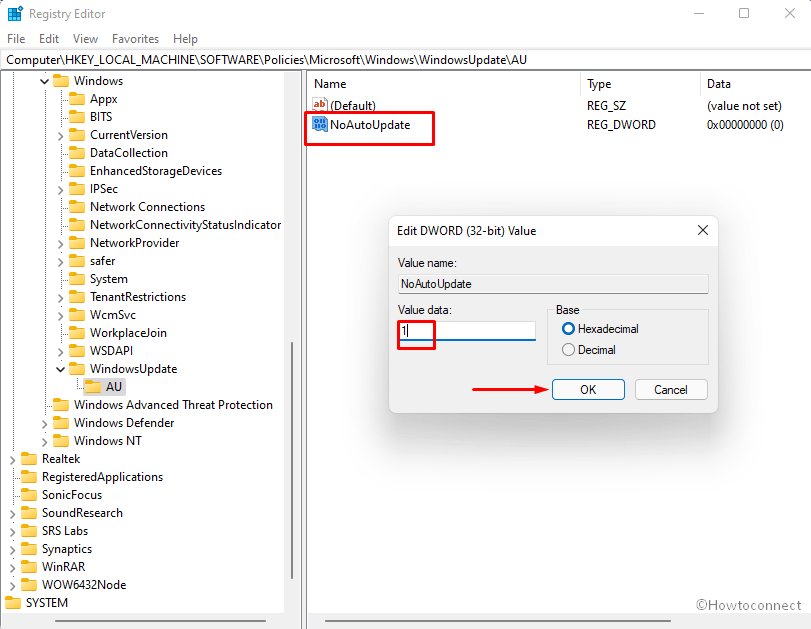
- In the right-side pane, right-click and select – DWORD (32-bit) Value.
- Put the name of this entry as – NoAutoUpdate.
- Double-click this value.
- Enter 1 in Value data field and click OK.
- Reboot your PC or restart the Windows Explorer to see the changes.
Way-2: Through Gpedit or Group Policy Editor disable Windows 11 update
- Press Windows and R keys together to open the Run Window.
- Type in – gpedit.msc.
- Click on – OK.
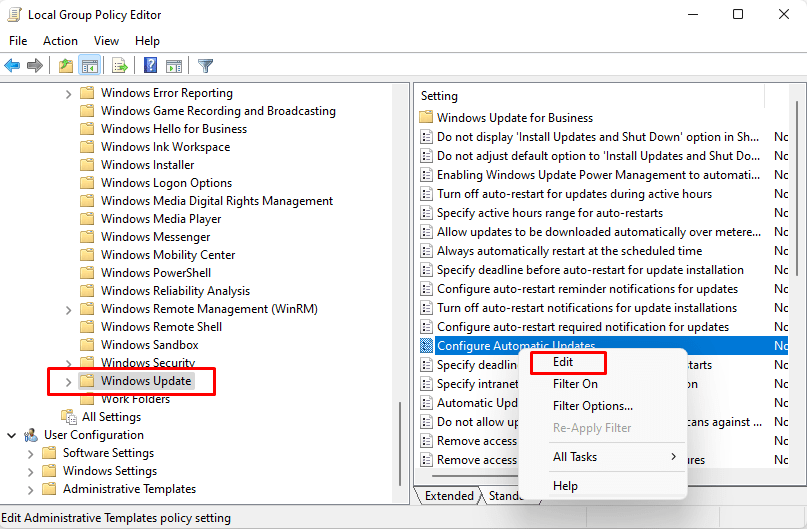
- From the left-side pane, navigate to
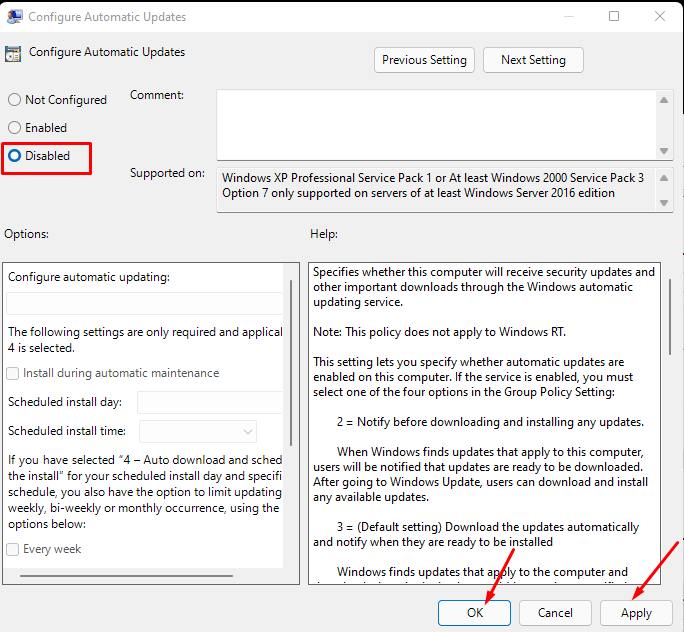
Administrative Templates -> Windows components -> Windows Updates- Now, from Settings in the right-hand pane, find and double-click on “Configure Automatic Updates”. You can also right click and select Edit.
- A separate window for the policy settings will prompt.
- Select – “Disabled”.
- Click – Apply and OK and that’s all; you are not needed to restart in this method.
Way-3: Via Windows services
- In the search box (open by pressing Win+S), type – Services.
- Select the same when it appears in the results.
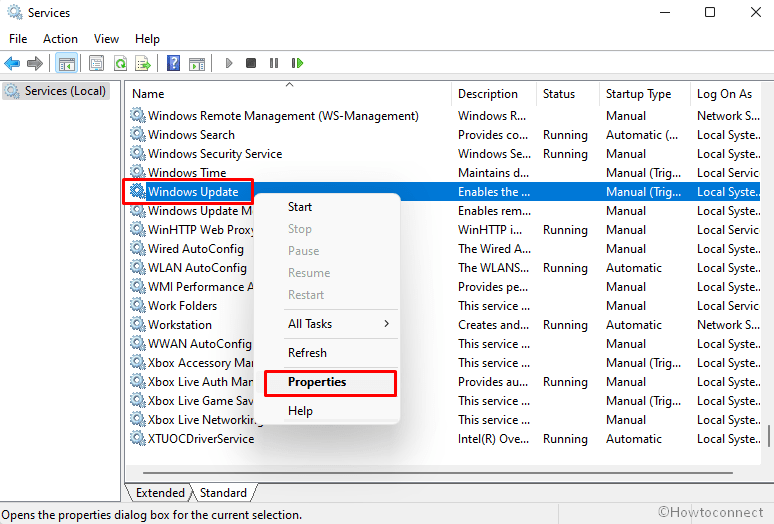
- Once the Services window opens up, scroll all the way down to where it says Windows update.
- Right-click on it and select Properties.
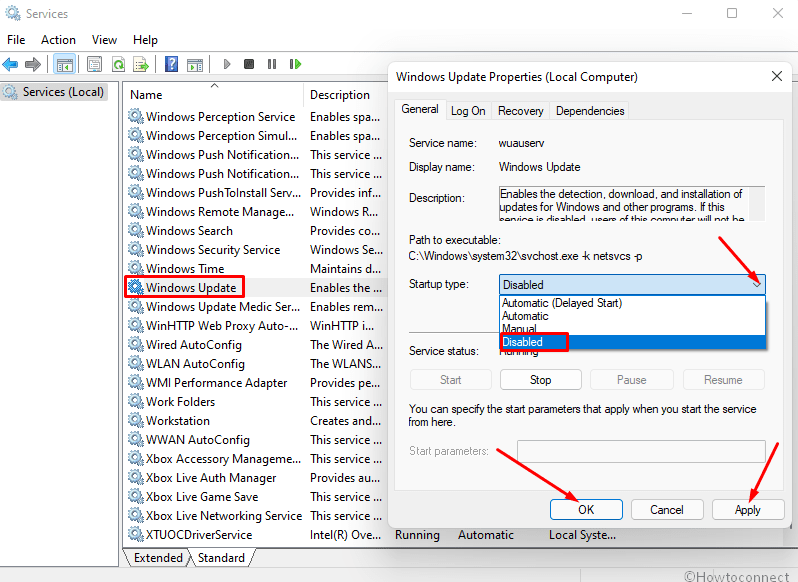
- Click on the drop-down menu next to Startup type.
- Set it to “Disabled”.
- You can click Stop to instantly halt the update in progress.
- Click on Apply then on OK.
Way-4: By enabling Metered connection
- Press Winkey + I key to open Settings.
- Click – Network & Internet from the left pane.
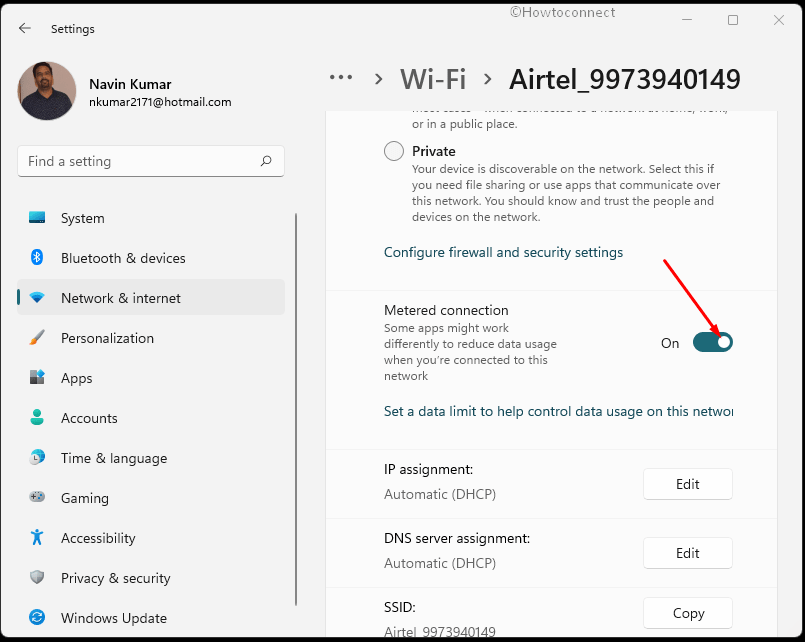
- On the right, select Properties of your running WiFi network (In case your computer has a wireless connection).
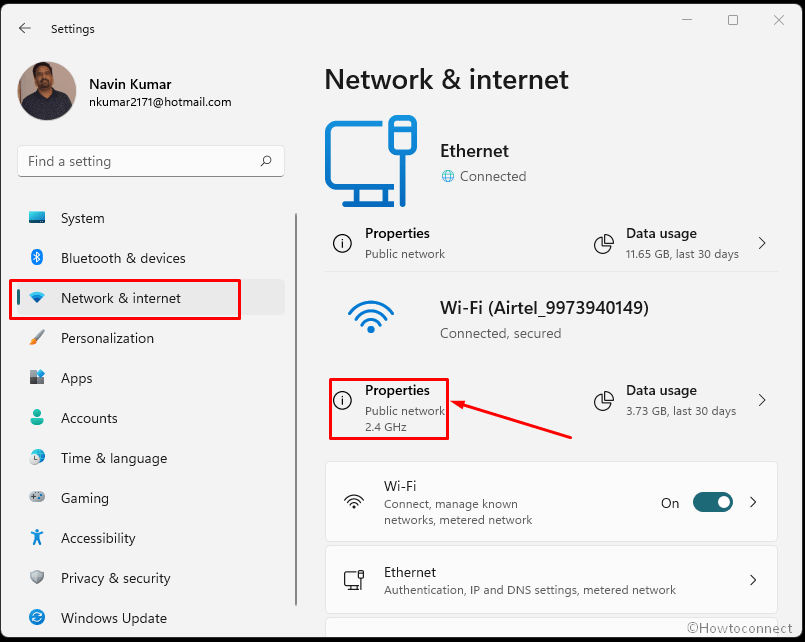
- On the next page, scroll a bit up or down to see Metered connection and turn the Setting on using the toggle switch there.
- In case, you’re on a wired network, click on Properties for the Ethernet.
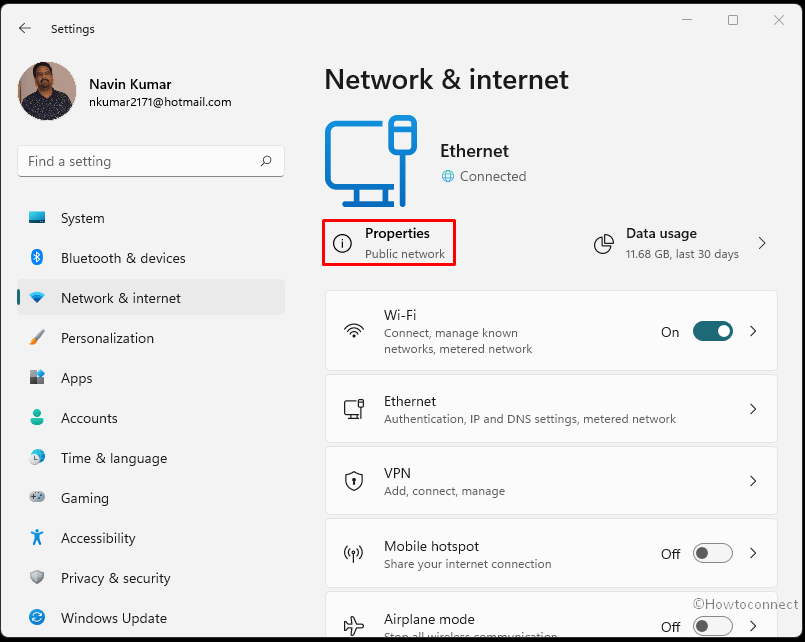
- Under the heading Metered connection, you’ll see a button. Toggle it on.
Way-5: Toggle Battery Saver Setting
- Pull out the battery charger of the laptop.
- Now, click on the Start, type Battery saver.
- Hit Enter to launch the Settings page.
- Toggle the switch under Battery Saver to On.
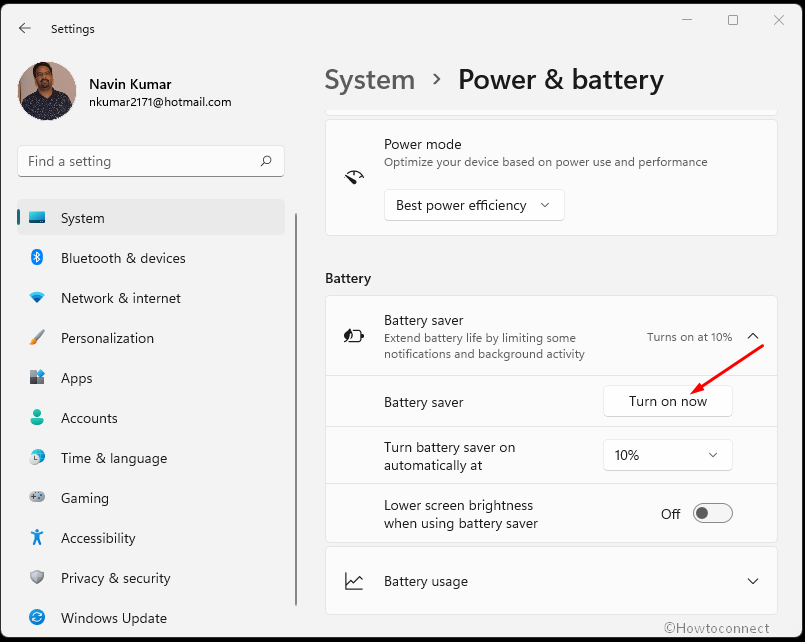
- Click the drop down under Turn battery saver on automatically at and Select – Always.
Way-6: Using Pause updates
Windows 11 provides a built-in setting that allows to pause updates for 1 week. This is sufficient time to stop receiving updates for general users. Moreover, using Resume and Pause for 1 week you can stop the updates for even more days. See how to pause Windows 11 update –
- Click Search icon located on the taskbar.
- Type – updates.
- Press – Enter.
- Once the Windows update settings page appears, click – Pause for 1 week.
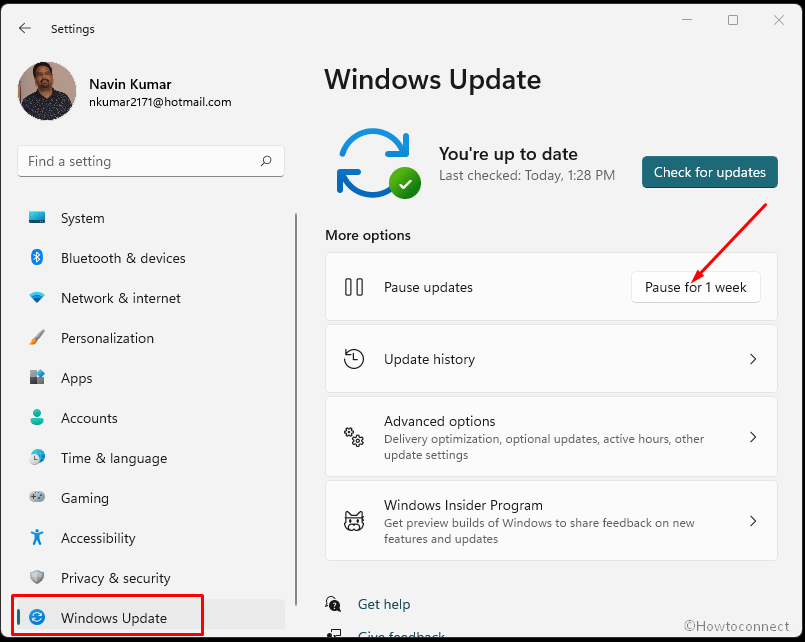
- If you want to extend it click on Resume and then again use Pause for 1 week.
Way-7: Disable Windows 11 update permanently using cmd command prompt
- Press the Winkey and type – cmd.
- Select – Run as administrator.
- To disable Windows 11 update copy the following command –
reg add "HKEY_LOCAL_MACHINE\SOFTWARE\Microsoft\Windows\CurrentVersion\WindowsUpdate\Auto Update" /v AUOptions /t REG_DWORD /d 1 /f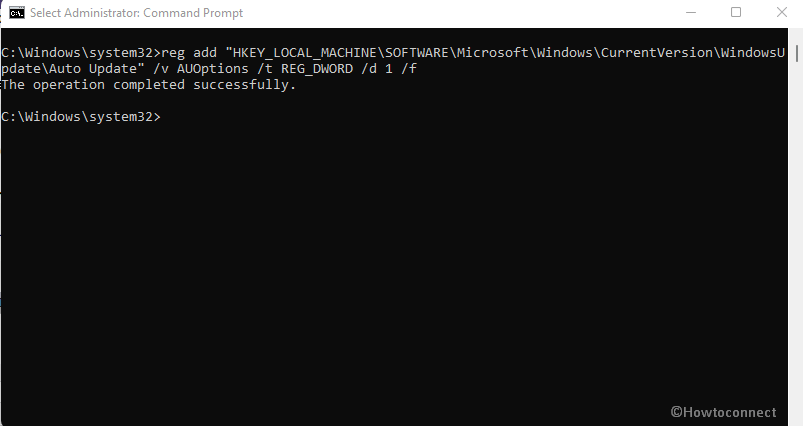
- Right-click on the command prompt and you will see – The operation completed successfully.
- To enable the update again run the below one –
reg add "HKEY_LOCAL_MACHINE\SOFTWARE\Microsoft\Windows\CurrentVersion\WindowsUpdate\Auto Update" /v AUOptions /t REG_DWORD /d 0 /f- You can also stop Windows 11 update using cmd command by disabling the service –
sc config wuauserv start= disabled- For stopping the service use –
net stop wuauserv- To again enable the service run –
sc config wuauserv start= autoBonus tip – Using Windows update blockers
We have already recommended Windows 10 Update Disable Tool; now this one works perfectly on Windows 11 too. Some more utilities are present that can disable Windows 11 update permanently on a single or only few clicks after only installing. Following are some of them –
A. Windows Update Blocker v1.6
B.
Note – When using the second one please save your ongoing docs and all stuff because the PC will be suddenly starting by the script without giving you enough time.
Methods list:
Way-1: Using Registry Editor
Way-2: Through Group Policy Editor
Way-3: Through Windows services
Way-4: By enabling metered connection
Way-5: From Battery saver toggle
Way-6: Using Pause updates
Way-7: Using cmd command prompt
That’s all!!