Ways to Enable High-DPI Support For Application on Windows 10 through Steps. – You might have confronted with Blurry text, fuzzy Application interface or display regarding similar issues on Windows 10 PC. Microsoft has been working for a long to overcome this problem following the growing number of user’s demand. Now you will not face such messes because they have included High-DPI scaling behavior Support for Apps in Windows 10.
Build 15002 adds the High-DPI Support For Applications to Windows 10 and is available for insiders. This feature is active in the major built-in applications but for 3rd party applications, you need to enable it manually. So you will see here a guide to Enable High-DPI Support For Application on Windows 10. This support addition method requires only a few steps.
Enable High-DPI Support For Application on Windows 10
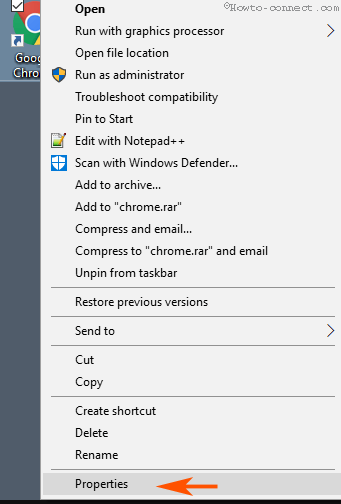
Step 1 – Right click on the application for which you want to turn on High-DPI Support and select Properties option.
Step 2 – Switch to the Compatibility tab on the application Properties wizard. Move below to the Settings block under the Compatibility tab and select the option – Override high DPI Scaling behavior.
Step 3 – Once you select the option, the drop down for Scaling performed by will become active (previously it was grayed out). Click on this drop down and select System (Enhanced).
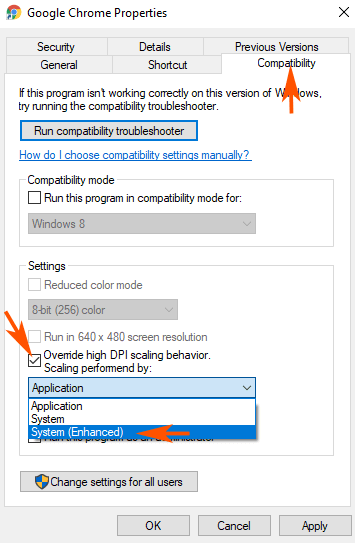
Step 4 – Finally, press Apply and after then OK to make the change effective.
The new setting overrides the process that application manages DPI scaling (that applies bitmap stretching and results in apps rendering blurry) and propel them to be scaled by Windows.
The Override high DPI Scaling behavior setting works with all the applications that use Graphics devices interface to run.
So if you are facing display regarding issues like blurry fuzzy fonts or images or interface you need to Enable High-DPI Support in this one using the above method.
Till now we use to Disable display scaling on high DPI settings if any application encounters these types of mess. You can see in a case here – Chrome Looks Fuzzy, Blurry, Distorted on Windows 10, 8.1 – Fix. But now Override high DPI Scaling behavior has replaced the earlier setting.
This setting was a great demand from the user’s side through feedback and this setting was the existing one on the Surface book.
For this improvement, Microsoft management console (MMC) has received a few new features. In addition, Performance monitor got updated to better cope up with the High-DPI Settings.
So now GDI Based applications whether they are built-in or an outsider will run without any trouble.
Conclusion
So the easy procedures to Enable High-DPI Support For Application on Windows 10 will keep you aside from any issue on applications. This is an outcome of users’ feedback, as Microsoft has taken an initiative seriously on the complaints. We hope this guide will help you!