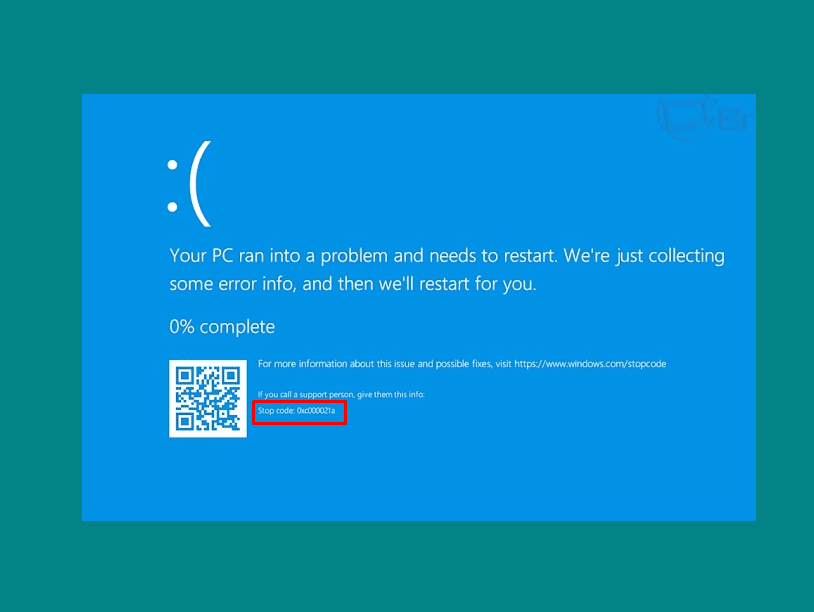
In this post, we will categorically talk about getting rid of the 0xC000021A Blue Screen of Death on Windows 11/10. When a user’s system enters an unsafe state, this dreadful error appears. Issues in either the hardware or the software can cause it. There can be several causes of this BSOD error including faulty Windows Updates, drivers, signature validation errors, or hardware failures.
To deal with the Blue Screen of Death 0xC000021A, the Automatic Repair option will come in handy. This alternative, however, has its own set of constraints. Users who encountered this issue said that when the automated repair was done, they were sent to the Windows Recovery Environment screen, from where they could restart their machine or enter the Advanced settings menu. Both the error and the Boot loop reappear when the PC is rebooted.
Table of Contents
0xC000021A Blue Screen Error in Windows 10 or 11
Here is how to fix 0xc000021A Blue Screen Error BSOD in Windows 10 or 11 –
Way-1: Replace hidparse.sys file
A BSOD might also be caused by faulty hardware connected externally. As a result, please disconnect any external devices and restart your computer. If you’ve removed all peripherals, you can restart your computer by pushing the power button. If it doesn’t work, try the suggestions below.
The recent update of Windows 10 22H2 KB5021233 has been the main cause for the aforementioned BSOD error 0xC000021A. Microsoft has officially mentioned the reason for the issue which might be a difference between the file versions of hidparse.sys in c:/windows/system32 and c:/windows/system32/drivers, which could cause signature validation to fail during cleaning.
However, they work for a more permanent solution, for the time being, check out this workaround.
- Press Winkey+I.
- Select – Update & Security.
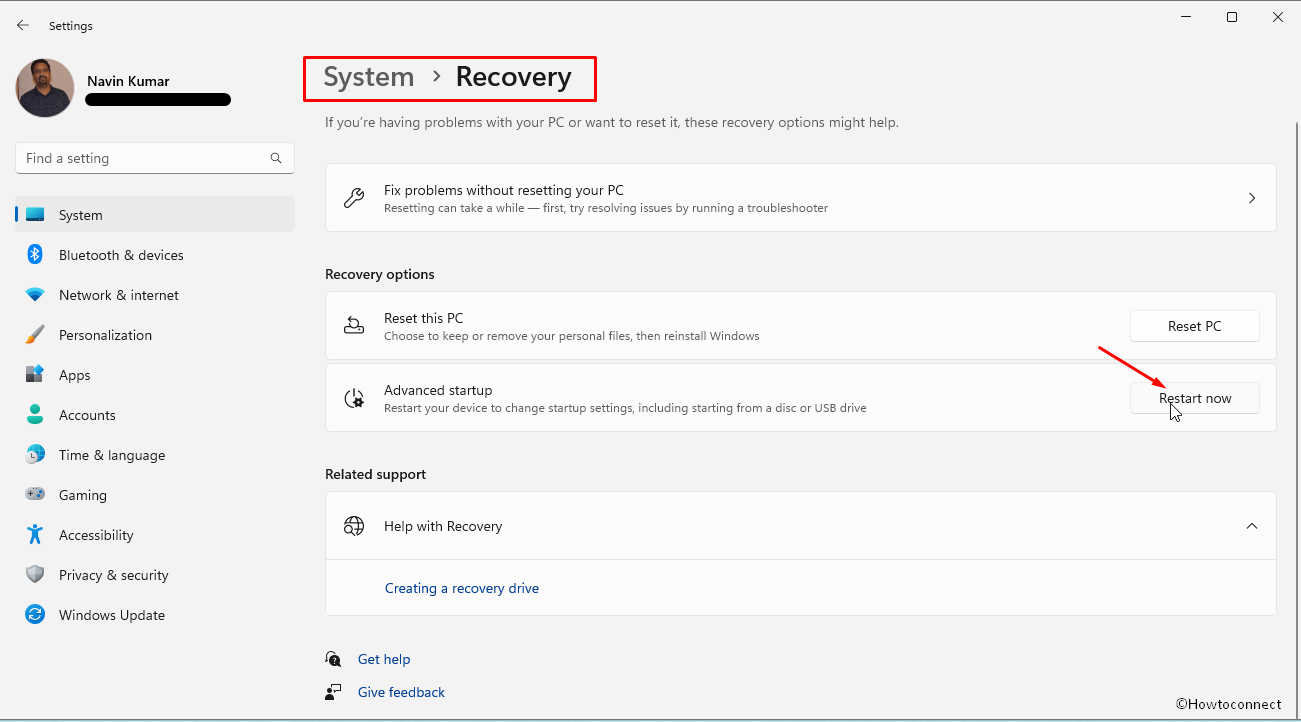
- Click on Recovery from the right pane on Settings.
- Select – Restart now from the “Advanced startup” section.
- Then, choose Troubleshoot.
- Click on – Start recovery, troubleshooting, and diagnostic tools.
- Choose Advanced Options.
- Choose Command Prompt leading your PC to Restart to open the same.
- The Command Prompt window will appear after the restart. If you are prompted to enter your device password, do so.
- Now, copy and paste the following command into the Command Prompt. Then press the Enter key.
xcopy C:\windows\system32\drivers\hidparse.sys C:\windows\system32\hidparse.sys- After executing the above command, type Exit and press Enter.
- You will again be presented with the Windows Recovery Environment screen.
- Proceed by clicking Continue to restart your computer. Windows should launch normally.
Source – Windows 10 22H2 Known issues
Way-2: Uninstall KB5021233
Since the stop code 0xC000021A started after installing KB5021233 so removing this patch will rescue your PC from this error. Follow the guide and uninstall this update –
- Press – Windows + R.
- Type – appwiz.cpl.
- Once the Program and Features window is loaded, click on – View installed updates.
- Find KB5021233 and select it.
- Click on Uninstall and approve the prompt by clicking on Yes.
If you want to uninstall KB5021233 using cmd command then –
- Click on Search from the taskbar.
- Type – cmd.exe.
- Next, press Ctrl + Shift + Enter.
- Select “Yes” on UAC.
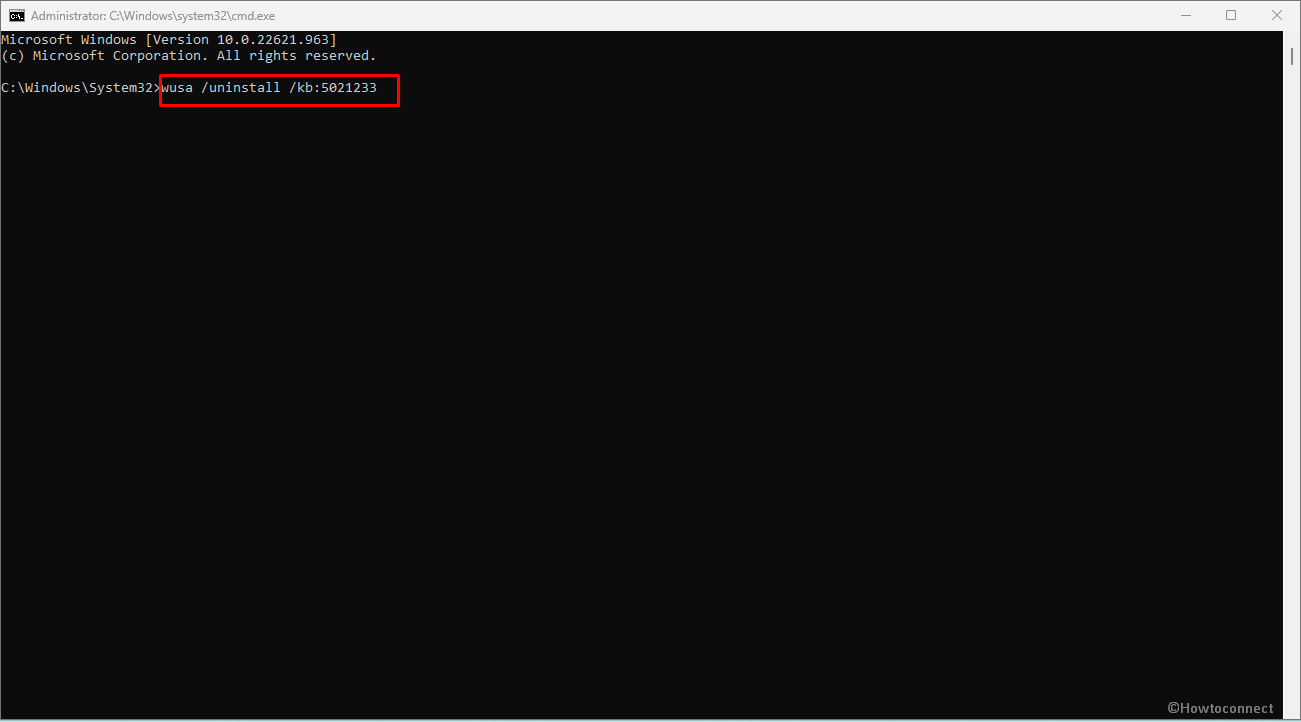
- Type – wusa /uninstall /kb:5021233.
- Press enter and verify the prompt.
Way-3: Run SFC, DISM, and CHKDSK
Faulty hard disk or corrupted system image files can be the pivotal force behind the 0xC000021A after update. To repair them, you may require to run system file checker scan (SFC), deployment image servicing and management (DISM), and check disk aka Chkdsk. Follow these steps to run these scans:
SFC and DISM Scan
- Click on – Start.
- Type – cmd.
- Choose – Run as an administrator.
- Select Yes when User Account Control displays.
- Enter the next command line:
sfc /scannow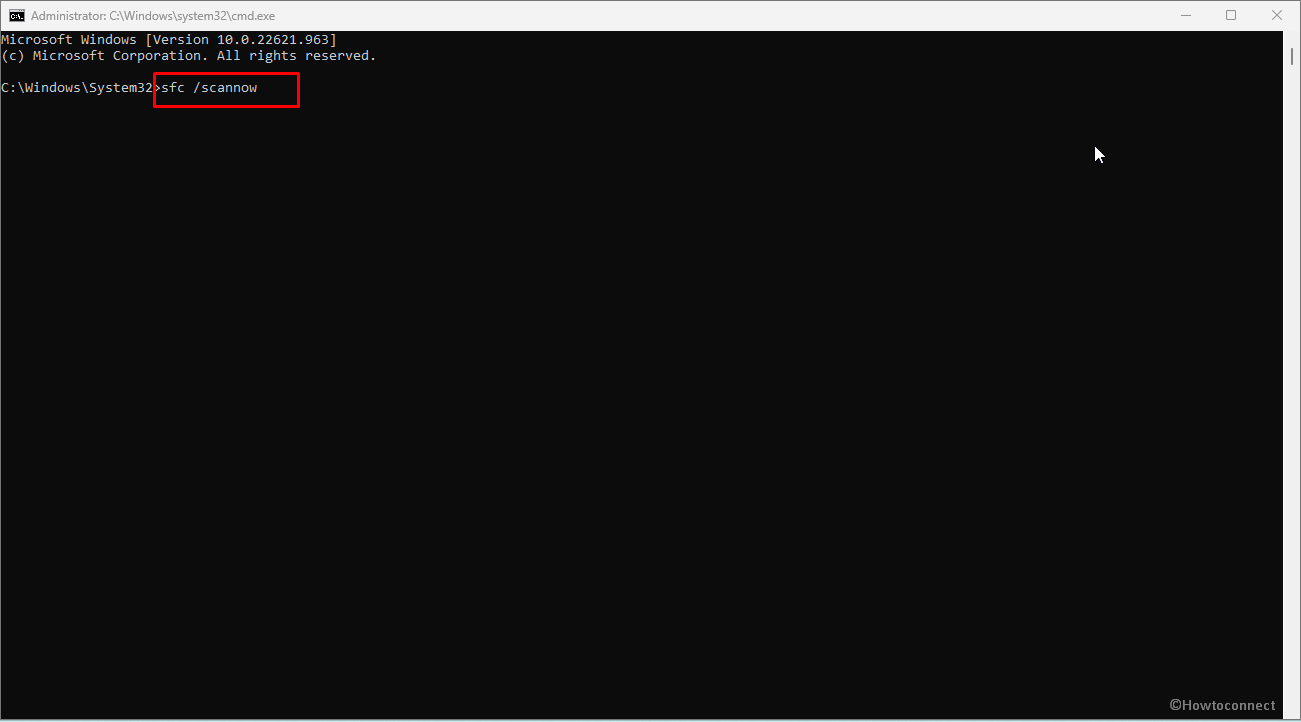
- After the utility has completed its operation, restart your computer and verify if the update error has been resolved.
- If the problem continues, execute the instructions following in sequence:
DISM /Online /Cleanup-Image /CheckHealth
DISM /Online /Cleanup-Image /ScanHealth
DISM /Online /Cleanup-Image /RestoreHealth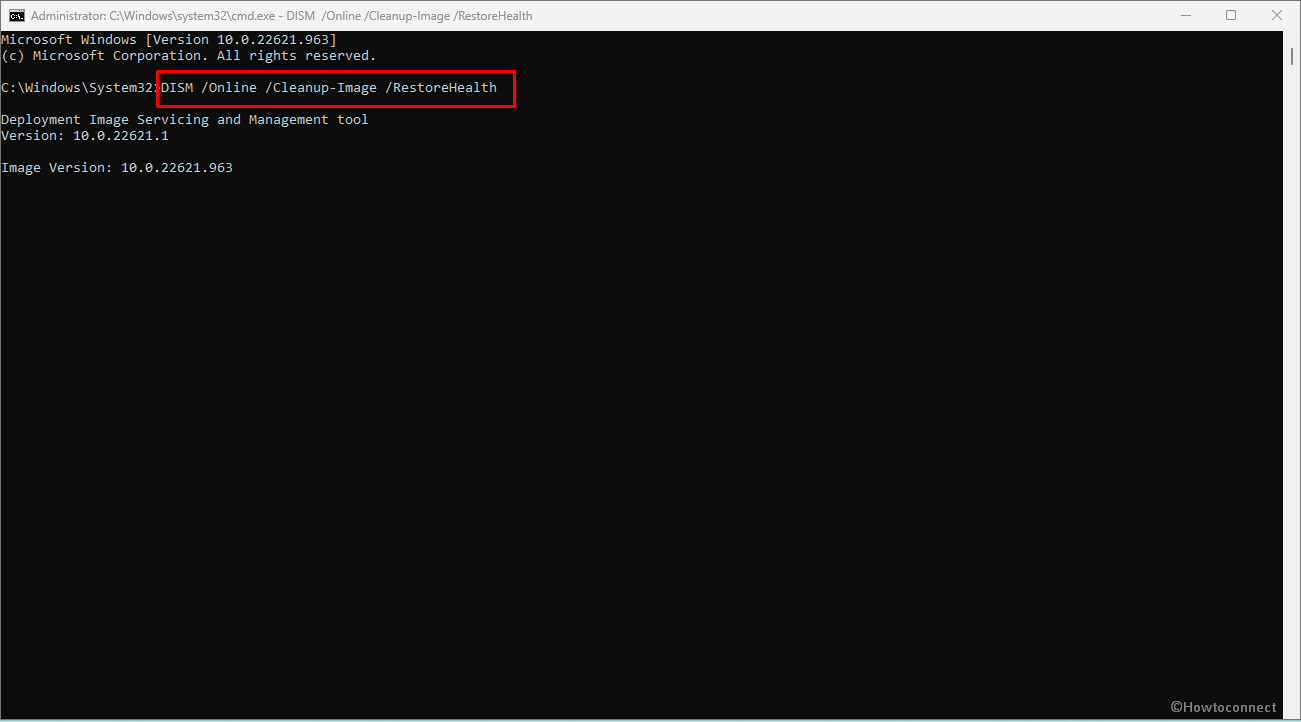
- Finally, restart your PC.
Now use CHKDSK
- Launch the Command Prompt.
- Now, type the following command and press Enter.
chkdsk /f /r
See – SFC /Scannow, DISM.Exe, CHKDSK Windows 10
Usually, the concerned error is resolved after following this way, if it persists then move on to the next way.
Way-4: Restore all the Pending Actions
When 0xc000021a Windows 10 install error appears with system crash generally finds its roots in improper restart which ultimately becomes the leading cause for the Blue Screen of Death 0xC000021A. Restoring all the pending actions can be a good way of dealing with them, for that try following these steps:
- Open Command Prompt as administrator to accomplish this. Initiate the Command Prompt from the Windows Recovery Environment. Steps are provided in the first method.
- In the Command Prompt window, the following will appear:
x:\windows\system32>- You must now choose the disk on which Windows is installed. If Windows is installed on drive C, type C: if it’s installed on drive D, type D: and so on. Windows are often installed on the C disk.
- Enter the command below and press Enter – C:
- Now, enter the command below and hit Enter – dir
- You should notice Windows in the directory listing displayed following the preceding operation. If Windows is absent from the directory list then the operating system is installed on a different disk. In this instance, the letter C must be replaced with another drive letter.
- Now, type the command below and press Enter.
dism /image: C:\ /cleanup-image /revertpendingactions- Let the preceding instruction execute. Following a successful execution, the following message will be displayed –
“The operation was completed successfully.” - Enter Exit and hit Enter. This closes the Command Prompt and returns you to the Windows RE page, where you must select Continue to restart your computer.
Way-5: Go for System Restore
Utility like System Restore is significant and known to protect and restore system software when crash and bug check is the trouble on Windows 10 or 11. Once used, you are served with several days and times, therefore, if you encounter any error like 0xC000021A you can navigate to the prior restore point when the system showed no such BSOD error code.
- Press Win+S.
- Type rstrui.exe and hit Enter.
- Select – Choose a different restore point.
- Click on Next.
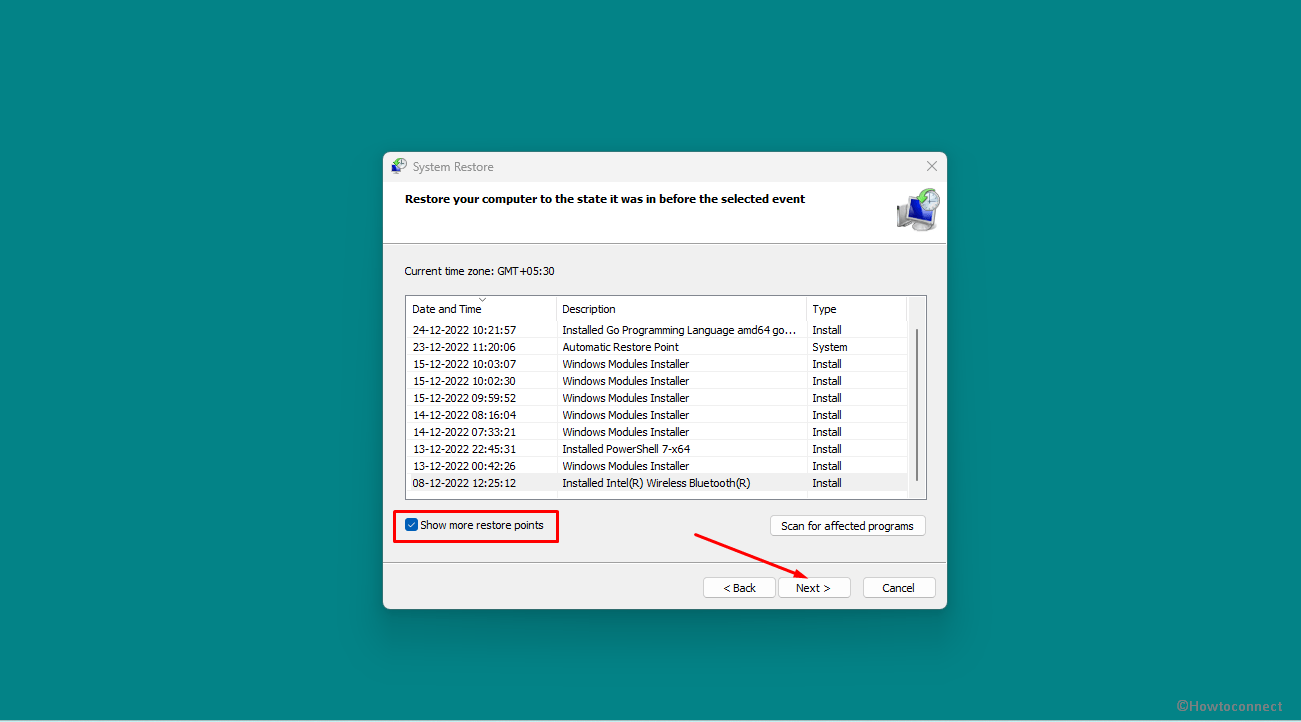
- Check the box – Show more restore points.
- Find the one in the list when the Blue Screen did not start and select it.
- Now click on “Next”.
- Review your selection and click on Finish.
- You will come across a pop-up saying – “Once started System Restore cannot be interrupted. Do you want to continue?” Click on Yes.
- The process will take a big amount of time so wait with patience and allow the system to perform multiple restarts. No you will experience an absolutely error-free system.
Way-6: Run Startup Repair
When encountering the aforementioned problem highlighting 0xC000021A, this step can bring positive results. When you keep getting these kinds of issues on your computer and can’t log in to the system, this method will assist.
- Open Settings (Win+I).
- Select Update & Security.
- Now, go to – Recovery.
- Under Advanced startup, click – Restart now.
- Select – Troubleshoot.
- Click the – Advanced options.
- Following screen will show you the option to Startup Repair.
We are confident that the 0xC000021A Blue Screen of Death in Windows 10 or 11 may have been resolved by following these 5 solutions.
Methods:
Way-1: Replace hidparse.sys file
Way-2: Uninstall KB5021233
Way-3: Run SFC, DISM, and CHKDSK
Way-4: Restore all the Pending Actions
Way-5: Go for System Restore
Way-6: Run Startup Repair
That’s all!!
