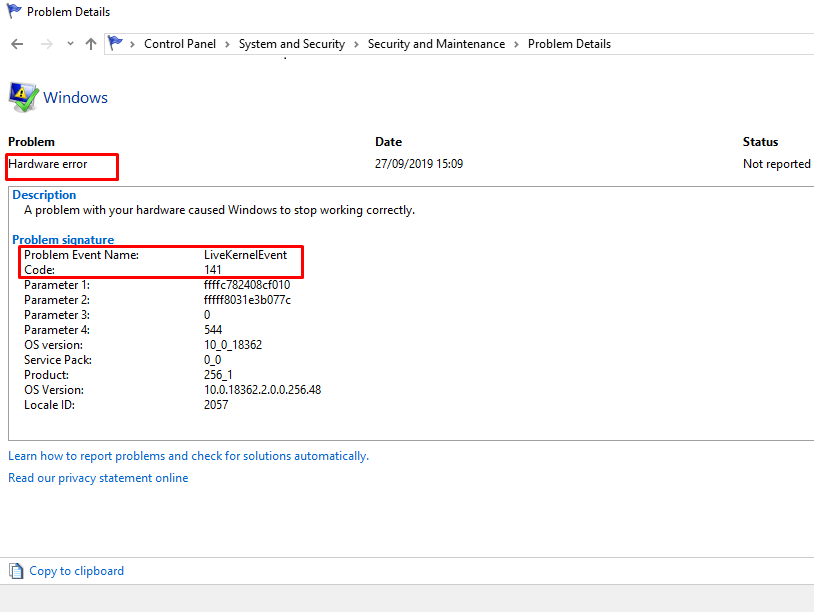
Several users are facing sudden crashes when playing games which specifically make extensive use of graphics. LiveKernelEvent 141 error message headed by Hardware error appears when the issue occurs with hanging, lagging, and freezing. Hardware failure, third-party programs, or damaged or obsolete display adapter drivers are the prominent reasons for this gaming error.
To fix this annoying error permanently it’s crucial to do a full hardware diagnostic on everything from the graphics processing unit (GPU) to the random access memory (RAM). However, you might also get away with a clean boot or reinstallation of the video graphic drivers.
Table of Contents
LiveKernelEvent 141 Error in Windows 11 or 10
Here is how to fix LiveKernelEvent 141 Hardware Error Problem in Windows 11 or 10 –
Way-1: Install the latest version of NVIDIA Driver
Unstable, broken, incompatible, or buggy NVIDIA driver is found culprit in most of the cases for LiveKernelEvent 141 hardware error. The problem occurs with Modern Warfare II (MW2), cyberpunk, Warzone 2.0, or other even when playing on a gaming or powerful laptop.
Therefore, first of all, pay attention to the NVIDIA GPU driver and install the most recent version if you face this glitch. For this, navigate to the official site of the adapter, find the driver, download and install it.
See – Fix Cyberpunk 2077 Blue Screen Error BSOD in Windows 11, 10.
Way-2: Run DISM and SFC or System File Checker Scans
DISM and SFC scans are known to repair damaged or corrupted files. Similarly, in this scenario of facing LiveKernel 141 error it’s quite logical to run both these utilities via the steps provided below:
- Press – Winkey+R.
- Type cmd and hit Ctrl+Shift+Enter altogether.
- Select Yes on the User account control dialog box.
- Type the following syntax into the command prompt:
SFC /Scannow. - Press Enter and allow this to complete the work.
- Once the Command shows 100% completed, reboot the PC.
- Check if the error still persists or it is fixed now.
- If the issue again occurs then launch the Command prompt as administrator, paste the following commands, and press Enter after each one.
DISM /Online /Cleanup-Image /CheckHealth
DISM /online /Cleanup-Image /ScanHealth
DISM /Online /Cleanup-Image /RestoreHealth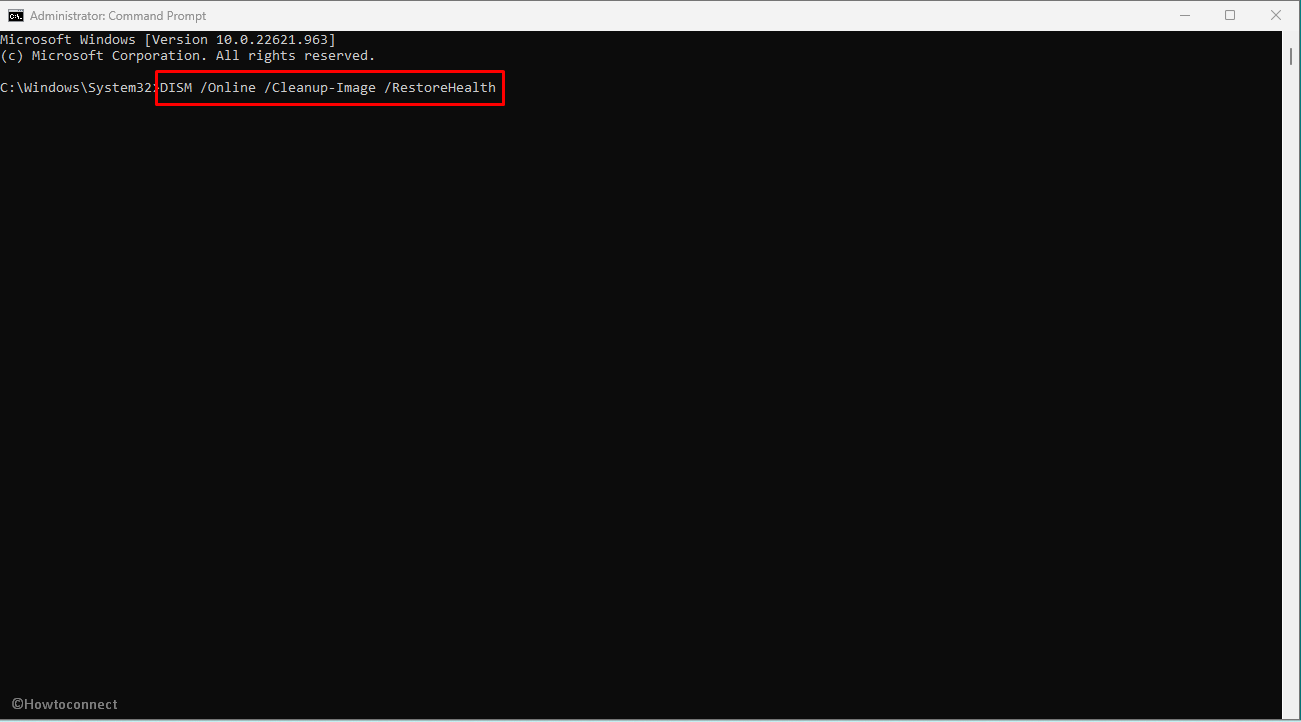
- When the operation is over, restart your computer to verify whether the hardware error code 141 is solved.
Way-3: Initiate a Clean Boot in your System
If you’re having trouble with your game or application in the form of a LiveKernelEvent 141 error its better to find out if it’s either being hindered by Windows or another software by performing a clean boot, which starts Windows with the set of the minimum number of drivers and apps. Follow these steps to perform the same:
- Click Search from the Taskbar and type – msconfig.
- Hit Enter to launch the System Configuration window.
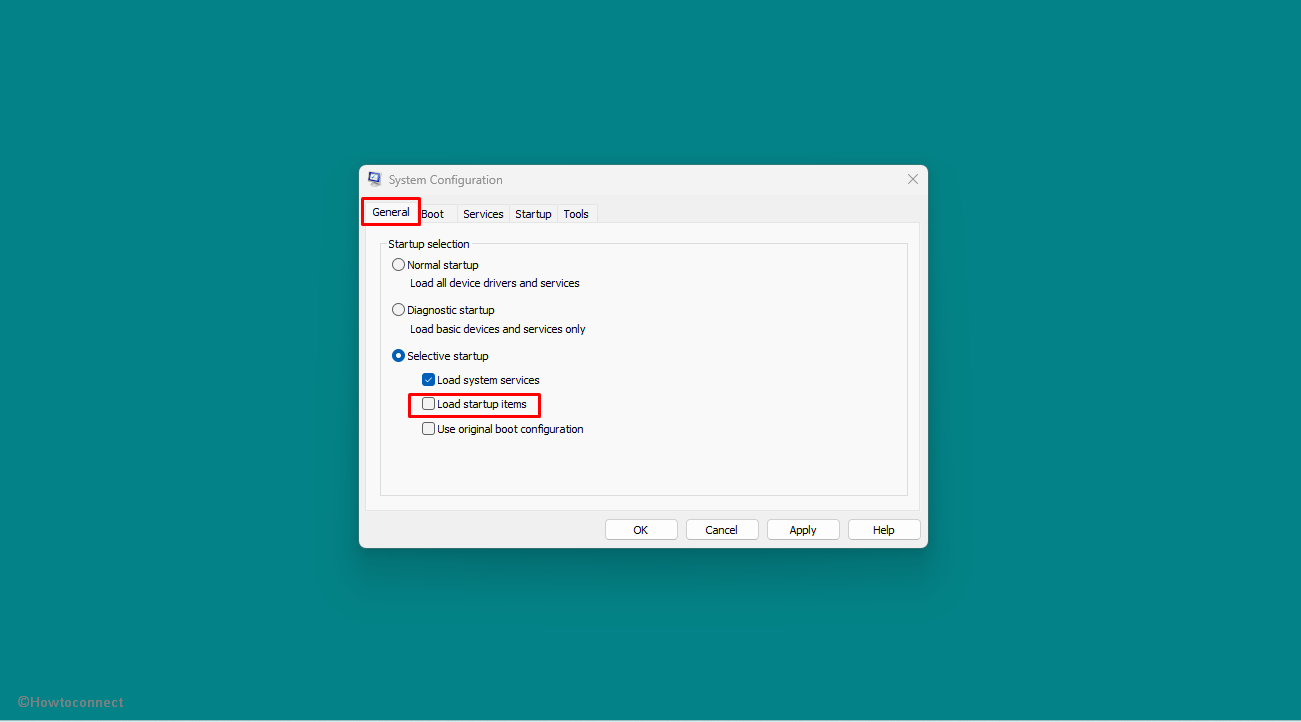
- Click the General tab.
- Locate the entry under Selective Startup and deselect the Load startup services option.
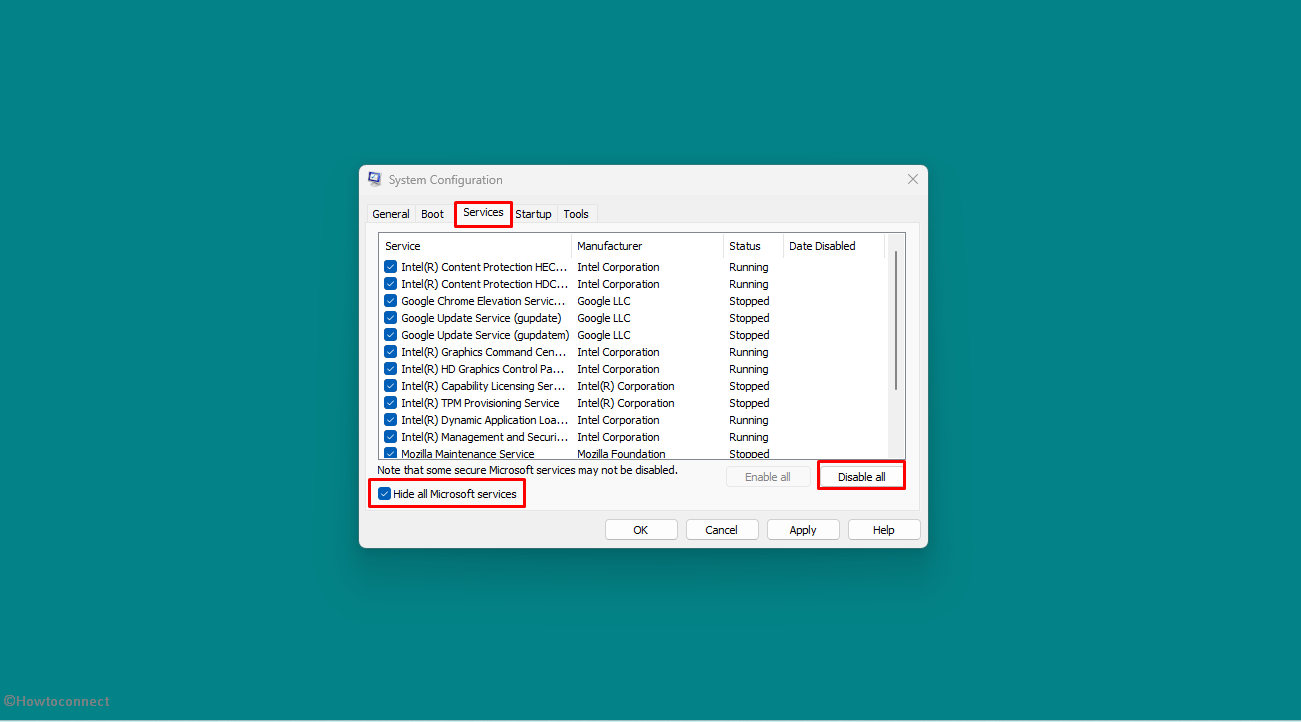
- Go to the Services tab.
- Click the checkbox before – Hide all Microsoft services.
- Then click – Disable all.
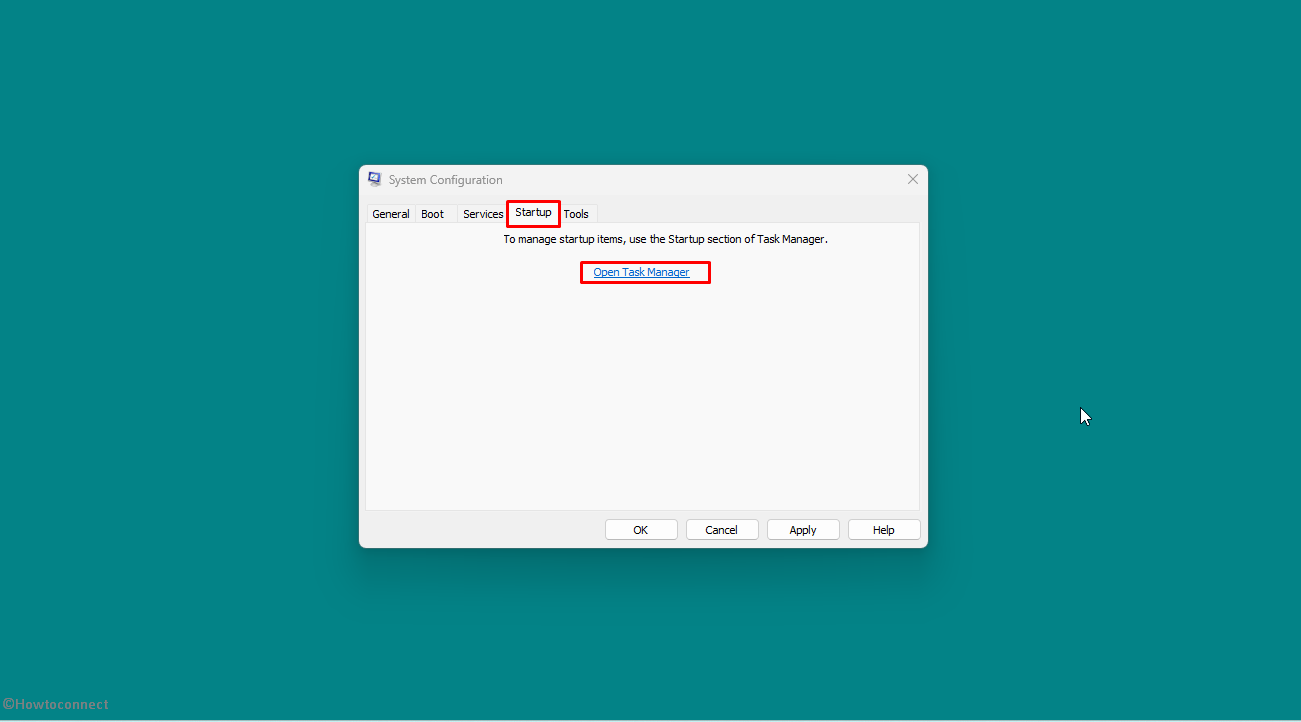
- Next, navigate to the Startup tab.
- Select the option labeled – Open Task Manager.
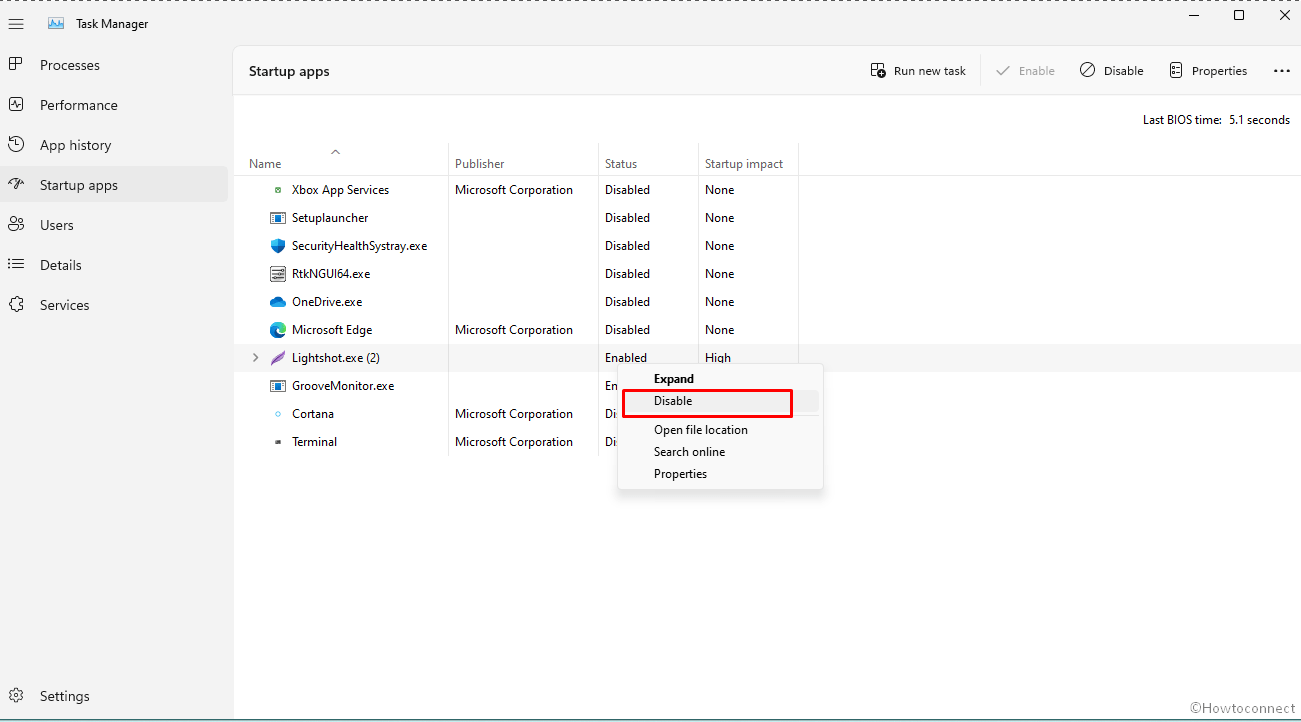
- Disable all Startup applications. For this, right-click on each of the items currently showing on the Task Manager and click on “Disable”.
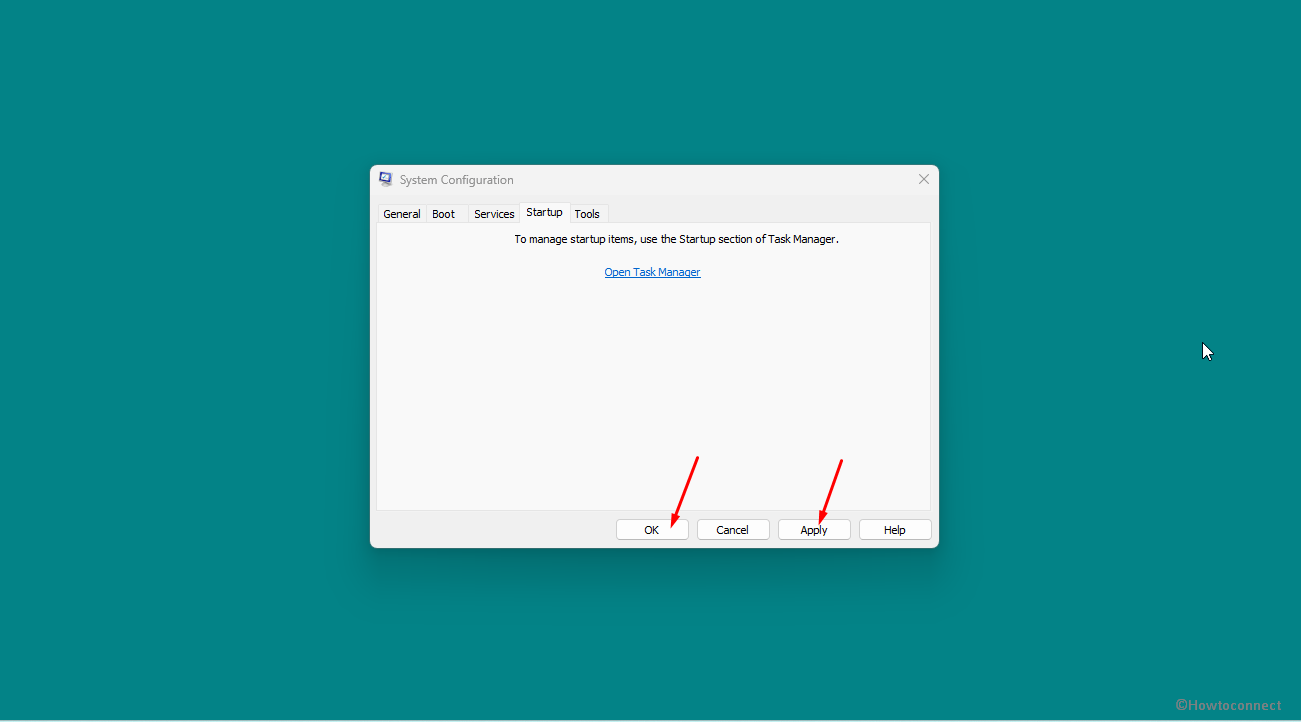
- Close the tool to return back to the System configuration window.
- Click on Apply and then on OK.
- The system will throw a pop-up; click Restart on that.
Way-4: Check Out the GPU Overclocking Software and uninstall
Overclocking software manipulates NVIDIA, AMD, or other GPU to increase the Video game speed but overall this action put a bad impact on the system performance and sometimes triggers error. To solve LiveKernelEvent 141 error sometimes its crucial to uninstall the application –
- Right click on – Start.
- Select Settings.
- Click Apps now.
- Go to Installed apps. (Note: In Windows 10, it is ‘Apps & features’)
- Find the overclocking program you are using,
- Click on the 3 dots menu and select Uninstall.
- Confirm the prompt.
- Follow the steps for complete removal.
Way-5: Detect Memory with Diagnostic tool
Over time, one of the most essential components of your PC, the RAM may become unstable and often crash. Usually, RAM is responsible for determining how many applications may run simultaneously on a computer and consumes the highest while playing games or performing any graphic-related task.
Therefore, the chances of this issue causing the LiveKernel 141 error are quite high, so check out the following steps to correct it:
- Press Winkey+R and select Run.
- Type – mdsched.exe.
- Hit Enter to open Windows Memory Diagnostic.
- Select – Restart now and check problems.
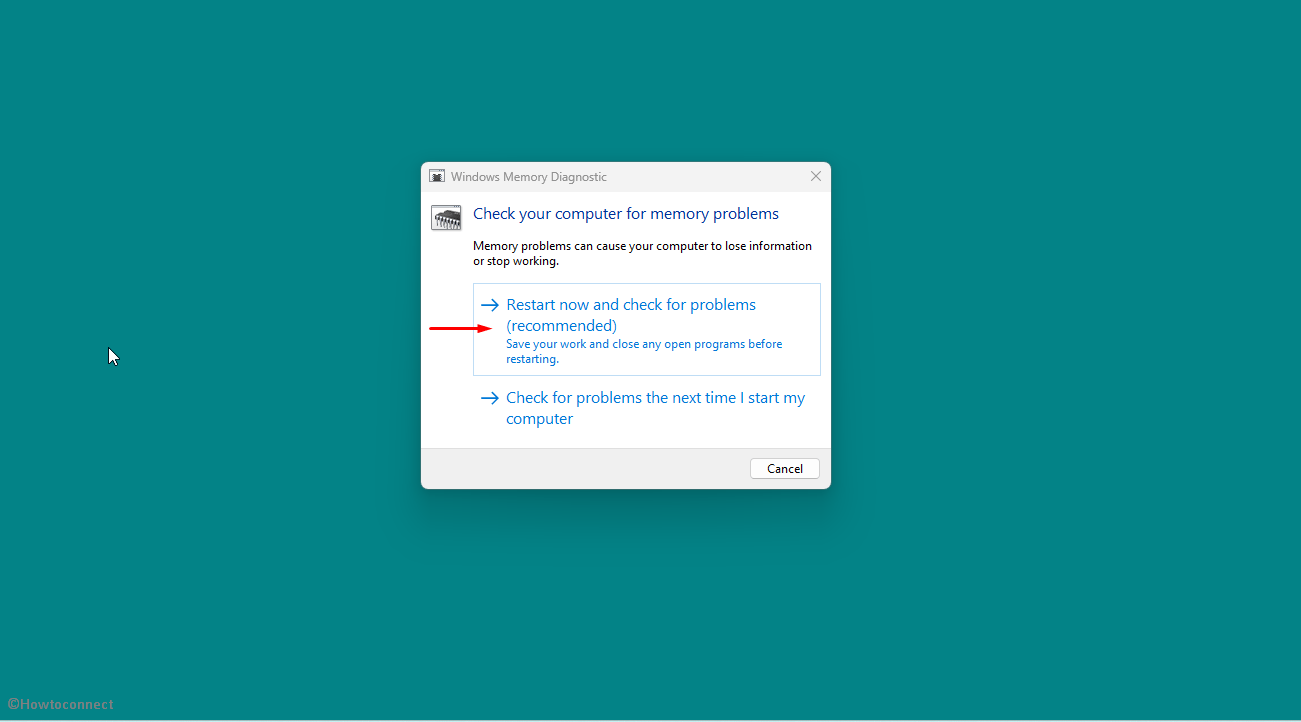
- Following the restart, the system will conduct a diagnostic on your RAM modules to identify any potential issues. If this occurs, you will have to replace the damaged module(s).
Way-6: Remove and then Reinstall the Video Graphic Drivers
LiveKernelEvent 141 error has a direct link with the video graphic drivers so it’s better to remove the same and then reinstall using Device Manager in order to fix it.
- Press – Win+X.
- Select – Device Manager.
- Locate and double click on – Display adapters.
- Rght-click on graphic card and choose – Uninstall device.
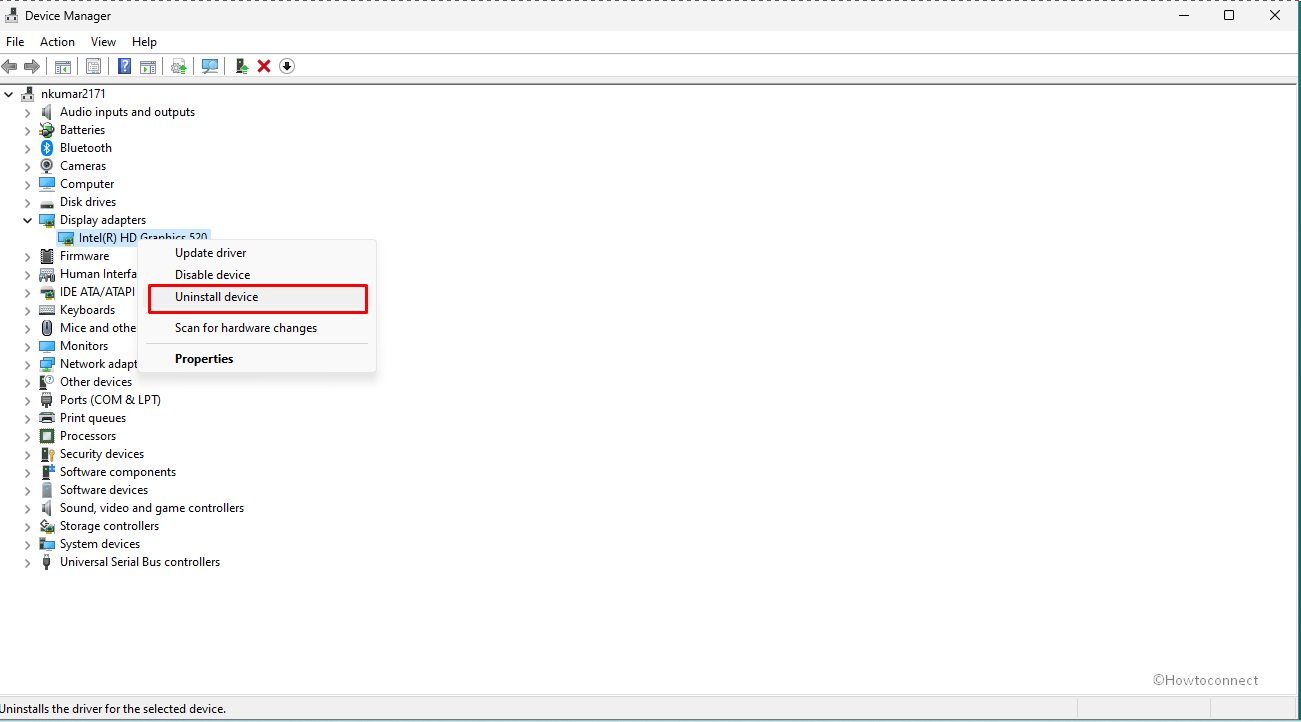
- Verify the popup.
- Restart your device and let the system re-arrange the driver files.
- If this does not fix the error then navigate to the manufacturer’s dedicated support page and download the right driver.
- Run the driver’s setup and reinstall the graphic card.
Way-7: Detach all the External Devices
Due to the possibility of a driver conflict inside the Windows, you should begin the troubleshooting procedure by removing the peripherals. Perform the action and see if the error code LiveKernelEvent still remains.
After that, you may rejoin your external devices, but you must reinstall any related drivers. If necessary, navigate to Device Manager and uninstall these drivers (hit Win + X, choose Device Manager, then pick the drivers to be uninstalled).
Way-8: Uninstall the third-party programs
Third-party programs are always responsible to generate problems including LiveKernelEvent 141 error in Windows 11 or 10. The applications might fall into conflict with the game you are playing leading the system to trigger a crash. Therefore uninstall them using the below guidelines –
- Press Windows and R.
- Type – appwiz.cpl. and hold down Enter to open the Program and Features window.
- Locate the third-party tool and right click on it.
- Choose “Uninstall” and move ahead with further instructions until the app is completely removed.
- Restart your computer to ensure that the error is resolved.
Way-9: Update the GPU Drivers
Update your graphics drivers to fix the LiveKernelEvent 141 problem, since this is a standard remedy for this issue. In order to accomplish it, please refer to the following steps:
- Press Windows + X, and then from the quick menu, choose Device Manager.
- Here, browse to the Display Adapters section, right-click the installed driver, and choose Update driver.
So, let’s hope these 7 ways aid in fixing your LiveKernelEvent 141 Error in Windows 11 or 10.
Methods:
Way-1: Install the latest version of NVIDIA Driver
Way-2: Run DISM and SFC or System File Checker Scans
Way-3: Initiate a Clean Boot in your System
Way-4: Check Out the GPU Overclocking Software and uninstall
Way-5: Detect Memory with Diagnostic tool
Way-6: Remove and then Reinstall the Video Graphic Drivers
Way-7: Detach all the External Devices
Way-8: Uninstall the third-party programs
Way-9: Update the GPU Drivers
That’s all!!
