One of the most common issues on the Internet these days is Windows 10 Deactivated Itself after Update even coming in 2024. It seems super frustrating when you have started a new day with your computer in the morning and see that the License is no longer active. An error message is shown in the notification for activating Windows again. When proceeding for that, repeatedly you will come across the following message –
“We can’t activate Windows on this device because you don’t have a valid digital license or product key”.
Even after trying to insert the correct product key, the system doesn’t accept that. We have come across already about few activation problems in Windows. Upgradation process from previous Operating System to the latest involves a few annoying issues. People around the world are facing this tiresome problem after making some successful modifications to the system. Sometimes when you install the latest upgrade from Windows 8.1 to 10 while using KMS software, the system keeps on informing you about the deactivation of the latest update and invalid license time and again. You can be sick of entering the exact code but things remain unchanged.
Solutions to Windows 10 Deactivated Itself after Update 2024
Here is How to fix Windows 10 Deactivated Itself after Update 2024 –
Enter the Product Key and Re-activate the Windows Manually
This is the most basic resolution in this respect. First of all, you need the genuine product key of the current Operating System. The key can be of the Windows 7 or Windows 8 you have installed while setting up the PC at the beginning. In case of having a Pre-installed Windows 10 edition, you need that code too.
To get a genuine product license key, you can look into the packaging boxes. If you miss out that, check the BIOS/UEFI firmware. However, you can still manage to get the key following through below procedure.
Step-1: Move the cursor and eventually click on the Taskbar search.
Step-2: Once opened, type CMD in the search box and hit a right click on Command Prompt when appears in the result.
Step-3: Select Run as Administrator from options. Hit the Yes option when UAC prompts for permission to open elevated Command Prompt.
Step-4: When the black window opens, at the base of blinking cursor, type the following command and press the Enter key.
wmic path SoftwareLicensingService get OA3xOriginalProductKey
The system will show you the product key in return to execution of the command. Now, proceed for the manual installation process.
- Open Windows Settings, the built-in app using the Win+I hotkeys from the keyboard.
- Navigate to Update & Security category. After proceeding to the next page, scroll down to select Activation from the left pane.
- Move alongside right and hit Change product key option from there.

- A popup screen will float up asking for the Product key. Enter your 25 digit code in the correct order.
- Hit the Next option from the bottom and follow the on-screen instruction to proceed further.

After inserting the product key manually, you might not come across the error again. If this basic solution fails to work, pass forward to the next workaround.
Ensure you have a fully Functional Internet Connection
Another basic resolution, in this case, can be rechecking your Internet connection for functionality. Windows nowadays executes the digital licensed for implementing authentic redistribution for the OS and software. In case of having the poor network, the connection between Windows and server will abort and you may found Windows 10 Deactivated Itself after Update. Therefore, you need to wait for a couple of days to fix the issue automatically in case of connectivity. If the same persists, move on to the next fixes from down below.
Run Windows 10 Activation Troubleshooter
Issues with Windows update is not new and people face difficulties when attempting to activate their Operating System copy. The problem was not confined with the upgradation process from “Windows 7, 8” or 8.1 only rather for those who have already gone through the Clean Install procedure. Therefore, Microsoft released Windows 10 Activation Troubleshooter as to restrict the error message “We can’t activate Windows on this device right now”. This tool will usually detect, resolve as well as troubleshoot the activation error automatically once put into effect. Let’s see how you can do that –
- Hover the cursor to the bottom left corner and click on the Start icon. Once it opens up, choose the Gear cog to launch the Windows Settings app.
- Go to Update & Security section and eventually click on the tile.
- Proceeding forward, choose Activation from the left and jump aside to corresponding right side pane. Scroll down to bottom and click on the link embedded with Troubleshoot option from the bottom.
- Windows Activation troubleshooter will show up and make an attempt to fix up the errors all by itself.
- After completion of the process, the system will notify you about the result. Once the result is upfront, a new popup will float up asking if you have made any changes in Hardware.
- Choose “I changed hardware on this device recently” option for more advice relating to this.

Get back to the Previous Build of Windows Operating System
Windows 10 Deactivated Itself after Update can happen if anything goes wrong while upgrading unintentionally. As a resolution process, you can roll back to the older version of Windows 10. In case of upgrading from Windows 7, 8 and 8.1, hit back to the respective older editions. To execute this solution, follow the below steps.
- Get access to the Settings application by making a joint hit on Win logo + I hotkeys.
- Click on Update & Security category. When shifted to the new settings page, select Recovery option from the left pane.
- Shift to the adjacent right pane and scroll down to Go back to the previous version of Windows 10 section. Hit the Get started button from there.

- The process initiates asking a few questions for information for heading back to the previous version.
After rolling back to old edition, you might not face this issue anymore.
Use the Windows Software Licensing Management Tool
Software Licensing Management Tool is a new invention by Microsoft owing to help users for checking their Windows Versions if activated temporarily or permanently. You can’t forcefully execute the same tool for Windows RE-evaluation as well as check whether it is activated properly or not. So, we can seek help from this mighty utility for solving Windows 10 Deactivated Itself after Update issue. Here is how to do it –
- .
- When it rolls out, type the below command after the blinking cursor followed by a hit on the Enter key –
slmgr –rearm
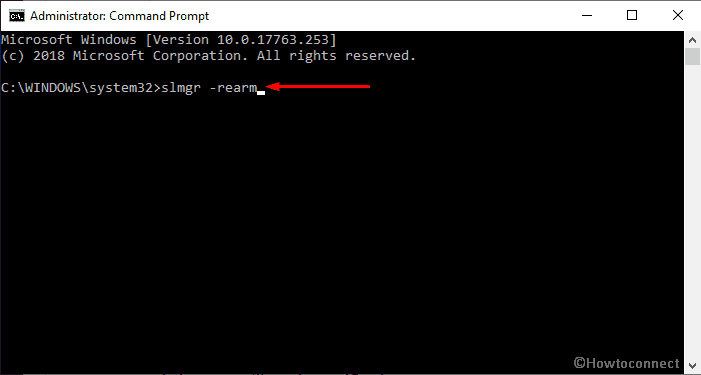
- The system will start executing the tool and resolve errors automatically if found. After completion, you will receive notification.
- Restart Windows 10 PC and check for the existence of error once more.
Hopefully, this will resolve the Windows 10 Deactivated Itself after Update issue.
Use a valid Microsoft Account
Often the issue rises up for using a regular account rather than a valid Microsoft account while setting up Operating System. The reason is quite simple as a local account is no longer associated with Microsoft. Hence, you need to reactivate Windows with credentials. Creating an account is rather too easy from their official website at free of cost and it involves no complication. In case of having a valid account, you need to connect it to PC following the below instructions.
- Press Win+I at once to invoke Settings app.
- Once it comes into the sight, click on Accounts.
- On the next page, select Email & accounts from the left column and shift to the adjacent right and click on Add an account.

- A new popup will appear asking to select an account. Choose Outlook account from there.
- On the following window, enter your credentials and then follow the on-screen instructions to add your “Microsoft Account”.
- After you are done associating the account, sign out from the current account. Restart your computer and log in to the Microsoft account.
Now check if the problem at hand got solved.
Delete Windows VM and Reinstall Windows (Only for MAC users)
While using the Windows operating system in MAC through official virtual machine software (Boot camp), you have to uninstall that to resolve the error. Then Reinstall the same again as to get back to original shape.
In this case, it is wise to install Windows from Bootcamp using a Fresh Installation Media. This will prevent errors coming from old Media. The process is as follows –
Open the Utilities folder and click on “Boot Camp Assistant“.
Click on Remove Windows 7 or later version.
Go through the on-screen instructions to wrap-up the process. Now Mac will start erasing your data and will uninstall Windows in the end.
Note – We recommend you to save a backup for all the necessary data in the computer before proceeding to uninstall the current version of Windows in MAC device. Otherwise, there is a possibility of losing necessary data and you will have to reinstall the Windows again which is more annoying and time killing.
Restoring from last Restore Point
Restoring the Windows from previous Restore point comes handy when you are failed to resolve issues using other resolutions. With the execution of this method, Windows will roll back to the point where the Operating System will not have any issues. This process requires a Previously created Restore point. The resolution is effective only when the error message is triggered after installing a new update. Here is the detail of the method –
- Right-click on Start and choose Run option.
- On the Run box, type rstrui in the empty box and click OK.
- In the “System Restore” wizard, perform a hit on Next to generate your PC’s Restore.
- In order to view more restore options, click on the checkbox against the option namely “Show more restore points” then select the latest restore point and hit the Next option to go ahead.

- Finally, click on Finish to let start this process.
Note: Ensure saving a back of necessary data before performing this workaround. Recommended using an External Hard Disk Drive or USB stick in this regard.
For Users having KMS (Post 1709 Update)
Usually, people use KMS software in absence of having an authentic version of Windows installed in the device. Previously, it used to work without any trouble rather seemed like running flawlessly as a genuine copy of Windows. However, with the updated version of 1709, a few of the weird symptoms are coming across. You may observe High CPU usage by Software Protection along with the error text telling that your Windows isn’t activated. Furthermore, the machine might take a long time for rebooting and running a few other programs.
In this point, you can assume Microsoft has caught up to the software as well as developed a new breaking point. Therefore, you have no choice left but to restore your current Windows version and disable any further update. This will restrict the system from going past to version 1709 and you will no longer see any more issues. Alternatively, you can buy an official Windows copy for your Computer.
Contact Microsoft Support
Microsoft upholds customer satisfaction at the top and made it really easy for the users to get connected with Support squad. If you are having a Preinstalled Windows 10 in your machine of any version, you can directly talk with Customer Visual Support Agents directly. Four ways you can do as following –
- Firstly the Voice call whose awaiting time is amazingly short.
- Secondly, you have the quick chat with a support agent. This is so quick that they may fix up your issues in a couple of minutes.
- Thirdly, you can manage an arrangement to call one of the Support agents in near future.
- The last one is a request group that will redirect you to the online Microsoft community. Proceeding to there, you can ask and answer questions related to Microsoft products and services.
In order to start the process of talking to a live agent, Go to Microsoft’s official support website and thereafter, follow the on-screen instructions.
Note – Ensure that you have the order ID or the reference number beforehand as proof of purchasing an Official version of Windows.
Reset Windows Operating System
Resetting is easy going through the Settings app. This resolution can help you get your system resources flawless in the process can resolve the issue. The steps are as follows –
Do a click on Taskbar search and type reset this PC in the void text bar.
When the result shows up in the display, hit Enter to invoke associated Settings page.
On the consequent page, shift to the right pane and click on Get started located under Reset this PC (See snapshot).

Doing so will reinstall the copy of Windows 10 on your computer and will recover your product key.
Perform a Clean Installation of Windows
Clean Install is the last option standing when all the workarounds above fail and unable to resolve the issue. Windows Operating system should get a refresh and everything in the system will start its new life. We recommend you saving all the important files in a safe place before you start proceeding to avoid greater loss.
A Clean Install is always a little complex as well as the professional issue. Hence, we recommend you to seek help from skilled technicians and install the latest Update files. Thus you can minimize consuming time unnecessarily and eventually can bypass Windows 10 Deactivated Itself after Update issue.
That’s all!!