Software Protection service in Windows 10 often reminds you about the reliability and authenticity of a utility while installing it on your PC. But sometimes the operation leads to failure of software installation. Even, when you want to use Microsoft Office on your PC then you may receive the following error:
Microsoft Office can’t find your license for this application. A repair attempt was unsuccessful or was canceled. Microsoft Office will exit now.
Actually, it happens when the Software Protection service is getting some trouble. When you check the “Software Protection service” you’ll notice that the Status shows it is not running (after opening through services.msc).
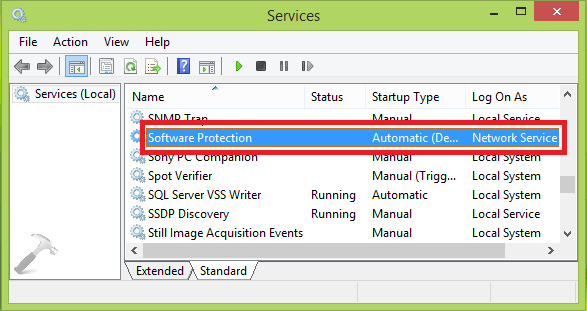
Starting the service will throw the following new error:
Windows could not start the Software Protection service on Local Computer.
Error 5: Access is denied.
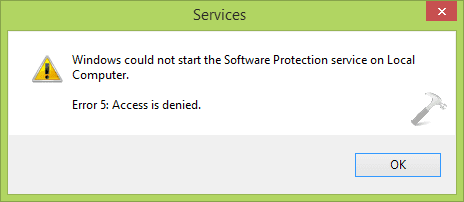
In this post, we will provide you a few tips to fix the Windows could not Start the Software Protection Service on your PC. You need only to follow its steps carefully. Let’s start how it can be done.
How to fix Windows could not Start the Software Protection service in Windows 10
First of all, make sure that Windows 10 is activated and then go further for more instructions below –
First Way
Step 1
Open File Explorer. To quickly launch, you can just press Windows and E buttons simultaneously. Go to the following folder –
C:\Windows\System32
Step 2
Check for the file under sppsvc.exe name and take ownership of it in the System32 folder.
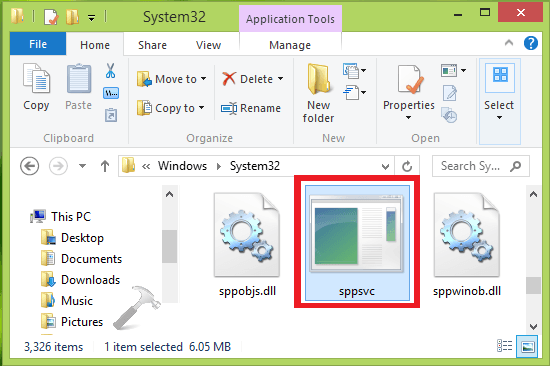
Instructions for taking ownership –
- Right click on sppsvc.exe and select Properties.
- Click on Security tab and select Edit.
- When Permission for sppsvc.exe window appears choose Add.
- Type your administrator email id using which you login into this Windows 10 PC and click on Check names.
- If the email id is converted to link click on OK.
- Go to the Permissions section and check the box for Allow and Full control.
Install the software or utility and check if Windows could not Start the Software Protection Service still occurs.
If you have done above then try to start Software Protection service. Even you get the same issue then go for another method using Registry Editor to fix them.
Help – How to Change File Permission to Grant Ownership in Windows 10
Second Way
- Hit Windows and R keys altogether to get run dialog box on your screen.
- Type regedit.exe in the text bar then press OK.
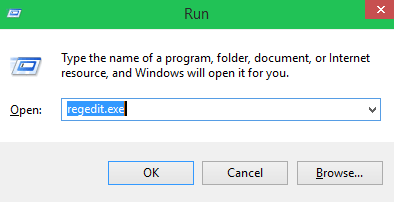
- Navigate the following keys carefully in the right pane of Registry Editor window:
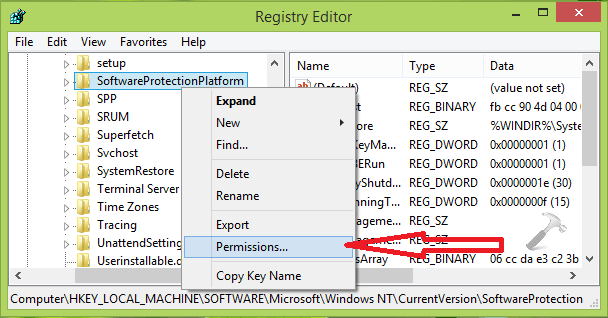
HKEY_LOCAL_MACHINE\SOFTWARE\Microsoft\Windows NT\CurrentVersion\SoftwareProtectionPlatform
Note: If SoftwareProtectionPlatform is not available then you need to just create this Registry Key in the editor.
- When you approach the SoftwareProtectionPlatform key, make right-click on the same and choose Permissions.
- Next, click on sppsvc under Group or user names section. Then mark the checkboxes Full control and Allow in Permissions section.
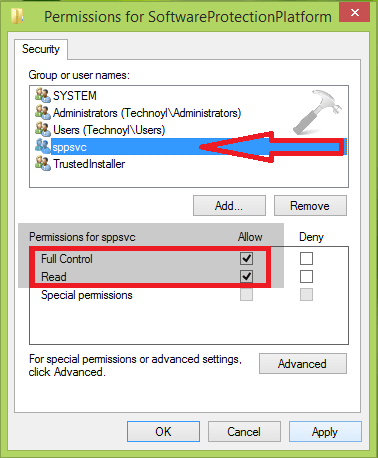
- Finally, tap on Apply button followed by OK button.
- Restart File Explorer or reboot Windows 10.
That’s it.
Now, you can close the Registry Editor and restart your PC. This is to be done to save for what you have changed on your PC. After, you will no longer face this type of trouble again.
