WISPTIS.exe is a common process of Windows 10 Operating System. Some of you may not be able to disable it permanently. Whereas a few of you are not sure whether WISPTIS.exe in their list of processes is a legit process or just any malware intended to harm the system. See – Fix: wuapihost.exe in Windows 10.
If you are reading this, it’s obvious that you are concerned about WISPTIS.exe in Windows 10. Either you are worried about it being a virus or whenever you terminate it from the Task Manager, it reopens after some time. If you delete this file, it automatically restores when you boot your computer next time. Don’t worry, this article addresses all your concerns.
WISPTIS.EXE in Windows 10 Solutions
Before we explore the solutions, let us first make it clear the basic concept of WISPTIS.EXE in Windows 10.
What is WISPTIS.exe in Windows 10?
The full form of WISPTIS is “Windows Ink Services Platform Tablet Input Subsystem”. WISPTIS.exe in Windows 10 is the pen input device tool for the Tablet PC Platform of Microsoft which basically supports Microsoft Office’s handwriting feature.
WISPTIS.exe is an element of Microsoft Pen and Touch Input. It is designed to remain active in the background even if a pen or touchscreen mode is not active. If you delete or rename this specific executable file, your efforts won’t fructify. This is because Windows File Protection instantly schedules its reinstallation for the next restart or when Adobe Acrobat or Microsoft Office is run again.
The programs that are responsible for bringing it into your computer are MS Office (2003 onwards), any of the Adobe product or Journal Viewer.
Since WISPTIS.exe deletion is temporary, it rarely affects the Windows 10 stability. Only the applications that require this process are affected and that too, for a short-term. For example, the programs that need a touchscreen or handwriting feature will stop performing. Also, the Snipping tool won’t work until you restart your system.
Is WISPTIS.exe in Windows 10 Genuine or Malware?
It’s true that you want to disable this process but before that, it is necessary to clarify whether WISPTIS.exe in your computer is genuine or fake. There are some programmers who put malicious codes in an executable file and name it as an important system file of Windows 10. Then, they transmit it into your computer (mostly through the internet) and destroy some or all the important files present in your device. Such files are also used to steal your information.
To check whether WISPTIS.exe in Windows 10 is genuine or a harmful virus is very easy.
Step-1: Open Task Manager by any of your preferred methods. However, the easiest one is to make a joint hit on Ctrl + Shift + Esc keys on your keyboard.
Step-2: Go to the Details tab and find out WISPTIS.exe.
Step-3: When you find, right-click on it and select the option Open file location. In the next moment, its location will be in front of you. If it is located in the following directory, you don’t need to worry because it is a Windows file.
C:\Windows\System32
But if the location is somewhere else, be careful because it can be a malware. In such a situation, you need to full scan your system for malware and virus attack.
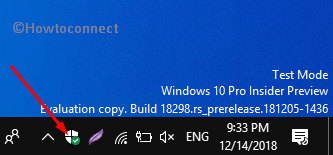
Click the shield icon on the taskbar to access Windows Security app.
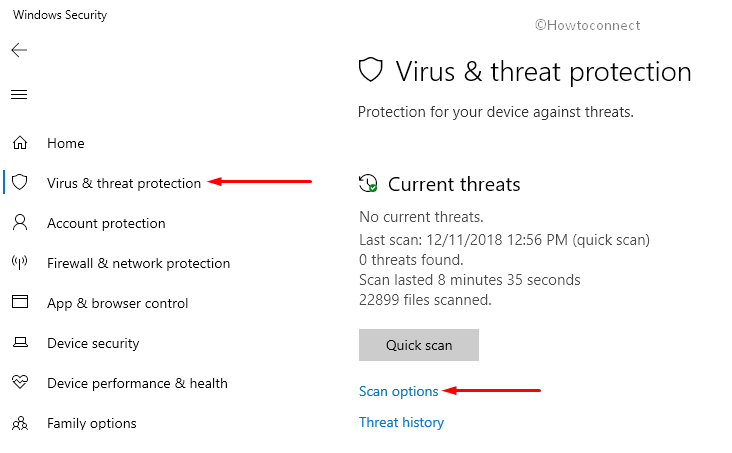
When the app opens up, go to the Virus & threat protection category. Switch to the corresponding right pane, click Scan options (see snapshot).
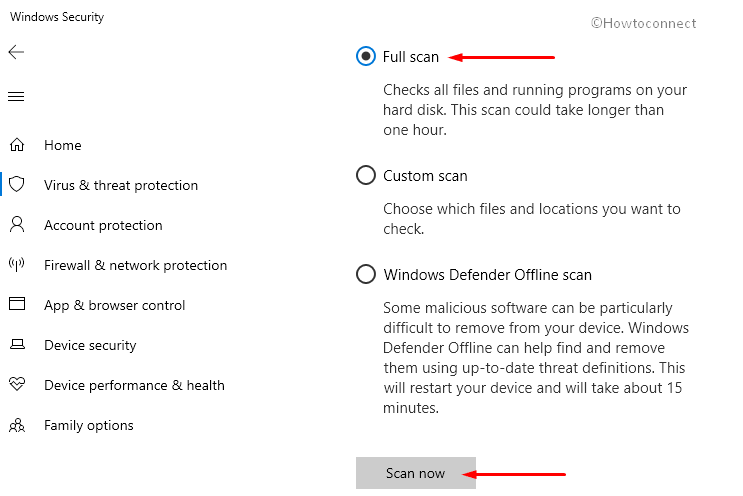
Choose Full scan radio button and click Scan now button.
Once the scan gets over, Restart Windows 10 PC.
These steps will free your device from any malware, especially if it is named as WISPTIS.exe.
Here are three solutions to fix the WISPTIS.exe issue. Try to follow the workarounds in order until the problem is solved.
Disallow WISPTIS.exe from GPEDIT.msc
The best workaround is to disallow wisptis.exe through Group Policy Editor. It will prevent the executable file from using the system resources.
First of all, open Run dialog box and to do so, press “Win + R” shortcut keys.
Type gpedit.msc in the provided text field and press Enter.
Once you access the Local Group Policy Editor, navigate to the below path on the left sidebar.
Computer Configuration > Windows Settings > Security Settings > Software Restriction Policies
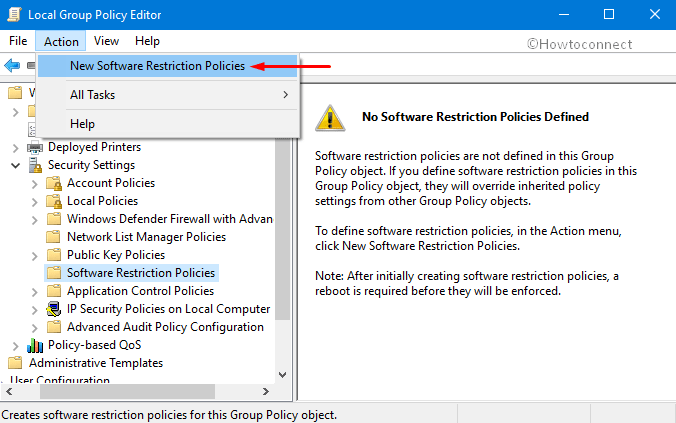
Once you reach Software Restriction Policies, click Action on the toolbar. Choose New Software Restriction Policies (see snapshot).
Moving ahead, perform a right-click on the Additional Rules, and select New Path Rule.
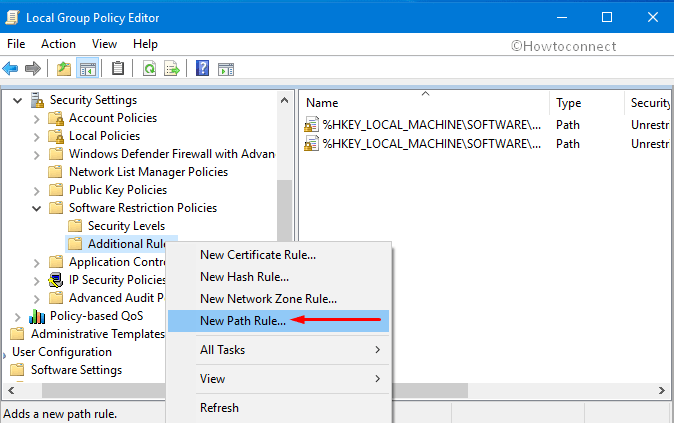
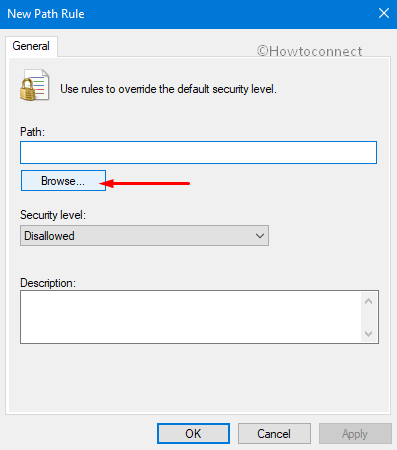
When the New Path Rule window opens, click on the Browse button.
Then, navigate to the WISPTIS.exe location which is C:\Windows\System32\wisptis.exe.
After setting this path, move your cursor a bit down towards Security level. Click on the drop-down menu and select Disallowed.
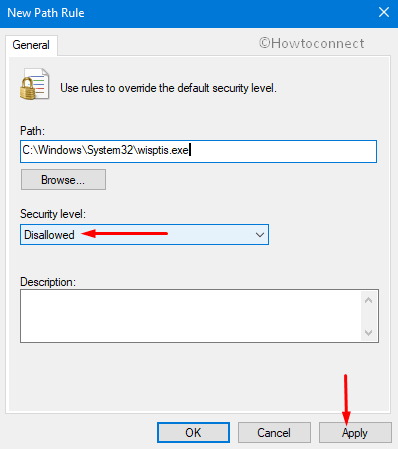
Finally, click on Apply to save the changes and then OK to close the window.
Remove WISPTIS.exe through Command Prompt
You should follow this method only if the first method fails to work. So, go through the following series of steps to remove WISPTIS.exe in Windows 10 through Command Prompt.
Type cmd on Cortana search box and right-click on the “Command Prompt” result. Choose Run as administrator.
Click Yes on the UAC prompt to go ahead.
Type these commands in the same order and hit Enter at the end of each command.
%systemdrive%
cd %windir%\system32
takeown /f wisptis.exe
icacls wisptis.exe /deny “NT AUTHORITY\SYSTEM”:(RX)
Finally, reboot the system and upon startup, you will notice that the WISPTIS.exe process no longer exists in the Task Manager.
Disable App-V Client
Disabling Microsoft App-V also prevents WISPTIS.exe from enabling again. This is a service that is in charge of virtual applications and App-V users.
This is an advanced solution and not recommended for every user. Note that disabling App-V Client might obstruct the process of any application and to do so follow these steps.
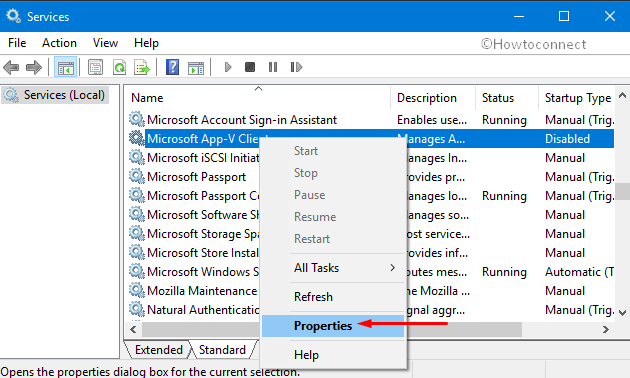
Get access to the Run command through any of your preferred methods. Here, type services.msc and hit Enter to continue.
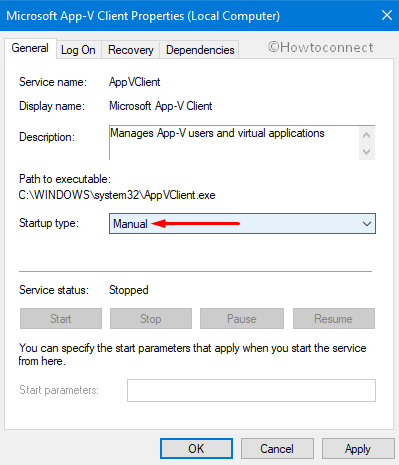
Locate and right-click on Microsoft App-V Client. Select Properties.
Move to the General tab. In the drop-down menu of Startup type, click first on Manual and then on Apply to save the changes. If you want to instantly stop this service, click on Stop.
Note: Both the options, changing the Startup type to Manual or Stopping the Service status, will stop WISPTIS.exe in Windows 10 from starting when you start your computer next time. So, what you choose doesn’t matter, your problem will be fixed.
1) How to Disable and Fix Wiaacmgr.exe in Windows 10
2) How to Disable and Fix wevtutil.exe in Windows 10
3) How to Disable and Fix whoami.exe in Windows 10
4) How to Disable and Fix wermgr.exe in Windows 10
5) How to Disable and Fix wuauclt.exe in Windows 10