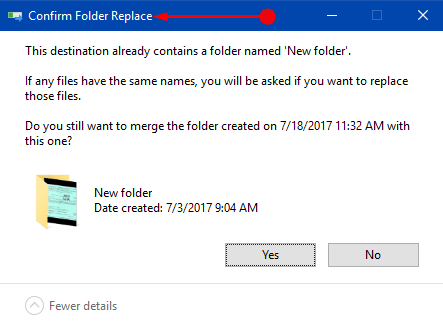
When you Hide Folder Merge Conflicts Dialog, the folder you copy automatically coalesces with the exactly identical one on destination. You might have experienced a situation when you find a pop up prompt Confirm Folder Replace. This appears when you move a folder into a destination where a folder with same name already exists. You may also like to see a guide to Hide Selected Items Together in Windows 10.
So, it asks you if you prefer to merge both the folders or not. Well, if you are sure about combining the folders and don’t wish to see the prompt, you can choose to Hide Folder Merge Conflicts Dialog. The message notifies that the folder in the destination and the one you are moving/copying have similar names.
The message notifies that the folder in the destination and the one you are moving/copying have similar names.
Before we proceed towards the steps, let us clear two things –
1. The changes will be effective to your user account only.
2. This feature is for folders only and will not affect file merge conflicts.
Hide Folder Merge Conflicts Dialog in Windows 10
Method 1 – Through Folder Options
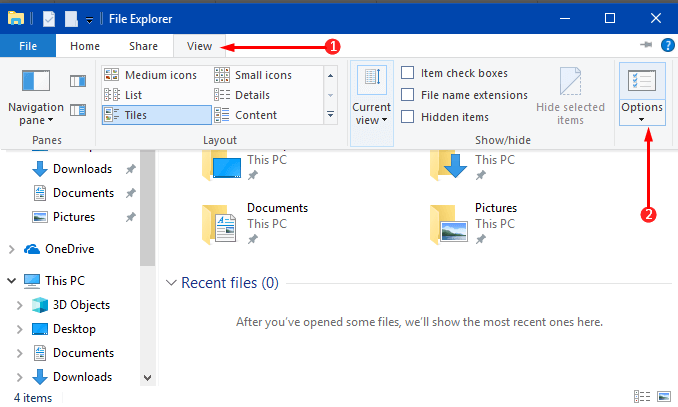
Step 1 – First of all, Click File Explorer icon on the taskbar. Moving ahead, click View tab on the File Explorer and select Options in the ribbon.
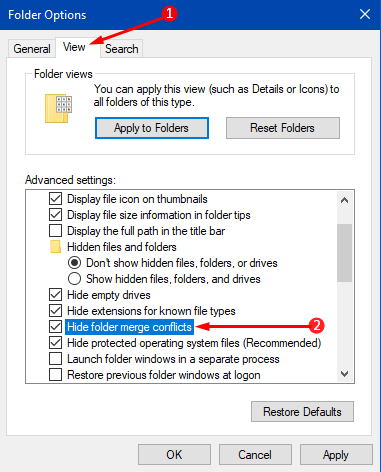
Step 2 – When Folder Options dialog appears on the PC screen, click View tab, the middle one.
Step 3 – Locate and select the setting namely Hide folder merge conflicts in the Advanced settings portion. Click Apply and OK buttons to make the changes effective of the merge dialog.
Well, if you prefer to notice the merge prompt, simply Uncheck the setting Hide Folder Merge Conflicts Dialog in the above-mentioned Step 3.
Method 2 – Via Registry Editor
Step 1 – Open Registry Editor and to do so, first, type regedit.exe on Cortana. When Cortana displays regedit.exe on the top, select it.
You can also Access Registry Editor in Windows 10 – 5 Simple Tips.
Step 2 – Click Yes when you experience UAC prompt on the PC screen.
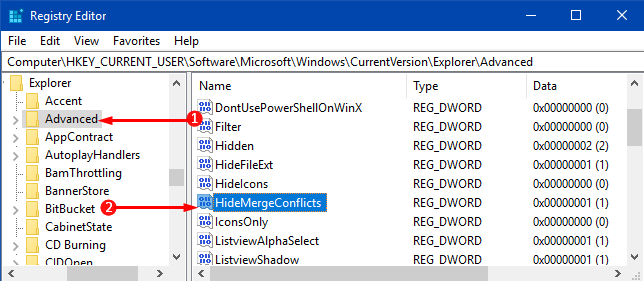
Step 3 – Go to the following path on the left sidebar of Registry window.
HKEY_CURRENT_USER => SOFTWARE => Microsoft => Windows => CurrentVersion => Explorer => Advanced
Step 4 – Find and double-click the Dword HideMergeConflicts on the right pane of Advanced.
If you want to learn more about Dword, this guide may come handy How to Create a New DWORD Value in Registry Editor on Windows 10.
Step 5 – Set 1 in the Value data box of the edit dialog to hide the merger prompt. Click OK to save the modification of the DWORD.
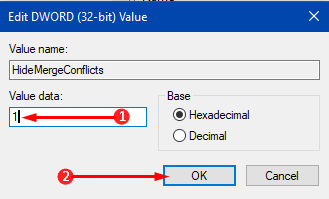
Note – In future, if you prefer the Folder Merge Conflicts Dialog to come up, just set the Value data as 0 in the above step.
For reference, you can follow our guide on How to Copy Path of a File or Folder in Windows 10.
Conclusion
Well, it would be great if Windows also provide an option to modify files with same names so you can actually save both in a merge. So, if you are quite confident about the folders you are copying or moving, you choose to Hide Folder Merge Conflicts Dialog. However, to avoid confusion in future, you can also show up the dialog.