This 2-minute tutorial will introduce you to the latest inclusion of settings to Show Visual Feedback Around the Touch Points in Windows 10 for the Touch Screen devices. The operating system provides you three various ways to manage this feature. This is really helpful when you have to give presentations on larger screens and monitors. It actually allows your audience to follow you in a better way.
The Ease of Access category includes new features to Read and Interact with the Screen using the Mouse, Sync the Narrator cursor and system focus and more. So, let us explore all the procedures to display visual feedback around the touch points.
How to Show Visual Feedback Around the Touch Points in Windows 10
Way-1: Through Windows Settings
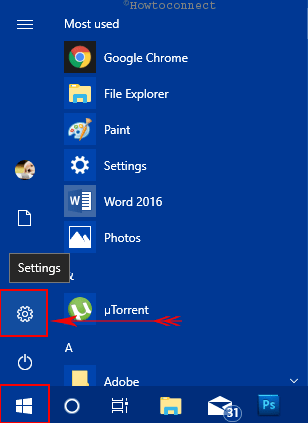
Step-1: Open Start menu and hit a tap on the Gear icon to Open Windows Settings app (see snapshot).
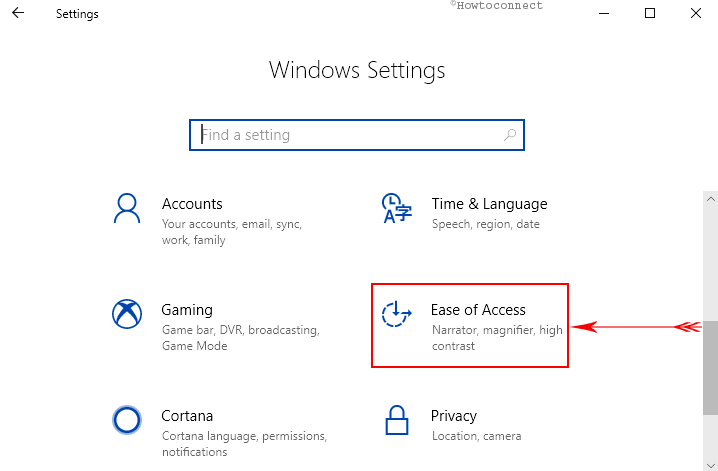
Step-2: Move the finger to Ease of access and touch it once highlights.
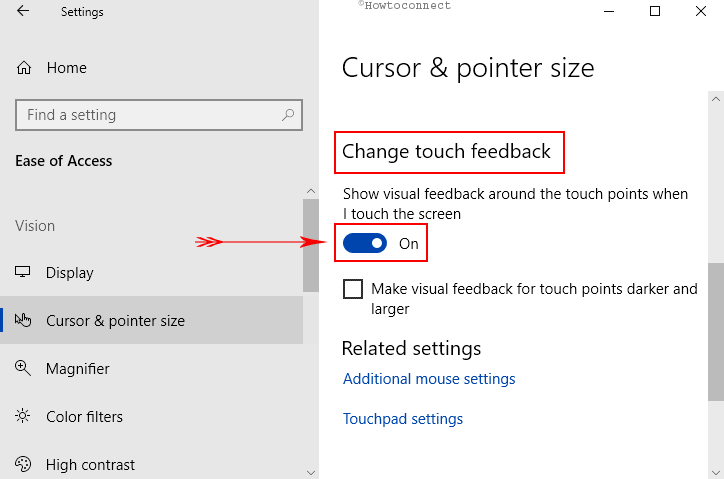
Step-3: Choose Cursor & pointer size section on the left pane and slide over to corresponding right.
See: How to Change Mouse Pointer Size and Color in Windows 10.
Step-4: Reach out to Change touch feedback segment. Here, toggle On the option Show visual feedback around the touch points when I touch the screen.
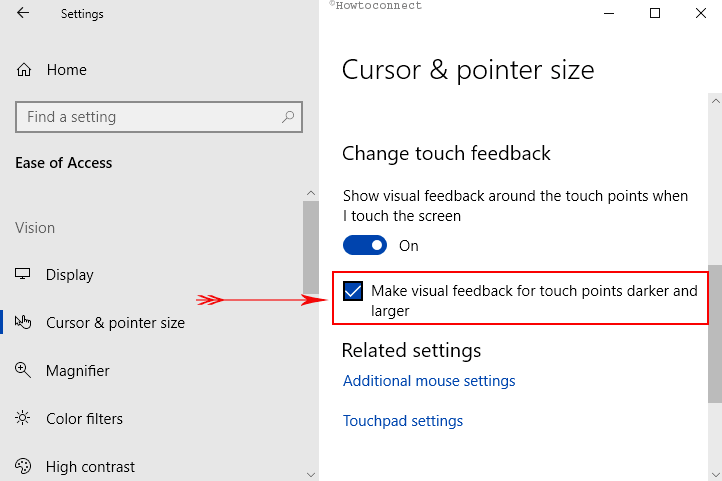
Step-5: Proceeding forward, you can check the option Make the visual feedback for touch darker and larger as per preference. By enabling this option, you can customize the way you want to see the feedback.
Way-2: Using Registry Editor
i. Open Run dialog box by together hitting Win + R hotkeys.
ii. Once the box shows up, type regedit and click OK to access Registry Editor (see image).
iii. On the left pane of Registry, navigate to the below-given path.
HKEY_CURRENT_USER\Control Panel\Cursors
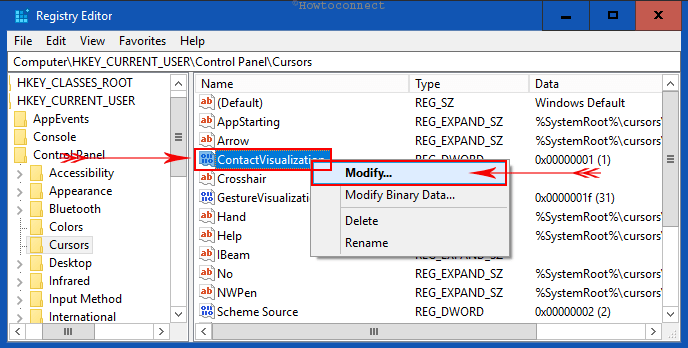
iv. On its adjacent right pane, locate and right-click the DWORD ContactVisualization. Click Modify from the menu that pops up.
For reference, read How to Create a New DWORD Value in Registry Editor on Windows 10.
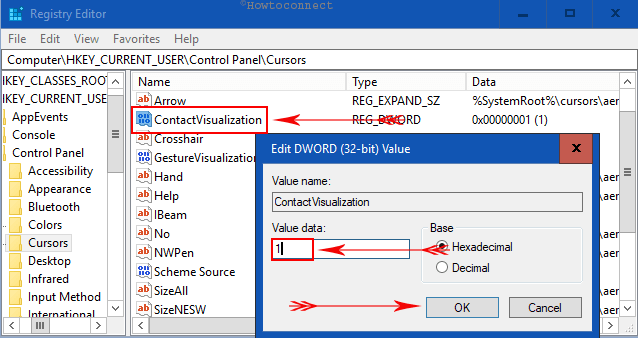
v. Now, use the below values as per your requirement in the Value data box and click OK to implement changes.
| Value | Description |
| 0 | Disable Visual Feedback Around Touch Points |
| 1 | Enable Visual Feedback Around Touch Points |
| 2 | Enable Visual Feedback Around Touch Points Darker and Larger |
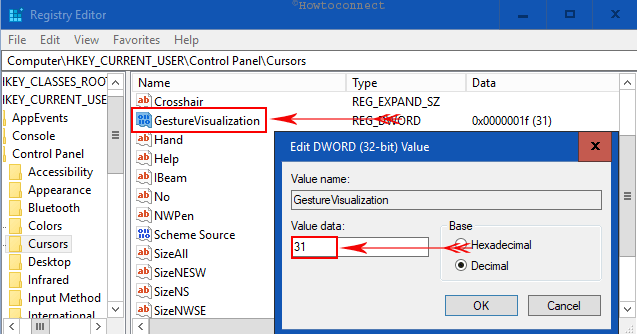
vi. Next, look for GestureVisualization DWORD and perform a double-click on it.
| Value | Description |
| 0 | Off |
| 31 (Decimal) | On |
Way-3: Via Classic Control Panel
I. First of all, “Open Control Panel on Windows 10“. The best way is to launch Start Menu, type cp, and then press Enter.
II. Make the icons into smaller view and select Pen and Touch.
III. Moving ahead, on the Touch tab, checkmark the option namely “Show visual feedback when touching the screen“.
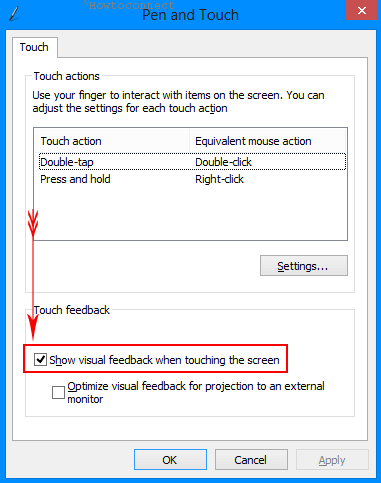
IV. You can also make the visual feedback larger and darker by selecting the option “Optimize visual feedback for projection to an external monitor“.
That’s it. No more additional effort to lose. This is how Microsoft is successful making the Ease of access for the valuable customers.