If you are outlook user and looking to increase mailbox size in Microsoft Office 365, here we come with easy tips to technically expand it. The growing awareness of internet has made Email the most efficient and easy way to store your valuable data. But often, the limited storage of Office 365 becomes a worrying issue for the business client as it leaves you to be in a provided margin. As a result, you may need to make preference and select the most important data over necessary files. Otherwise, the mailbox will automatically start to generate Error messages once you exceed the limit.
Nowadays, a large number of people use Mailbox application to exchange emails on a daily basis as it’s is pretty significant for both personal and corporate life. However, if the proper management has not been done, you might lose some of your significant data on account of its limited storage. To overcome this situation, you can run some commands (cmdlet) using PowerShell to access more space e.g. if you are having a storage capacity of 50 GB, it will increase up to 100 GB. Related –
Way to Increase Mailbox size in Microsoft Office 11 and 365 in Windows 11 and 10
Here is How to increase mailbox size in Microsoft Office 365 on Windows 11 or 10 –
Before deriving any method first you need to connect your system to Exchange Online with the help of remote PowerShell. Here’s how –
Connect to Exchange Online PowerShell
You can bring your Windows PowerShell into action to generate the remote session in order to interchange your Online settings by using the command line. It is very easy to do the process. Your job is to put in office 365 credentials and set up the needed connection settings. On accomplishment, import the exchange online cmdlets to your local computer using Windows PowerShell session.
Step-1: Press Win+X in combination and select Windows PowerShell (Admin) from the Power menu.
Step-2: If a UAC prompts up, click on Yes to give consent.
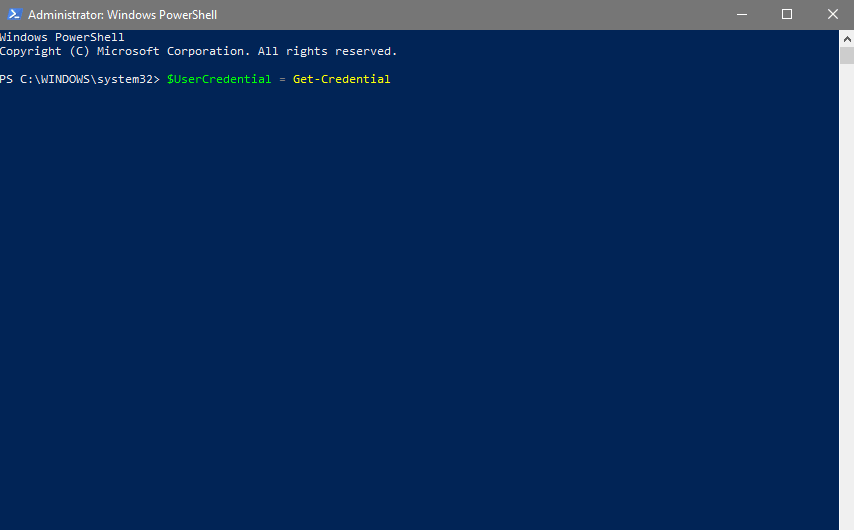
Step-3: Once PowerShell turns up into the screen, type the following command after PS C:\WINDOWS\system32> and hit Enter –
$UserCredential = Get-Credential
Step-4: Then you will view Windows PowerShell credential request dialog box on your Desktop Screen. Type your credential correctly and then click OK.
Step-5: Now execute this command –
$Session = New-PSSession -ConfigurationName Microsoft.Exchange -ConnectionUri https://outlook.office365.com/powershell-liveid/ -Credential $UserCredential -Authentication Basic -AllowRedirection
Note: If you are using Office 365 operated by different clients, then you need to perform some extra codes on your PC. These are mentioned below:
- For Office 365 operated by 21Vianet, use this ConnectionUri value: https://partner.outlook.cn/PowerShell
- For Office 365 Germany, use the ConnectionUri value: https://outlook.office.de/powershell-liveid/
- If you’re behind a proxy server, run this command first –
$ProxyOptions = New-PSSessionOption -ProxyAccessType <Value>, where the ProxyAccessType value is IEConfig, WinHttpConfig, or AutoDetect.
Here the value of ProxyAccessType is either IEConfig, WinHttpConfig, or AutoDetect.
- Then, add
-SessionOption $ProxyOptionsparameter and value to the end of the $Session = … command.
Step-6: At last, run the following command on PowerShell –
Import-PSSession $Session -DisableNameChecking
After finishing the process make sure to disconnect the remote session by executing the following command –
Remove-PSSession $SessionIn the end, reboot your computer so that the changes made so far take effect. Now follow any of the below methods according to your need to increase mailbox size in Microsoft Office 365.
Method-1: Set mailbox size limits for a single user
The below-described procedure will set mailbox size in Office 365 for a single user.
Launch Windows PowerShell as an administrator and type down the subsequent command after PS C:\WINDOWS\system32> and Press Enter –
Set-Mailbox < UserID > -ProhibitSendQuota < Value > -ProhibitSendReceiveQuota < Value > -IssueWarningQuota <Value>
Note: In this command, the <User ID> denotes the mailbox of user’s UPN, email address, or GUID, whereas <Value> represents a number in megabytes (MB), kilobytes (KB), or gigabytes (GB) which is required.
For example: If you want to set the mailbox size to 20 GB, set the send limit at 19 GB, and want to show the storage issue a warning message at 18 GB, you should go through the following command:
Set-Mailbox JDoe@contoso.com -ProhibitSendQuota 19GB -ProhibitSendReceiveQuota 20GB -IssueWarningQuota 18GB
In order to check the current list of quotas, run the following command –
Get-Mailbox < User ID > | Select *quota
Method-2: Set mailbox size limits for multiple users
Click on Cortana and type PowerShell in the search box. When the result appears, do a right-click on Windows PowerShell and select Run as administrator.
Click on Yes if a UAC shows up.
In the PowerShell command prompt write the given command and then hit Enter on your keyboard –
Get-Mailbox | Set-Mailbox -ProhibitSendQuota < Value > -ProhibitSendReceiveQuota < Value > -IssueWarningQuota < Value >
There are additional filters too that you can apply to get the Mailbox cmdlet or User cmdlet. Generally, these are used to control the users by applying changes. Let’s see an example where we use three cmdlets to filter the command in the Sales Department of an Organization –
Get-User | where {$_.Department -eq "Sales"} | Get-Mailbox | Set-Mailbox -ProhibitSendQuota < Value > -ProhibitSendReceiveQuota < Value > -IssueWarningQuota < Value >
That’s all. Hope the above methods help you to increase mailbox size in Microsoft Office 365 and fix the issue of unnecessary deletion of files.