We are here to provide you simple step by step instructions to Install Cisco Anyconnect VPN Client on Windows 11 or 10. Though the latest edition is well compatible with Windows 10 and 11, Microsoft Edge browser doesn’t have the necessary plug-in for its web-based automatic installation. Hence, this guideline will help you to install it correctly.
Cisco Anyconnect VPN Client is a popular simple and secure endpoint access to multiple locations all over the world. The organization delivers persistent user experience across devices, both on and off premises, and makes management easy with a single agent.
Procedure to Install Cisco Anyconnect VPN Client on Windows 11 and 10
Here is the way to Install Cisco Anyconnect VPN Client on Windows 11 or 10 –
Step-1: Click on the Start menu and select “Microsoft Edge” browser from Menu tiles to launch it.
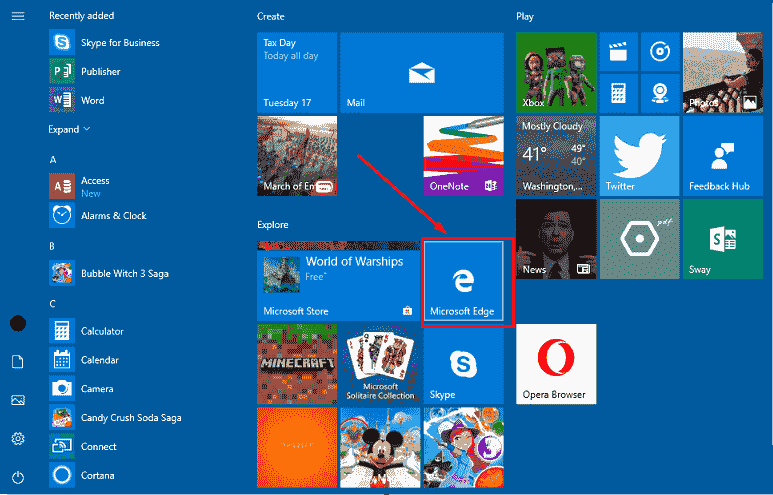
Step-2: When the Browser opens, copy the following link and paste it to address bar to visit:
https://vpn.gatech.edu/global-protect/login.esp. Press Enter.
Note: – You can also click the link to open with another browser.
Step-3: Once the Login page cuts your view, perform a click on the dropdown menu next to Group and select gatech-2fa-Duo, from the list.
Step-4: Proceeding forward, type your Username and Password in the respective fields.
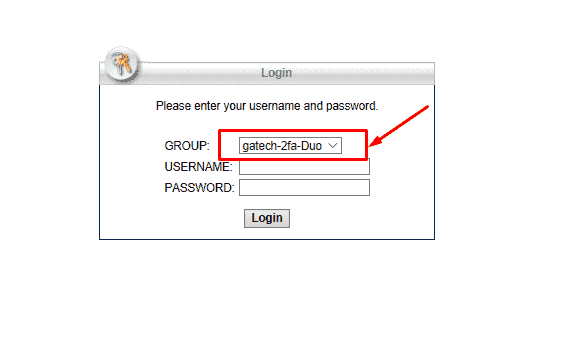
Once more enter your passcode.
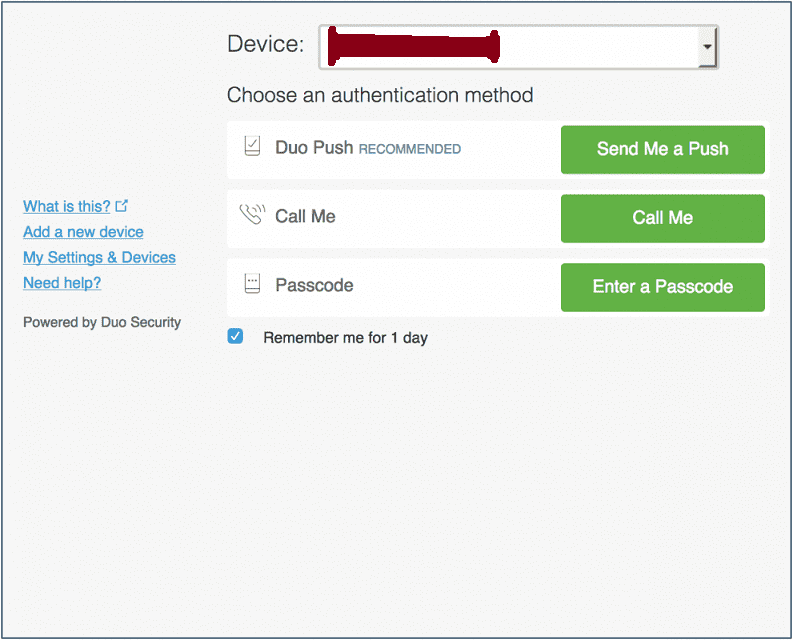
Step-5: Upon successful authentication of the credentials, you will see the Login banner. Hit the “Continue” to move forward.
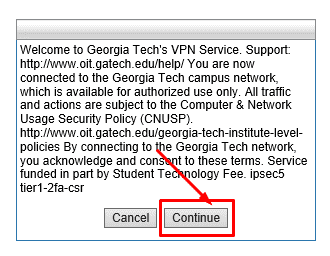
Note – To have an Auto install, Installer will quickly attempt to detect ActiveX and later on Java. Since Microsoft Edge doesn’t have these plug-in, you will see a popup with a failure notice. Therefore, do a click on the link provided with ‘Windows Desktop’ option from the popup to download the applications.
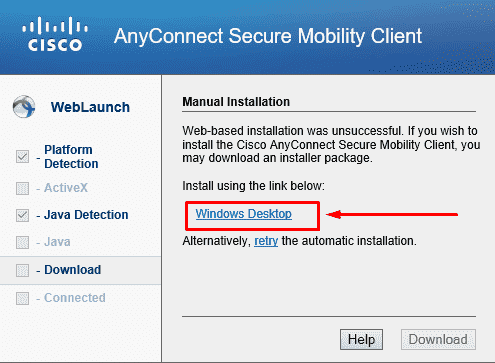
Step-6: Once the Downloading ends up, make a click on Run from Downloads bar and follow the installer’s on-screen instruction to proceed with the installation.

Step-7: Select “Yes” when UAC warning dialog prompts for your permission.
Step-8: When the next page appears in Installation Wizard, choose Next option to complete the installation.
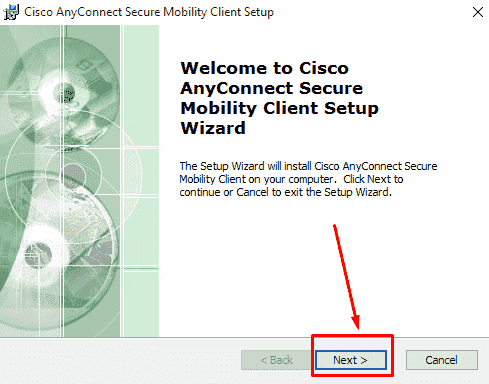
Once the Setup completes its work, select Finish.
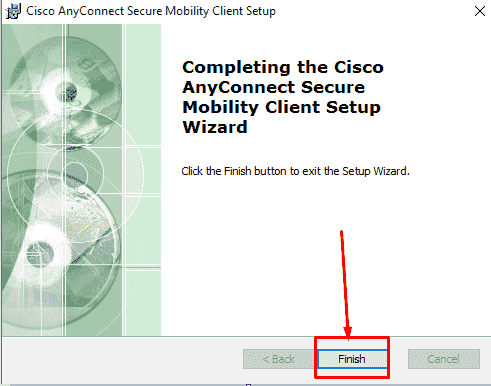
Consequently, Cisco Anyconnect VPN Client is installed in your Windows and it will be available in the Start menu.
Follow the below instructions to use Cisco Anyconnect VPN Client on Windows 11 or 10 –
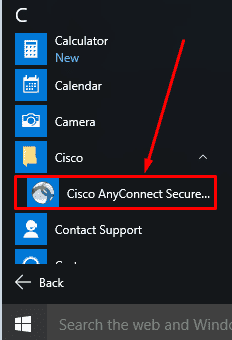
Open the Start menu and Select Cisco AnyConnect Secure Mobility Client from the list view to launch.
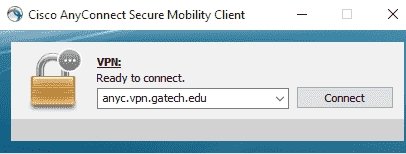
When the next popup comes into view, select vpn.gatech.edu under VPN and hit the Connect button to continue.
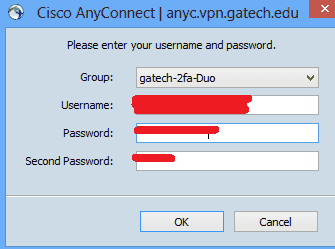
After the Credential popup appears, do a click on the drop-down box beside Group: and select gatech-2fa-Duo from the menu.
After selecting “gatech-2fa-Duo”, you will see some blocks in the popup such as Username, Password, and Two-factor (Second Password).
Provide the GT username and GT Password in the corresponding fields.
In the gap of Second Password, enter any of the following codes and choose the “Ok” button to continue.
push, phone, phone2, phone3, phoneN
Duo mobile Application will generate a code so you need to only tap on Key option from the top right side.
Push phone, phone2, phone3……. phoneN series lacks phone1 since both of phone and phone1 are reference and the app stores them in the system according to order. In case of phone1, the system will call your phone (might be a mobile handset) and for the Phone2, you will receive in your Office number.
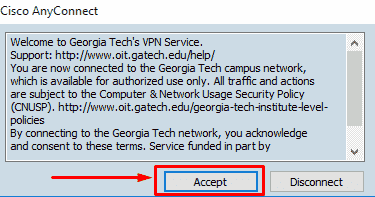
After checking off all the credentials, you will see a Welcome banner. Hit the “Accept” button to proceed ahead.
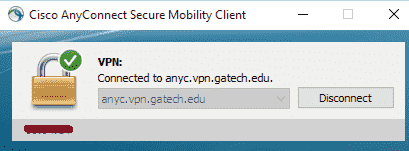
Thus, the AnyConnect icon will be kept minimized in the system tray. Once you make a click, it will be maximized. Have a click on the “Gear” icon from the bottom left corner to details.

If you want to terminate the connection, simply select “Disconnect” button.
That’s everything about the way to Install Cisco Anyconnect VPN Client on Windows 11 or 10.
Caution
The full instruction is about how to Install Cisco Anyconnect VPN Client on Windows 11 or 10 Software. This really does not engulph Start Before Logon component. In fact, this is not necessary for a general platform rather for specific campus units. If you need to have the component, Pay a visit to this link to get unique installer packages. Besides, as you have already installed the VPN client, “Start Before Logon” package will also be added to next Online update.
