You are able to make a Picture Black and White in Photos App Windows 10 or 11. Using this application, you get a simple and having high contrast image leaving a powerful impression on the viewer. This is a professional built-in photo editor that provides you lots of beneficial features for advanced users.
This application is bundled with Windows 11 or 10 and therefore there’s no requirement for third-party picture editors that includes a bunch of ultramodern features. So, it is easier to create a breathtaking black and white image with this Stock photos app. In this article, we’ll let you know how you can accomplish this in just a few clicks.
Ways to Make a Picture Black and White in Photos App in Windows 11 and 10
Here is How to Make a Picture Black and White in Photos App Windows 11 or 10 –
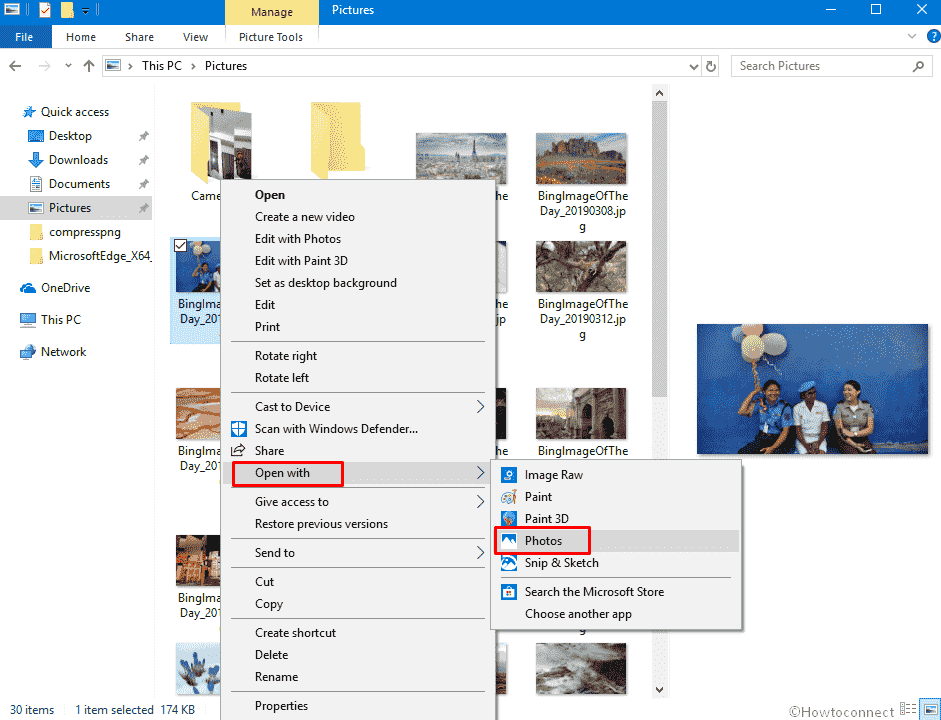
Step-1: First of all, select your desired image in the File Explorer. Right click on the same and select Open with =>Photos from the context menu on your computer.

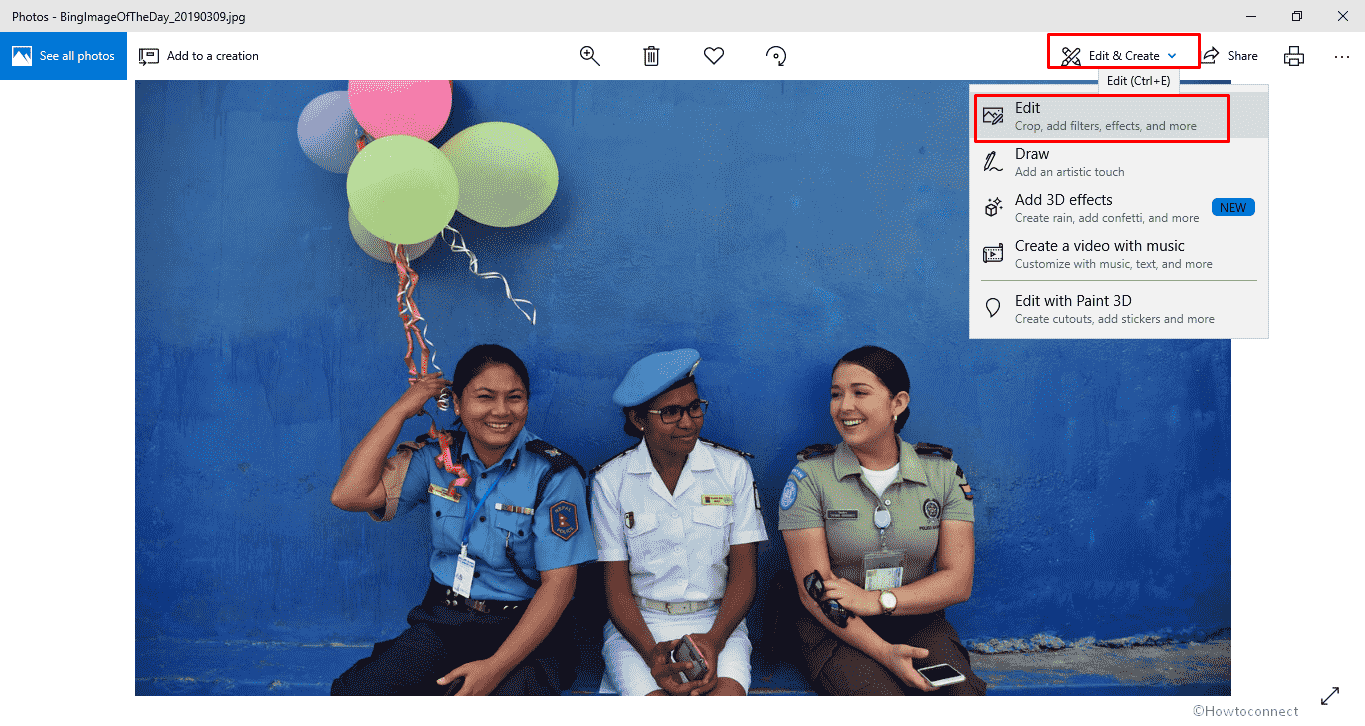
Step-2: Once opened, click the Edit & Create option above the photo and choose “Edit” from the drop-down menu.

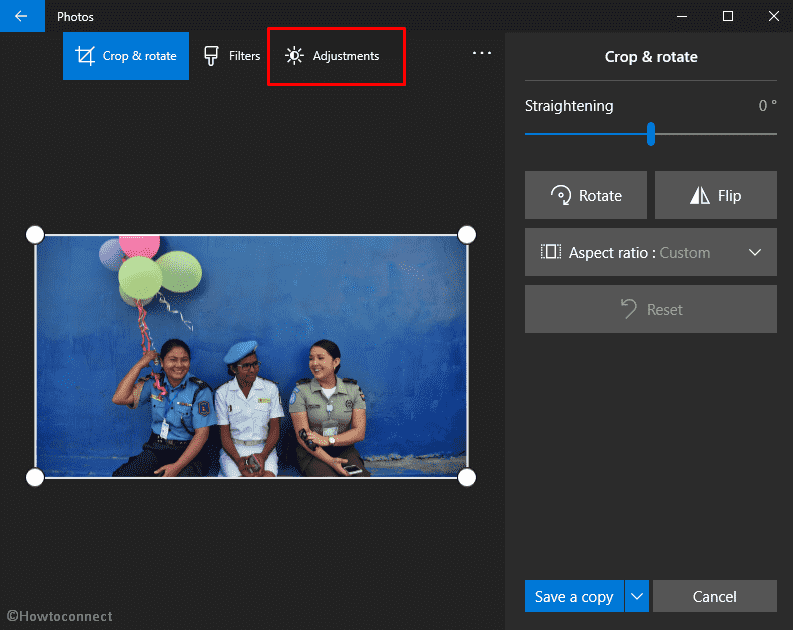
Step-4: Thereafter, switch to Adjustment option from to top middle.

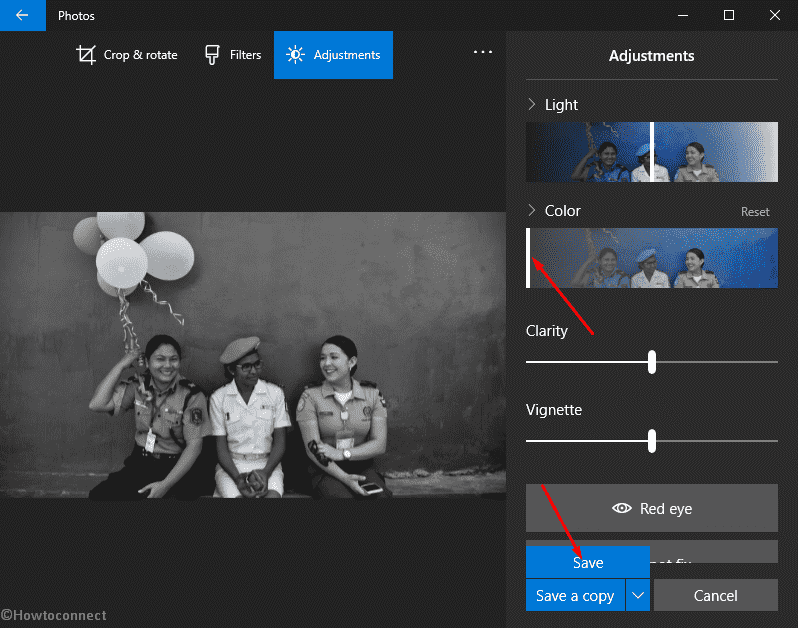
Step-5: Now, drag the Color bar way towards the left end to make a Picture Black and White in Photos App. Doing this you’ll notice that it results in decreasing the dazzling and brightness. As you move the way to the left, the image turns in black and white.

Step-6: Consequently, click on the Save button to materialize the changes you have made. By doing this, the original image will be overwritten.
Step-7: If you want to preserve the original picture, click on the Save a copy button. It’ll save the black and white photo and also keep the original one intact.
Note – The location of the new image will also be of the original one.
That’s all!!
