Microsoft Edge lets you browse the web fast as it has a new feature of page prediction that loads your following page instantly, by knowing the behavior of your browsing pattern. In this article, we will guide you with the steps to enable and disable page prediction in Edge.
After you enable page prediction in Edge, the browser downloads the following content by itself and exhibits you when you need it. And they are displayed in such a quick time, almost like they are stored in your computer’s drive. The entire session takes place in the background, without hindering your browsing session. So, when you enable this feature you save your time and also get a clear knowledge about other needed stuff. This new web browser in Windows 10 reads your browsing pattern and understands what will be your next search. It also enhances your reading and improves the browsing speed. Now, let us head towards the steps and see how to enable and disable page prediction in Edge.
Another useful post:
How to Block All Cookies in Edge in Windows 10
How to Enable and Disable Page Prediction in Edge
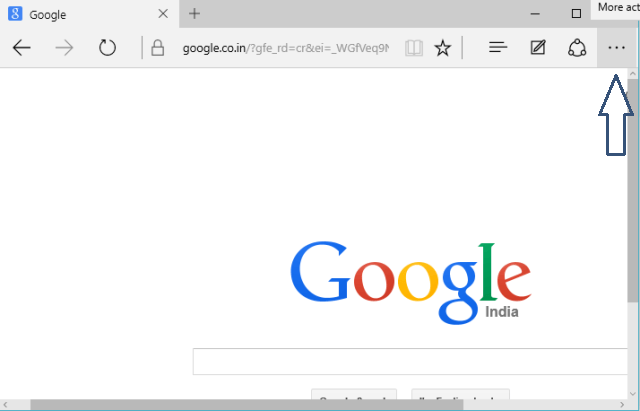
- Spread Microsoft Edge web browser on your screen and execute a click on More actions symbol at the far top right.

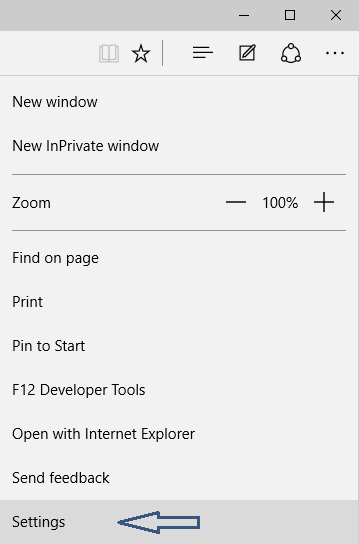
- Choose Settings option from the appeared list.

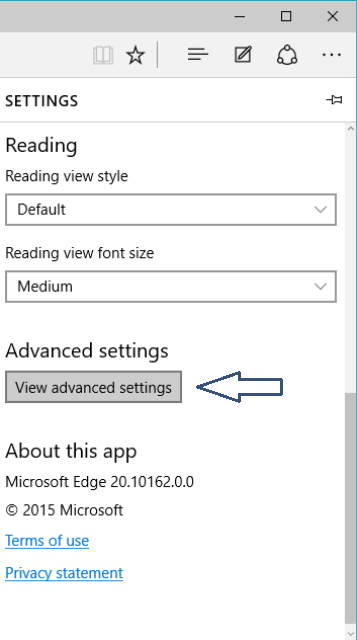
- Go to the extreme down and click View advanced settings button.

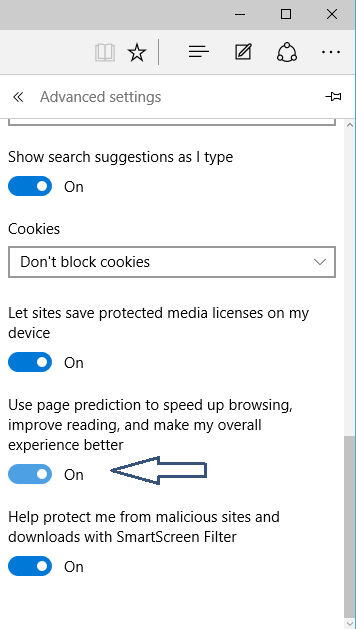
- Another advanced settings list opens up with different segments. Take yourself to the lower half of the settings and then you can see and option saying Use page prediction to speed up browsing, improve reading, and make my overall experience better.

- Use the slider to enable or disable the setting as per your preference.
- That’s it.
Microsoft Edge is all set to explore itself with many special features. We are sure to come up with a lot of new and exciting innovation. Few interesting articles we have also covered on Edge. We hope you go through them and let us know if you hold some extra information on this topic.
