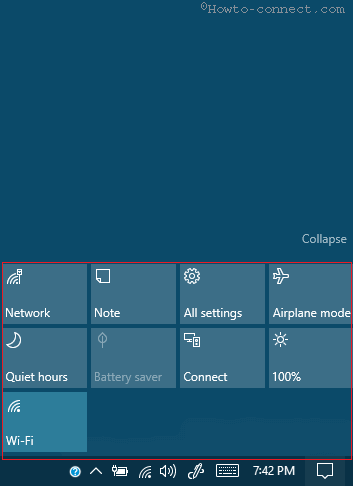
How to Remove or add Quick Actions Tiles in Windows 10 – At the bottom portion of Action Center few rectangular buttons are placed which empower a user to access the Settings field swiftly. By default 9 buttons present, but all of these are not so important for every individual. But now A utility enters into Notifications and actions allowing to Add or remove these buttons. Here have brought the identic topic How to Remove or add Quick Actions Tiles in Windows 10 with elaborations of steps.
How to Remove or add Quick Actions Tiles in Windows 10
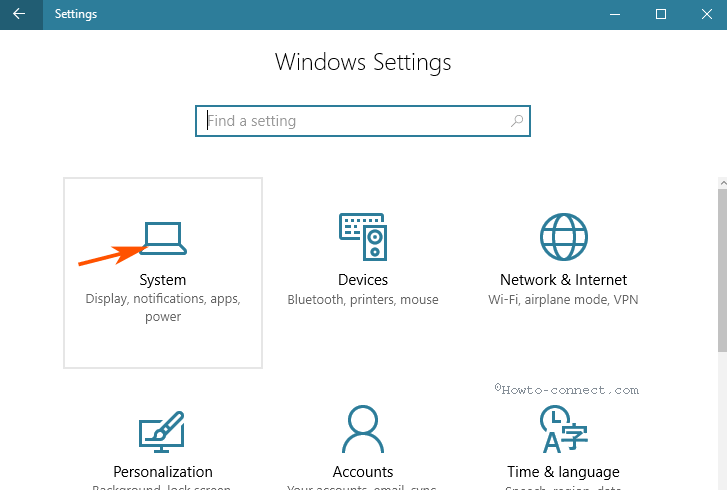
- Strike the combination of “Windows & I” keys and upon the arrival of the “Settings” program, click or hit the first block termed as “System”.
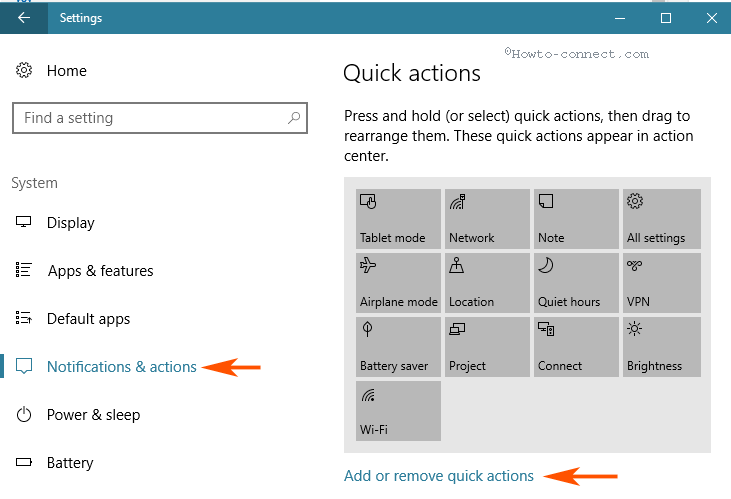
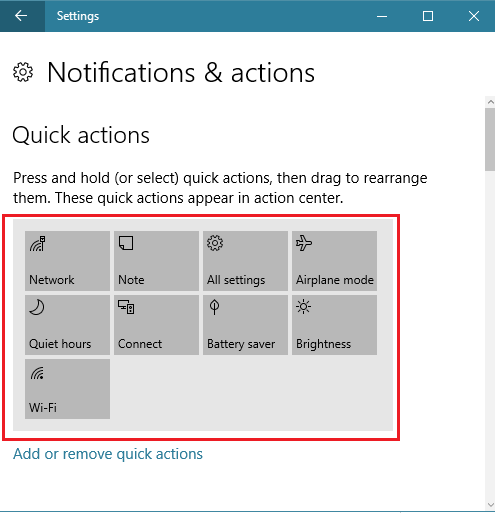
- Now, click or hit “Notifications & actions” that is observable in the left column of the following page.
- If you don’t need so many “Quick Actions” to be exhibited, then click or hit the link that reads as “Add or remove quick actions” in the right pane.
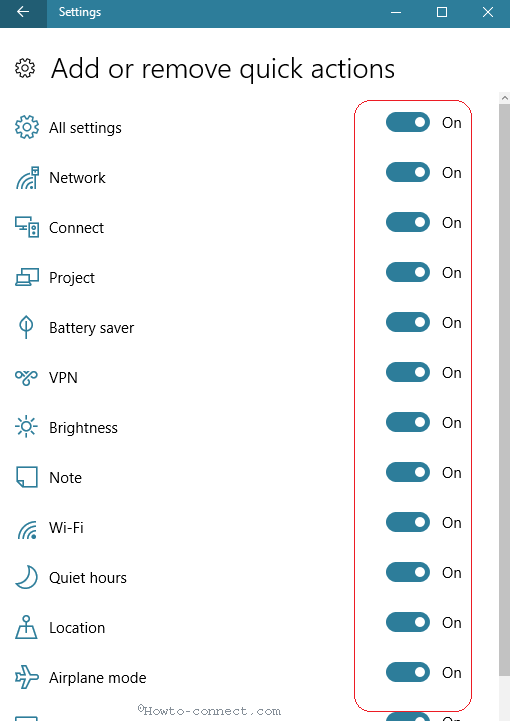
- In the succeeding screen, you can observe the titles of the available “Add or remove quick actions” and the sliders associated with each will also be observable. Here all the Settings in Turn on condition means you will see each of the settings in the Quick actions area.
- Toggle “Off” the ones that are not required for you.
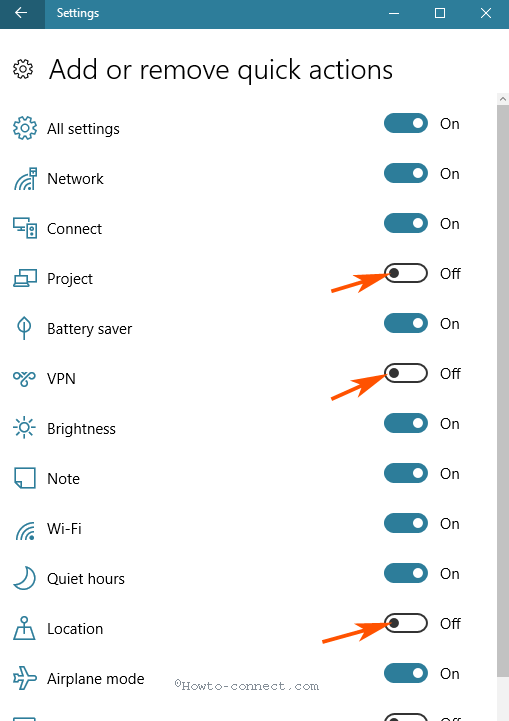
- Now, let me open up the “Action Center” and there is no trace of the above three quick action tiles.
- If you need them back, just turn them to “On” position.
Reposition Quick Actions
- Just look at its opposite side of “Notifications & actions” and you can view a bunch of tiles listed there. The position of the tiles is the same that you can notice in your “Action Center”.
- You can reposition the tiles and do so, first of all, trace out the “Quick Action” that you desire to relocate.
- Then “press and hold” the “Quick Action” with the mouse and pull it towards the targeted place and leave it there.
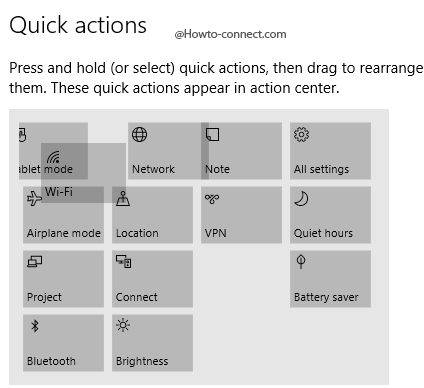
- So, shuffle the tiles and keep the often used one on the first row as you might need them quite often and then the same will be exhibited in the “Action Center”.
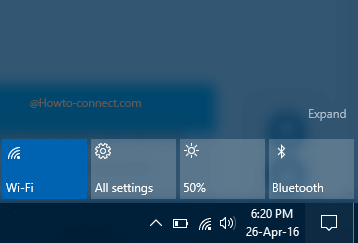
For instance – My top four “Quick Action” tiles are “WiFi”, “All Settings”, “Brightness” and “Bluetooth”, and hence, I rearranged the tiles in a way that these four will be observable in “Action Center” even if it is collapsed.