Do you experience Windows Photo Viewer missing in Windows 11? You know this app was among the most loved ones for Windows 7 users to manage and view pics. But starting with Windows 10 you find Photos app instead for the same which many users don’t want to use as default program. They are looking for the classic application but are unable to get it anywhere. If you are among them and want to restore Windows photo viewer in Windows 11 then you are at the right location here.
In fact, you don’t need to download or install this app but only a small registry change will activate Windows Photo Viewer. After then you can also set it as default program to preview and open images moreover use its tools for different operations.
Restore Windows Photo Viewer in Windows 11
Here is How to restore Windows Photo Viewer in Windows 11 –
1] Add Registry changes
To get back Windows Photo Viewer registry changes work like a wonder in Windows 11. We are giving here a downloadable .reg file that will modify and tweak all the necessary entries to bring the app once again.
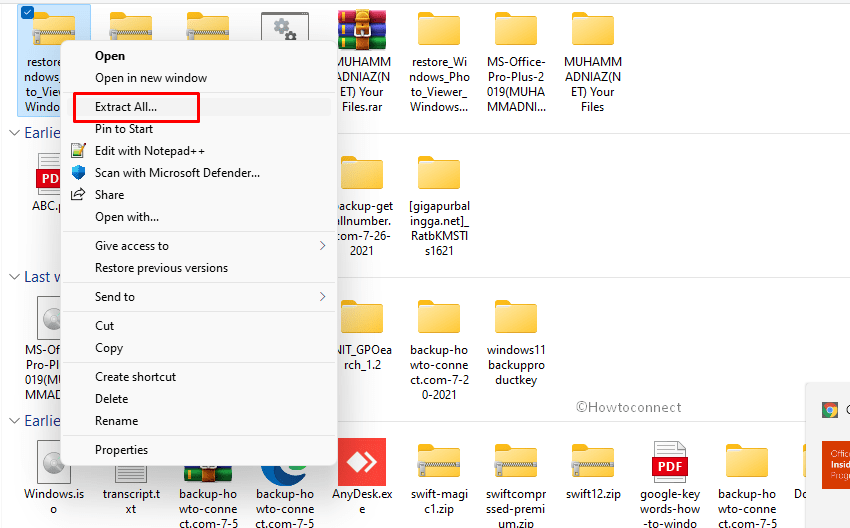
- Download the zip archive that has .reg file –

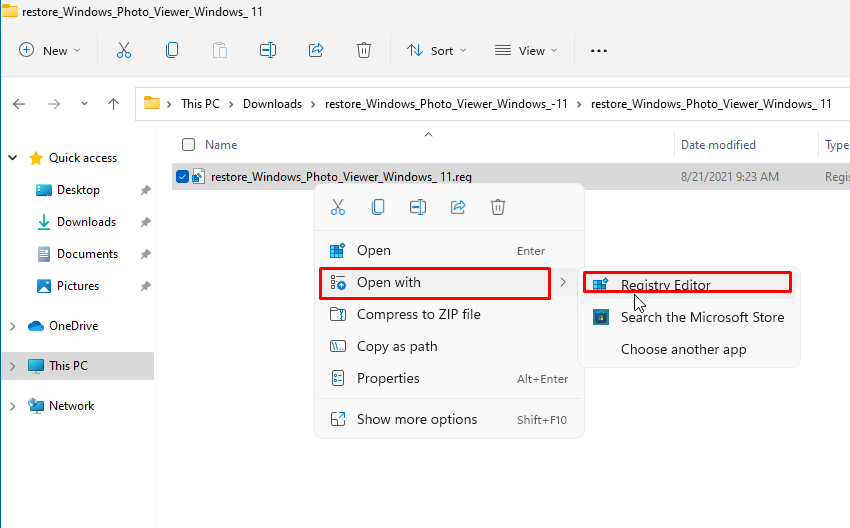
- Unpack the file to a folder and right-click on restore_Windows_Photo_Viewer_Windows_ 11.reg.
- Select Open with > Registry Editor.
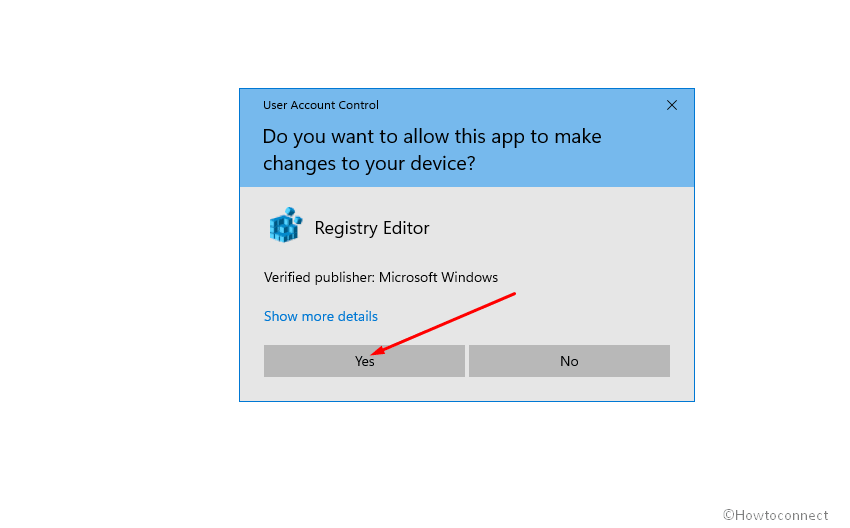
- On User account control prompt, give consent by clicking on – Yes.
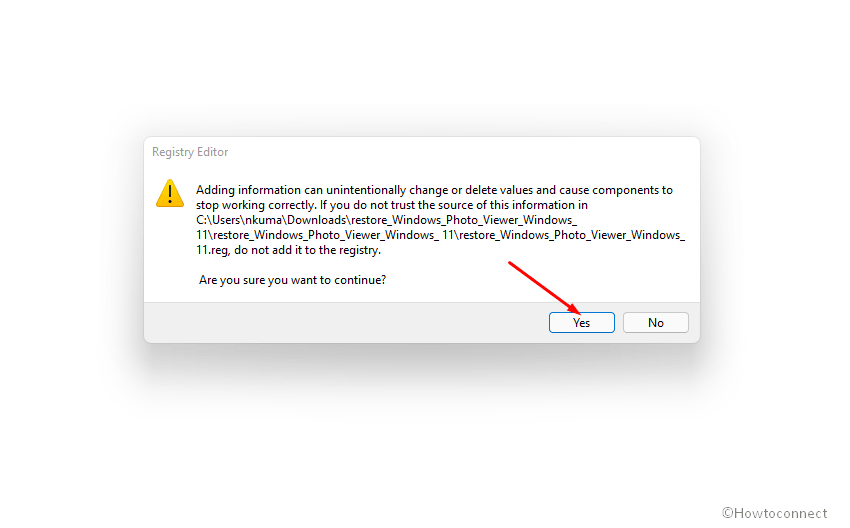
- A registry Editor warning pop-up will ask, “Are you sure you want to continue?”; select – “Yes”.
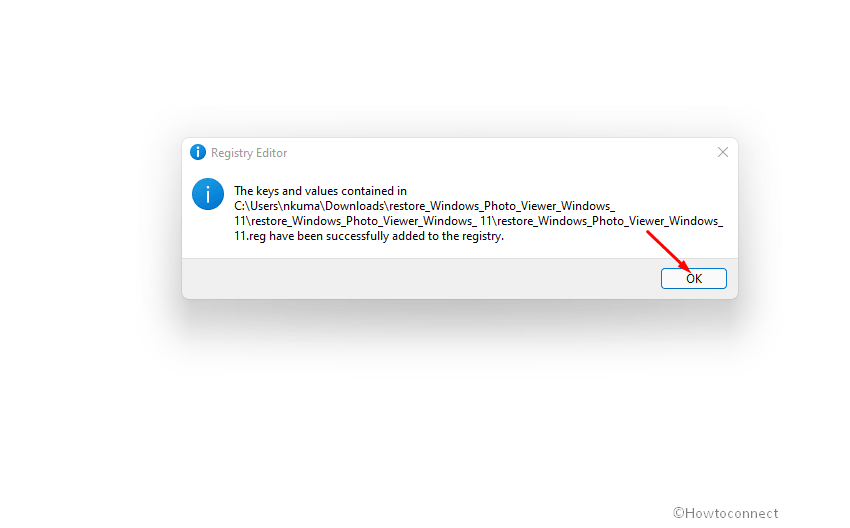
- After you get a confirmation that the .reg has been successfully added to registry settings successfully restart your computer.
2] Set Windows Photo viewer as default in Windows 11
a] Using File Explorer
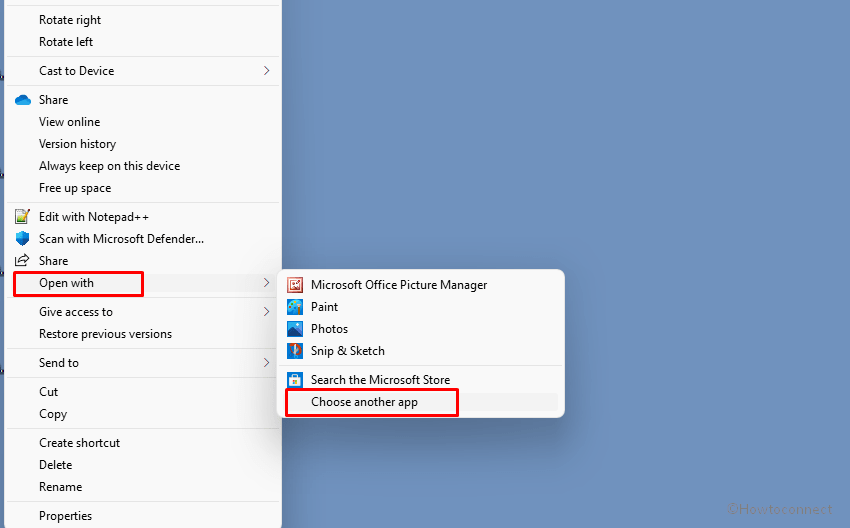
- Right-click on an image file (having extensions .jpg, .png, .jpeg, .BMP or .TIFF).
- Select – Open with > Choose another app.
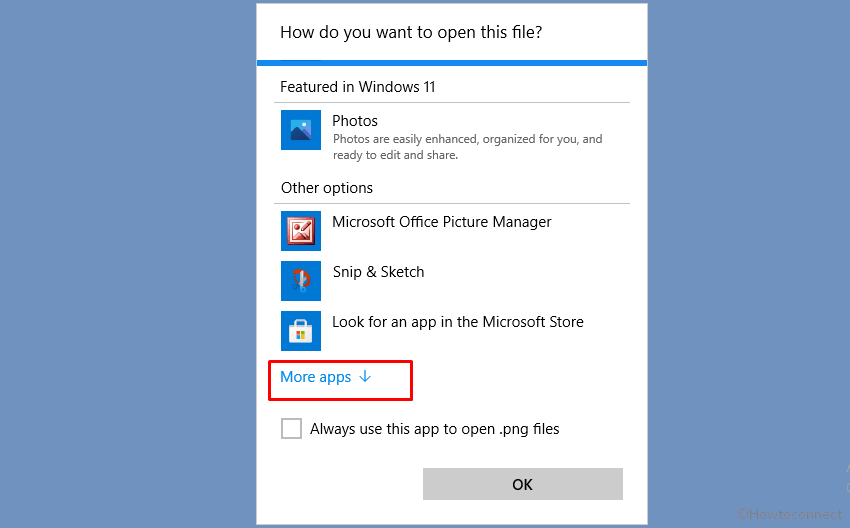
- You will see a list of image handlers on a pop up asking – How do you want to open this file?. Scroll down a bit down and click on More apps.
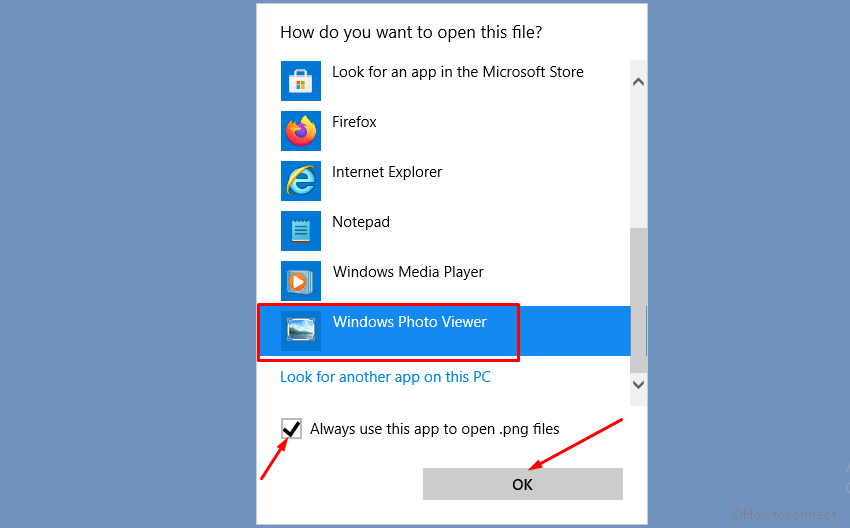
- Click – Windows Photo viewer.
- Check the box – Always use this app to open JPG file (or which one you are using).
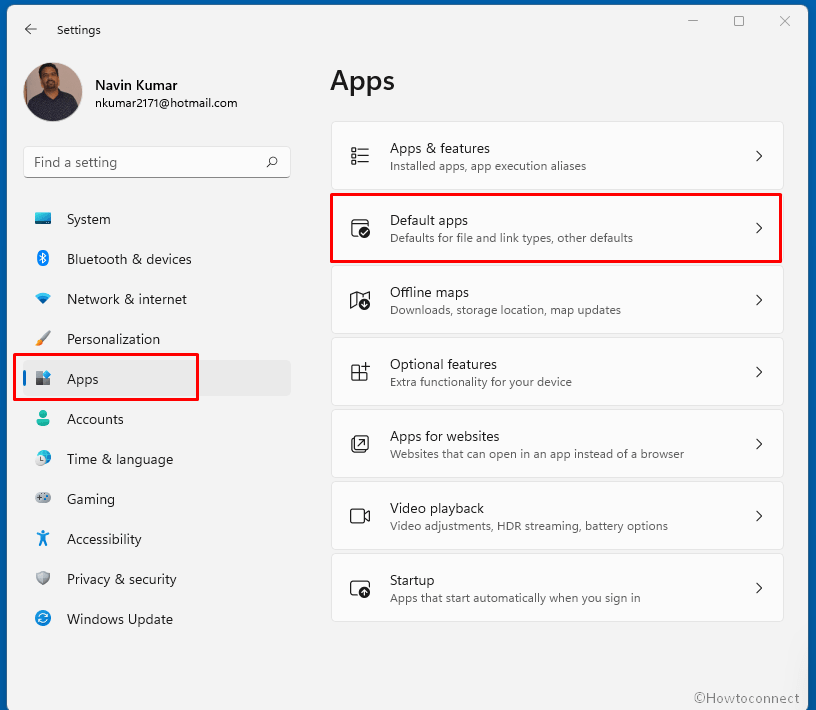
b] Through Settings app
- Press – Winkey+I.
- Select – Apps from the Settings.
- Click Default apps from the right pane.
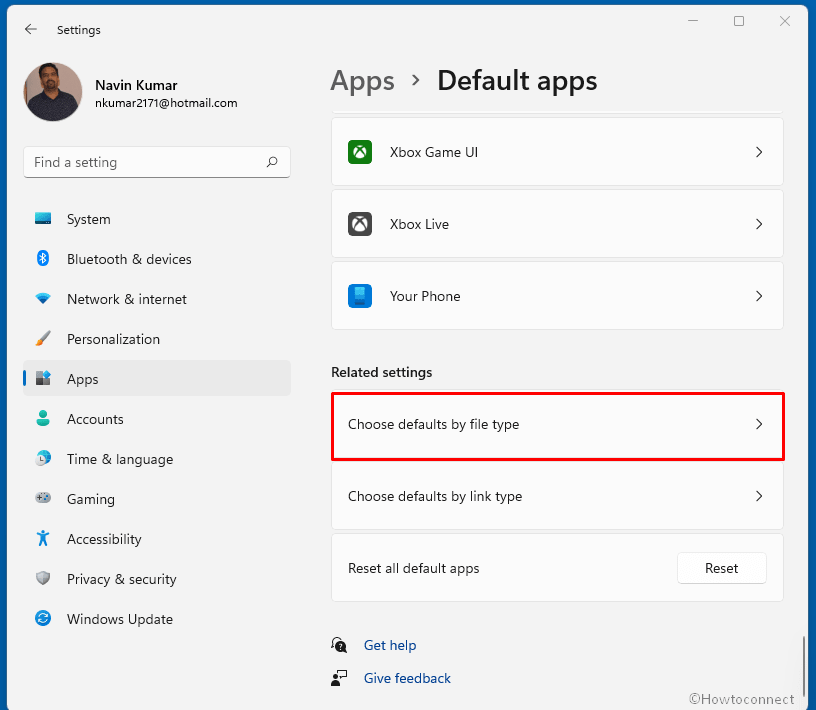
- Go to the right. Because Windows 11 doesn’t have the default file associations for the Photo Viewer app so you don’t see Windows Photo viewer for Photo Viewer.
- So, click – Choose defaults by file type.
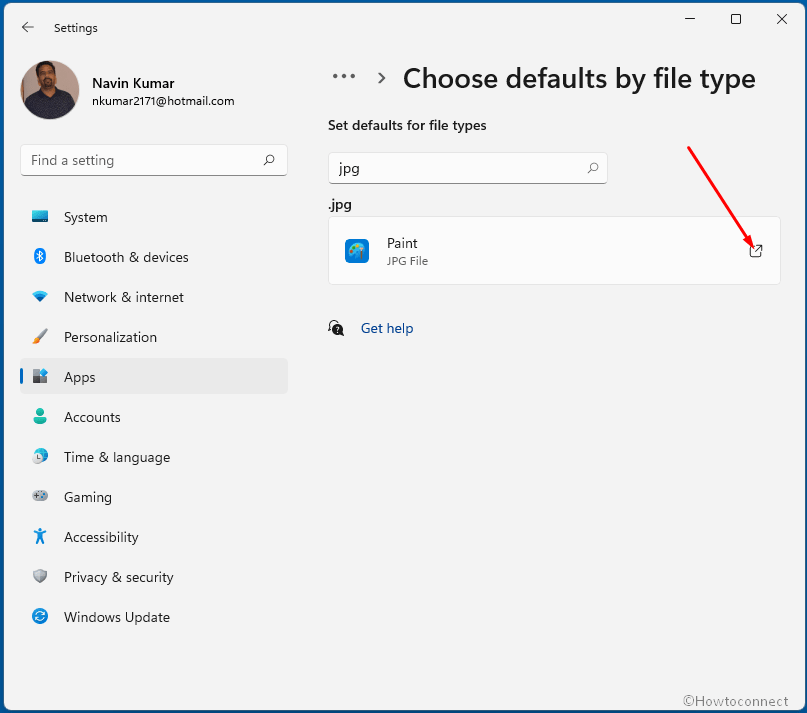
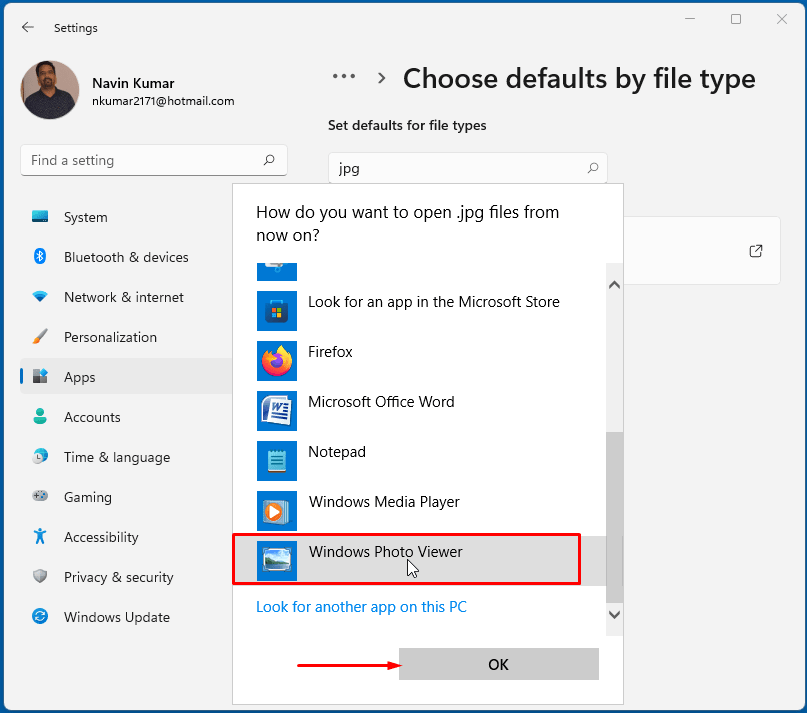
- On the next Settings page, type jpg in the search bar.
- In the result, click on + sign and choose “Windows Photo Viewer”.
- On the appearing list of image handlers, scroll down a bit and click on More apps.
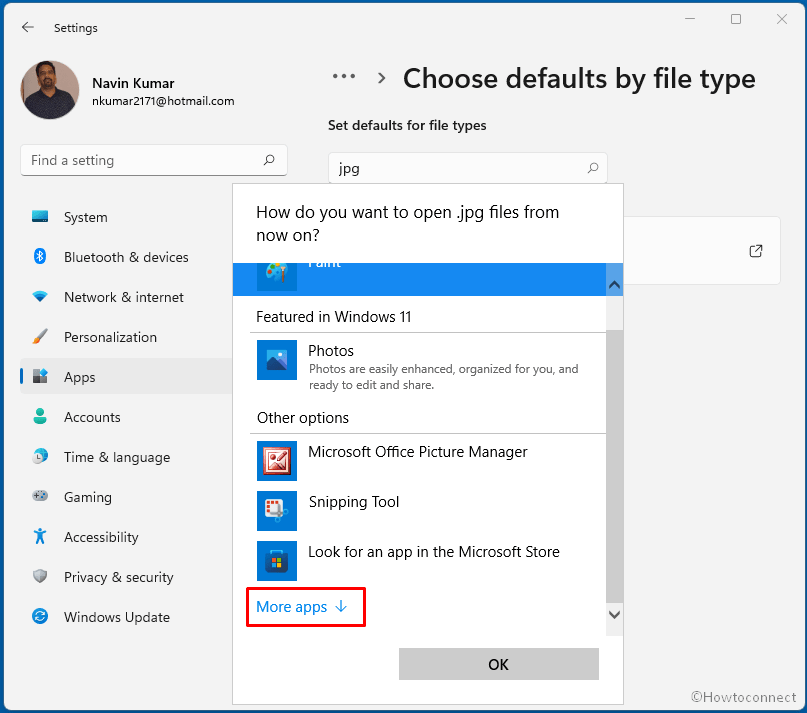
- Select Windows Photo viewer and click OK.
You can see in the method here – Windows 10 – How to Manage Default Apps Through Settings.
Once you add the appropriate registry entries under “HKEY_LOCAL_MACHINE\SOFTWARE\Microsoft\Windows Photo Viewer\Capabilities\FileAssociations” using the above .reg file and make it default you will see Preview option for the image context menu. Keep in mind that you can add more file type extensions for images to this directory in the Registry Editor anytime.
The registry file restores the registration of the app and allows you to use the photo viewer in Windows 11. This will recreate the missing “features” of the photo viewer, specifically, it “tells” the application that it can handle the following types of files:
“.jpeg” = “PhotoViewer.FileAssoc.JPEG”
“.png” = “PhotoViewer.FileAssoc.PNG”
“.bmp” = “PhotoViewer.FileAssoc.BITMAP”
“.dib” = “PhotoViewer.FileAssoc.BITMAP”
“.jpg” = “PhotoViewer.FileAssoc.JPEG”
“.jpe” = “PhotoViewer.FileAssoc.JPEG”
“.jxr” = “PhotoViewer.FileAssoc.JPEG”
“.jfif” = “PhotoViewer.FileAssoc.JFIF”
“.wdp” = “PhotoViewer.FileAssoc.WDP”
“.gif” = “PhotoViewer.FileAssoc.TIFF”
“.tiff” = “PhotoViewer.FileAssoc.TIFF”
“.tif” = “PhotoViewer.FileAssoc.TIFF”
If you could recall, the Windows 7 Photo Viewer desktop was having a Preview command for images. The context menu invokes the below command –
rundll32.exe “% ProgramFiles% \ Windows Photo Viewer \ PhotoViewer.dll”, ImageView_Fullscreen <file path>
The best part about this context menu is that the command works even if another application is installed as the image viewer. For example, the Preview context menu will always open the selected image in the Windows Photo Viewer nevertheless you have the built-in and default Photos application.
That’s all!!