Method to Set Custom Notification Sound in Windows 10. When a notification arrives at a PC by default it causes to hear a sharp bell type sound. Several users don’t feel comfortable with the audibility of this buzzer and want to replace it with a custom one.
Subject to, you accompany the users who are desirous to Set Custom Notification Sound in Windows 10, pursue the process elaborated underneath.
Way to Set Custom Notification Sound in Windows 10
First of all, ensure the sounds file you desire to set must be in .WAV format. There are many websites that can help you in converting your custom sound’s Format.
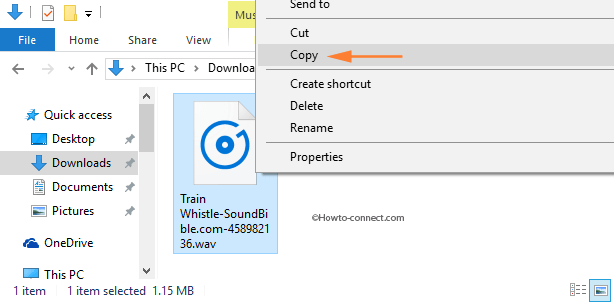
Step 1 – First of all, be ready with your sound in .WAV format. Perform a Right-click on the sound and hit the choice Copy.
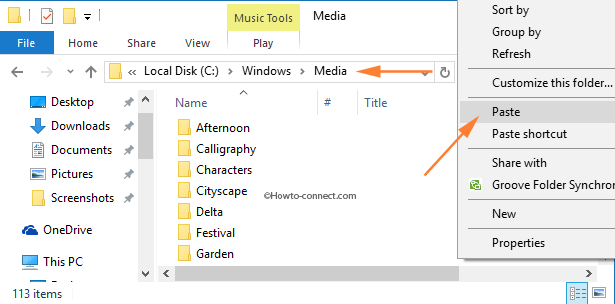
Step 2 – Next, strike the sequence of Win & E keys in order to widespread File Explorer. Once it is visible, head towards this location – C:\Windows\Media
Step 3 – Stay in the Media folder. Right-click on a vacant area inside the folder and click or hit Paste.
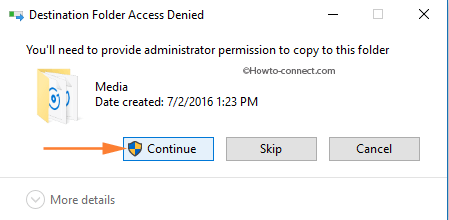
Step 4 – A separate tiny box entitled Destination Folder Access Denied will be visible. To successfully paste the sound file in the Media folder, click or tap Continue button.
After placing your custom sound in the Media folder, it is time to modify the notification sound.
Change Notification Sound
Step 1 – To begin with, trace out the speaker icon on your taskbar. Input a Right-click on it and hit the choice labeled Sounds.
![]()
Step 2 – As a result of the above action, a separate Sounds box with Sounds tab on display will arrive.
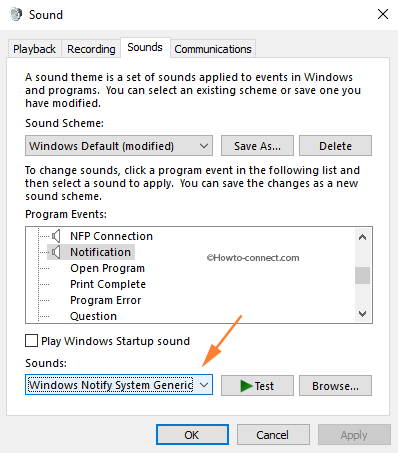
Step 3 – Underneath the Program Events block, locate Notifications carrying a speaker icon and select.
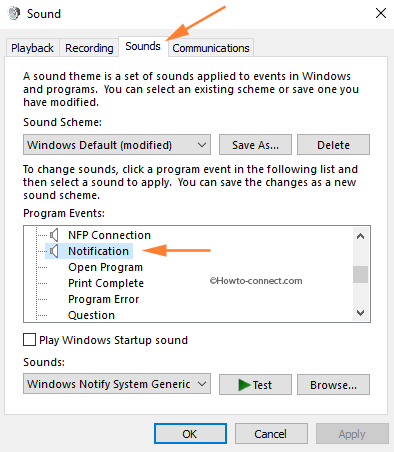
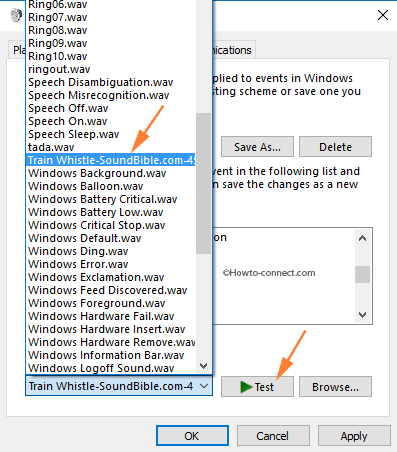
Step 4 – Now, navigate to the Sounds section at the lower part of the wizard. Click or hit its drop-down and find out your custom sound from the list.
Step 5 – Then, click or hit on the custom sound name you have previously placed in the media folder. Click or tap the Test button if you desire to listen to the sound.
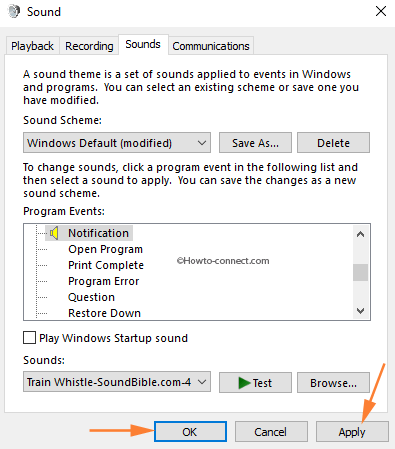
Step 6 – To implement the custom sound for the notifications that arrive on your machine. Hit or Click Apply and successively Ok buttons for implementation of the Custom Notification Sound.
Now, onward whenever a notification will arrive, it will cause to hear the custom sound instead of the boring default one.
Though considered as an awesome feature, the default notification sound is a little dull thing. Furthermore, because of this pretty imperfection, you would be detained to Set Custom Notification Sound in Windows 10.