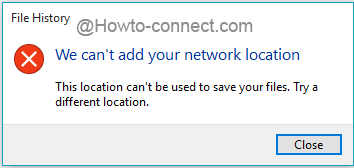
The best thing on Windows 10 is to keep track of the file changes and back them up regularly. When a user takes a benefit of his available network that has a Network Attached Storage or server, he definitely prefers to accumulate the back up there. But while adding the location, he is being conveyed an error note which says – This Location Can’t Be Used to Save Your Files. Try a different location.
In this article, we will cover up the steps to fix This location can’t be used to save your files. Before jumping to the fix, allow us to portray the entire issue.
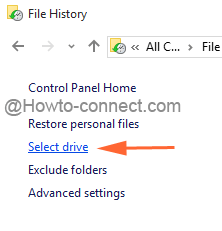
You might have known File History is retrieved from Control Panel where you execute a click on Select drive option at the left fringe followed by another click on Add network location button in the subsequent screen. This brings up the available Network, traveling through which, the desired location can be added. OneDrive is chosen as a location to backup but instead of it getting added, an error note emerges that says This Location Can’t Be Used to Save Your Files.
The fix is very simple. When the problem was severely examined, lack of permissions for the location was found vicious. The location was allowed to share, but it did not have the entire permission. Now, let us dive into the steps –
How to Fix This Location Can’t Be Used to Save Your Files in Windows 10
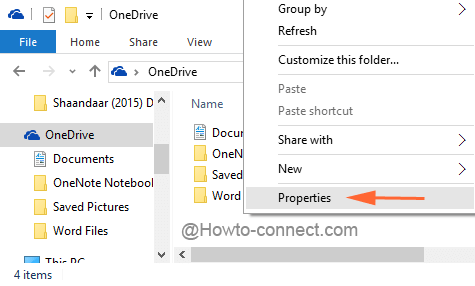
- Be into the same location that encountered this issue and for which File History refuses to save the backup. OneDrive is taken up as an example here.
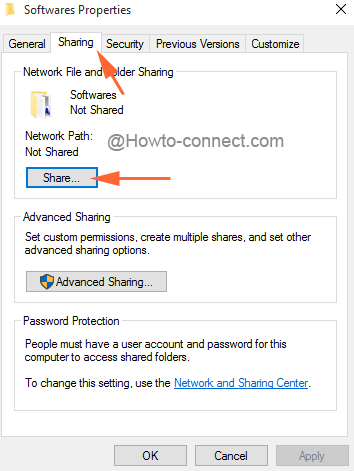
- Bring a right click into effect on the location move off with Properties.
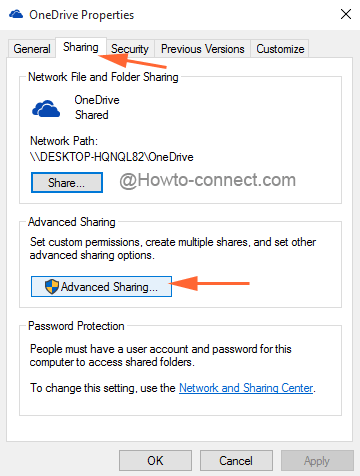
- Among the various tabs, click on the second one – Sharing.
- Implement a hit on Advanced sharing button.
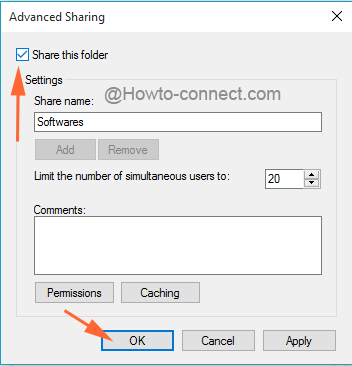
- Another separate window will get emphasized on screen. Click the Permissions button.
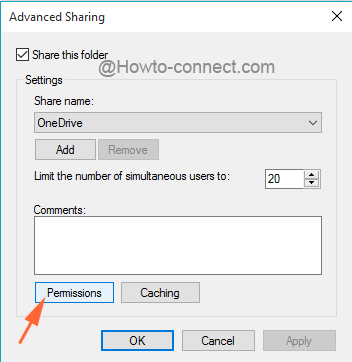
- In the lower region of the Permissions window, select the little box of Full Control which is labeled under the Allow column.
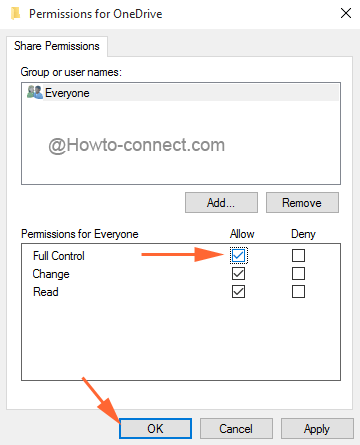
- Save the changes on Permissions window afterward on Advanced sharing window to impose the modifications by executing clicks successively.
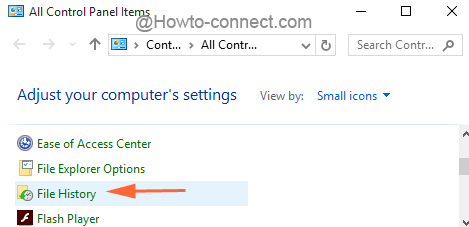
- Get back to Control Panel to obtain File History.
- Administer a click on Select drive link on the left fringe.
- Make another hit on the Add network location on the following page.
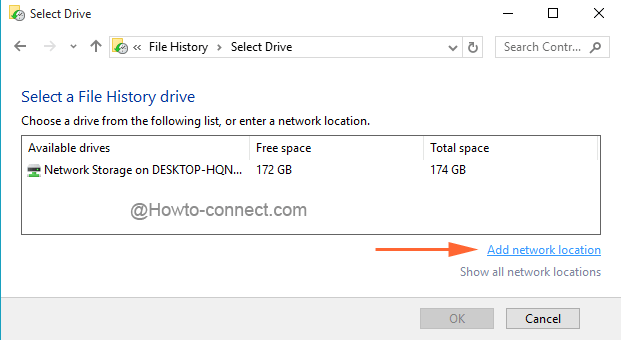
- Perform a right-click on the network to enter into it.
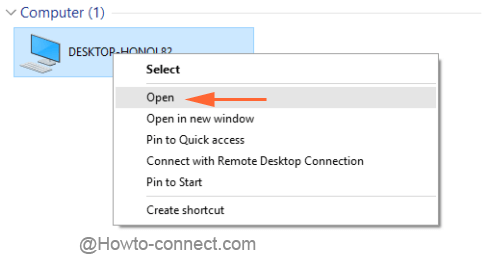
- Pick for the desired location and finally click on Select Folder button.
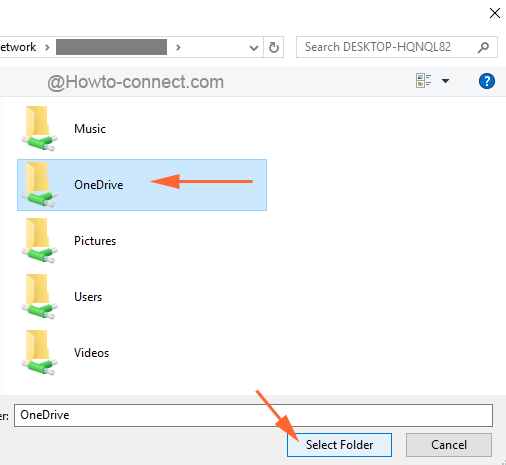
- Soon, the files will be backed up to the chosen location.
Here one more question arises – why not all the locations are visible in the network along with those of Libraries? The answer is that they are not being allowed to share their folders. Suppose there exists a location where the backup of the files is decided to be stored. But while adding a network location, the network is not showing the desired location. Wanna know to make it show in the network list? Continue reading –
- Be into that location that should be manifested in the Networks list.
- Conduct a right-click on the location and choose Properties.
- Get into its Sharing tab and administer another click on Share button.
- Upon the emergence of Advanced sharing window, the first box is of Share this folder. Tick mark the checkbox and proceed by saving the changes.
- Remember to examine its permissions also, otherwise, the same error note This Location Can’t Be Used to Save Your File will be perceived.