Although many users are quite pleased with the performance of Windows 10, the OS Version indulged in so many critical issues. Video Memory Management Internal Error is another severe problem taking place in the OS. This is a BSOD with a bug check value of 0x0000010E which indicates the Video Memory Manager facing an abnormal condition.
So many reasons can be accused such as infection from malware leading to delete system resources, missing DLL files. In addition Removing necessary OS components by conflicts between two similar programs and mostly by the outdated device drivers also cause this Blue screen. Furthermore, low disk space, incorrect condition of memory, bad areas in RAM and HDD itself are equally responsible for the problem. In certain cases, this annoying issue occurs even after connecting an additional Hard Disk. As a result of this BSOD, the device goes for automatic restarting quite regularly without noticing the users. Besides, showing a bunch of error texts and freezing of desktop will be common issues. With this condition, you need immediate disposal for this issue and that why we are here today describing favorable workarounds aiming to fix them. Solutions list is as follow –
Video Memory Management Internal Error Problem in Windows 10 Solutions
Here is how to fix the Video Memory Management Internal Error Problem in Windows 10 –
1] Never let the Windows to Restart Automatically
Among all the problems upfront once Windows is affected with Video Memory Management Internal Error, Automatic Restart will annoy you most. Unless you move for disabling this feature, Windows keep on rebooting without noticing. As a result, there will not be enough room to deploy other workarounds. To make the environment for applying others, let’s follow the below steps and disable Automatic restarting –
Step-1: Save all the ongoing process or minimize them otherwise. Now, do a joint press of Win+D hotkeys to shift in the desktop area at once.
Step-2: While in the on the Desktop area, perform a right click on the This PC icon and choose Properties option.
Step-3: After coming ahead of the System window, move ahead and select “Advanced system settings” from the left pane.
Step-4: After another new popup floats up with System Properties, shift to its the Advanced tab.
Step-5: Select Settings lying under the Startup and Recovery region.
Step-7: After the new wizard comes in view, proceed to System failure zone and unmark the checkbox right beside Automatically restart option.
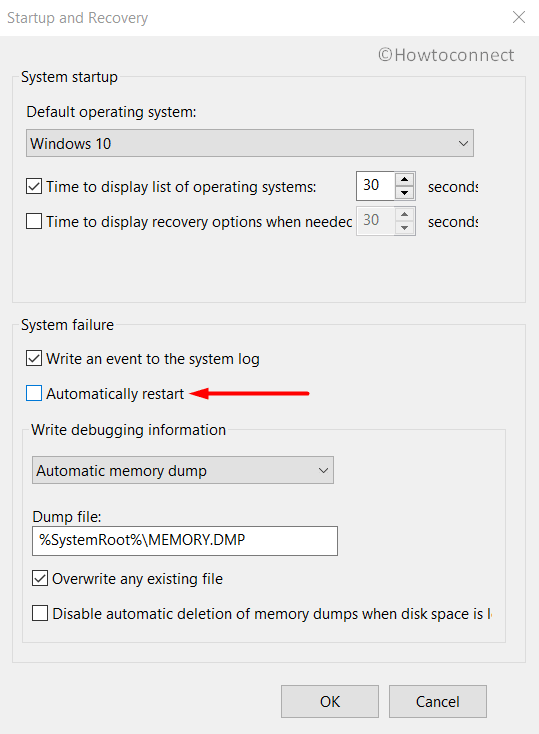
Step-8: Hit the Ok button to save the changes done and leave all the wizards.
As the changes are saved by now, Windows will no more restart automatically. As a result, you can have ample opportunity to scrutinize the cause and deploy workarounds accordingly.
2] Update all the defective and outdated drivers
Video Memory Management Internal Error Problem in Windows 10 mostly occurs due to outdated device drivers present in the system. Device Manager comes as savior as these outdated ones are shown in indicating colors. To access the method, follow the below guidelines –
- Take the pointer to the bottom left end of Desktop where Start menu sits and do a right click on it.
- From the appearing menu, choose Run.
- When the Run dialog appears, type devmgmt.msc in the area and hit the Ok button located beneath the box.
- In a moment, Windows Device Manager will open up. Look closely in the console and expand the device having a mark of exclamation in it.
- Just after expanding, perform a right click on the driver and when the menu shows up, choose Update driver option and let the process begin. Complete the process by following all the upcoming guidelines. Do the same for other outdated drivers as well and eventually update them.

Once all these drivers are fully up to date, there should not be any Video Memory Management Internal Error in Windows 10.
3] Run Programs in compatibility mode
Often, the BSOD errors disappear just after running the applications in compatibility mode. To accomplish the task, the below procedure will help –
- Do a right click on the application you opt to run in compatible mode.
- From appearing options, choose Properties.
- Shift to the Compatibility tab.
- Put a checkmark in the box before “Run this program in compatibility mode for”.
- Moving ahead, select Windows 10 from the list of Operating Systems.
- Hit Apply button first and then OK from the bottom of the wizard.
- Try running application once again and check is the BSOD issue is coming up.
4] Run video games in Window mode
You might have come across the Video Memory Management Internal Error while playing the favorite video game. In that can case, running that game in windowed mode will help the most. This is a special Gaming Mode and different for each. To run, you have to enter into the Game’s video option and enable the option from there. In this very mode, you can choose either you want to run the game in Fullscreen or Window.
5] Try Running Windows Security for Malware issues
Malware or virus attack deletes the necessary data from there. In the process, Video Memory Management Internal Error comes up. These vulnerabilities are present everywhere on the web and it’s really hard to stay away. To safeguard, we can run the Default Windows Security and dismiss them. See the below guidelines to do the task –
- Hover the pointer to the right side of Taskbar area and make a click on the Show hidden icons arrow from there.
- After the icons are upfront, choose the one with Shield and allow the Windows Security app to launch.
- Proceeding ahead to the app, hit Virus & threat protection located in the left pane and jump to its corresponding right side.
- Here, move ahead to the link with Scan options and do a click on it.
- When the scan options come up, select the radio button ahead of Full scan and in due course, hit the Scan now option from the tail end.
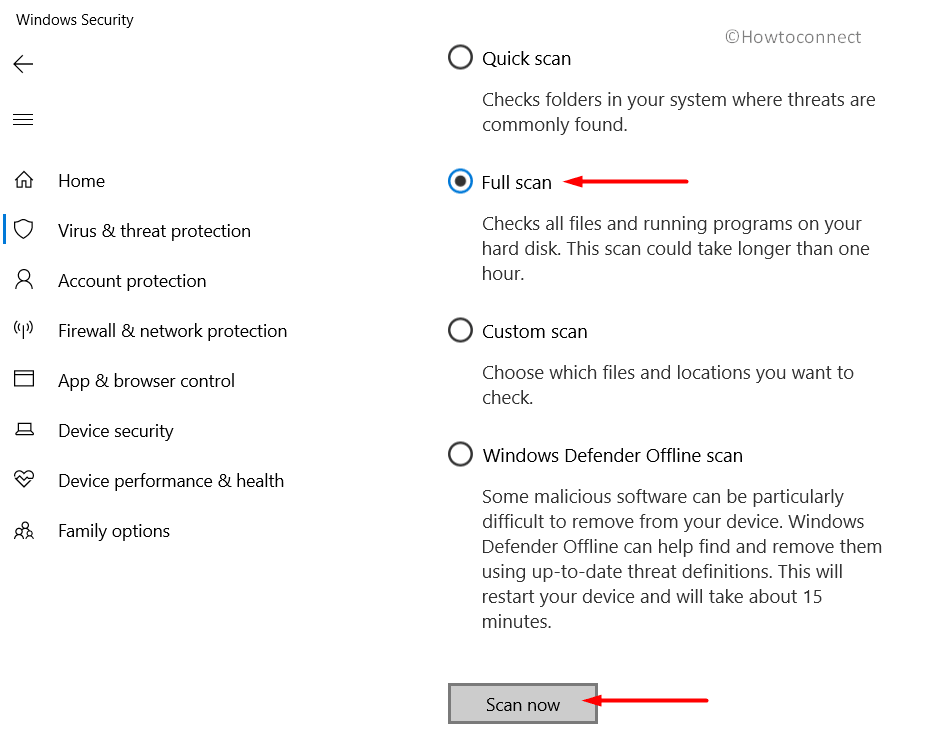
- The tool will look for malware components in the whole system. Once the process ends, you will be notified about the proceedings.
- Now, if there is any malware present after searching, hit the Clean threats option to dismiss it.
- On the succeeding page, there will be three more options available for you. Hit the Remove button initially and then finally Start actions option to take measures.
6] Deploy Windows Blue Screen Troubleshooter
BSOD error is getting very common in Windows Operating System. As the consequence is devastating and hard to accept, Microsoft brought out new default utility. This Blue Screen Troubleshooter can efficiently resolve any BSOD issue and in due course, you can have a flawless system. Good news is, this is a default tool and you don’t need to install an additional application. If you have the Windows 10 Fall Creators Update or more can follow the below steps to run this utility –
- Press the Windows button from keyboard and when the Start menu opens up, select the Gear icon from the bottom left corner. This will allow the opening of Windows Settings app immediately.
- When in the app UI, move to Update & Security tile and eventually do a click on it.
- After the additional settings page loads completely, select Troubleshoot from the left pane and jump to the corresponding right.
- Move ahead to the find and fix other problems section first and then find Blue Screen from there.
- Select it to expand and hit Run the Troubleshooter button once seen.
- Be patient and wait for the process to end successfully.
- We can expect that the error will disappear immediately after running this utility.
7] Boot Windows in Safe Mode as General Remedy
You can always use this workaround for any critical issues in Windows. In Safe Mode, the system starts with loading basic services and that heal most of the critical errors. Follow the below guidelines to start in Safe Mode –
- Make a combined pressing of Windows and S keys to call up Taskbar Search.
- When it appears, type msconfig in the blank text area and hit the Enter key as well.
- Proceeding ahead to the System Configuration wizard, enter into the Boot tab.
- In the tab, reach to the second half titled with Boot options at the same time, check the box beside Safe boot.
- Moving forward, select the radio button before Minimal to continue.
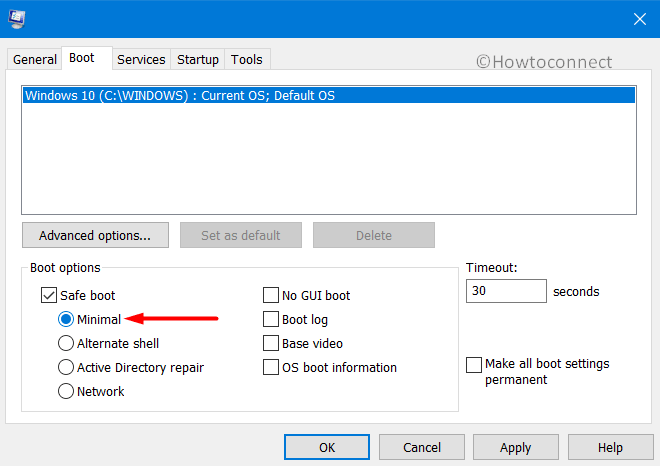
- Hit the Apply button primarily and then choose the Ok option from the bottom.
- Leave the wizard and reboot the device,
- Once the device come at the startup, keep pressing the F8 key at a stretch.
- When the following page will show up, select the Safe Boot option,
- On the next step, straightway be lead to the Safe Mode.
8] Fix up Exiting Memory Problems in Windows
Incorrectly allocated Memory devices and bad Ares in the RAM (Random Access Memory) plays an important to cause Video Memory Management Internal Error BSOD in Windows 10. It will all be easily resolved if you use Windows Memory Diagnostic using below instructions –
- Before proceeding to this workaround, let’s first save all the in-progress processes and close them in the process.
- Move the mouse pointer to the bottom left corner and make a click on the Start menu.
- Once the menu unrolls, select the gear icon and let Windows Settings app to load on display.
- In the app UI, when you will see a search box, write Windows Memory in it.
- Once the results appear, select Diagnose your computer’s memory problems.
- Windows Memory Diagnostic will open in the wizard immediately.
- Moving to the appearing wizard, select the “Restart now and check for problems (recommended)” option from the wizard and let the device reboot.
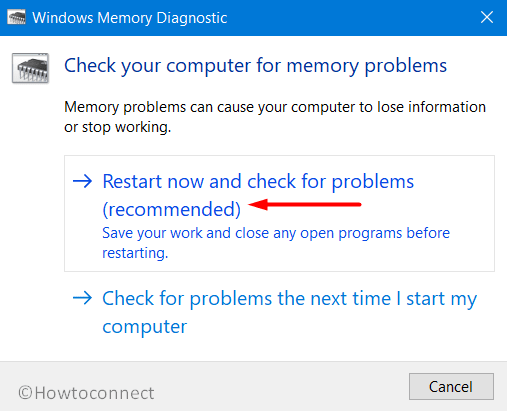
- After sign back in, a blue screen will appear and start diagnosing the problem in the memory.
- Prior to reaching it to 100%, the computer will restart automatically.
- Upon starting up, the result of the last diagnosis will be shown in the notification area located in the system tray.
9] Update the Operating System installing all patches
An outdated OS can be easy prey to Video Memory Management Internal Error. That’s the reason, Microsoft releases cumulative updates and major patches. These files always contain fixes for bugs and problems. We can easily download the available patches in presence on active internet. Here is the procedure to follow –
Important– The best way to move with this workaround is in the presence of Wi-Fi or an Ethernet connection. You can also use Mobile Hotspot as well. But before that, disable Metered Connection from Network settings.
- Open Windows Settings app using any convenient method we have discussed earlier.
- Once the app cuts you view, move ahead to Update & Security tile and perform a click on it.
- When the subsequent window loads completely, select Windows Update subsection from the left side.
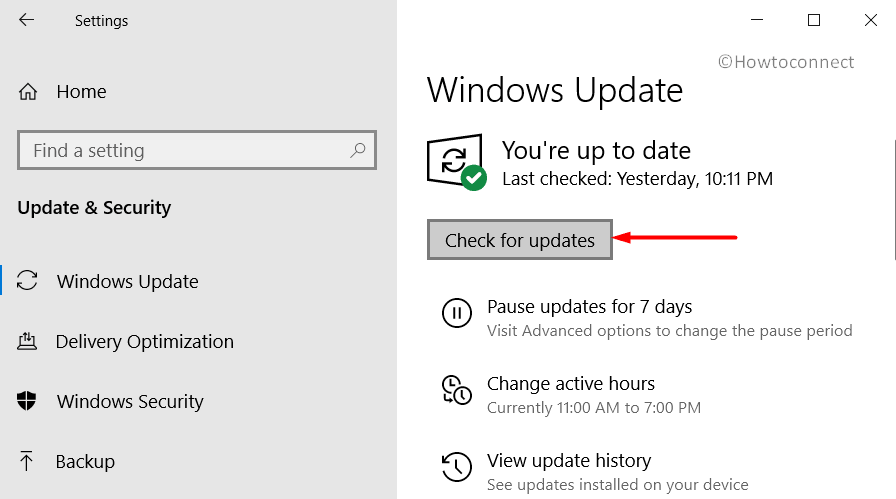
- Jumping ahead to the alternative pane, you might see “You’re up to date” message with the status of Last checked time. Don’t bother that and proceed accordingly.
- In this page, make a click on the Check for updates to initiate searching.
- When you can see all the patches, hit the Download button located beneath each of these.
- After finishing the downloading process, the installation will begin automatically.
- Never leave the device unattended and restart it once it prompts to do so.
After the Windows is finally up to date, you might not see any BSOD error in the system in the future.
10] Stop Similar Programs colliding each other
If Windows has more than one similar application, they often engage in collision with each other. In the process, various necessary system resources go missing and Video Memory Management Internal Error comes up. To stop this annoying action, we can uninstall these programs until error disappears. To uninstall an app, follow the below guidelines –
- Open the Run dialog by pressing “Win+R” shortcut keys together.
- Type appwiz.cpl in the empty text box and hit Enter key eventually.
- After the Programs and Features unrolls, reach to the programs causing Video Memory Management Internal Error in Windows 10.
- Select them and hit Uninstall option visible in the top ribbon area.
- Follow the guidelines provided on display until the process ends.
11] Free up Space in System Files using Disk Cleanup tool
Junk files are truly useless once a task gets finished. These are temporary and when getting bigger in amount, occupy huge space in the storage. When the HDD space runs low, the operation is affected and BSOD errors make its way in the OS. Therefore, we need to clear up these junks in order to free up space. Disk Cleanup tool can serve the best deal in this case. Here is the process to move on –
Step#1: Invoke Run dialog on screen using any of the guidelines stated above.
Step#2: In the empty box provided here, type cleanmgr and select Ok button indicated.
Step#3: In a very short time, a small popup will appear asking you to choose the drive where to run the disk cleanup.
Step#4: Choose C: by clicking the dropdown menu.
Step#5: The Disk Cleanup tool will start with calculating total space it can recover from Disk C:.
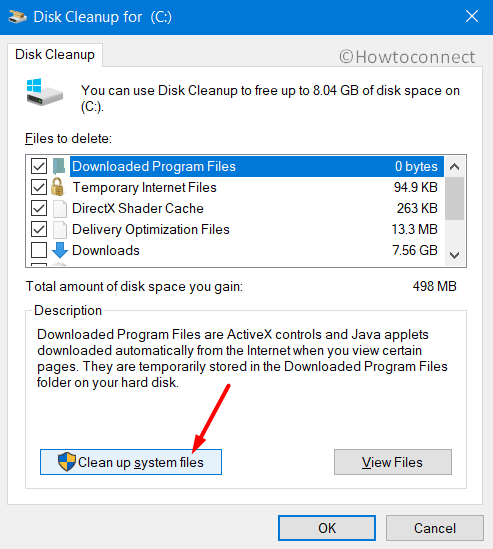
Step#6: After finishing up the calculation, a new wizard will roll up on display. Here, you need to move little downward and hit the Clean up system files from the bottom left end.
Step#7: Once more time, the small popup rolls out to choose the drive and you must choose the same drive chosen before.
Step#8: Prior to finishing up the calculation, Disk Cleanup for (C:) will appear on the screen.
Step#9: Head to the Files to delete area and check all the boxes leaving Downloads untouched.
Important- Before you proceed here, make sure nothing left important in Recycle Bin and if there is any, restore in the proper location.
Step#10: Now, hit Ok to start deleting process.
Step#11: It might take a while as too many files have been piled up. Once finished, reboot Windows normally.
Step#12: Perform a check for the error prior to sigh back.
12] Perform System Restore to Undo current changes
Changes in Windows like installing a program or uninstalling might keep footmark in the Registry. When anything goes, either way, Video Memory Management Internal Error will come up in the system. If you have previously created Restore points, can perform System Restore to get back earlier state. In lack of that, you can leave this workaround but, if have, continue following these instructions –
- Hit the Windows key from the keyboard and open the Start menu.
- Type “rstrui” using keys and select the app appearing in the result.
- When the System Restore wizard is upfront, select the Next button to move ahead.
- From the succeeding page, do a click on Show more restore points to show up all previous ones.
- Choose the latest point and hit the Next button again.
- After the next page arrives, select the Finish button lying at the bottom and initiate the restoring process.
13] Treat the Defective areas in the Hard Disk
Hard Disk areas might have bad areas in it after using for a long time. Disk Checking tool can easily remove these areas and also solve Video Memory Management Internal Error. To execute the handy utility, we need to move with the Elevated Command Prompt. Follow the below guidelines to accomplish the task –
- Make a together press of Ctrl+ Alt+ Del keys and invoke the Task Manager on display.
- When the app is upfront, select File located at the top left end and select Run a new task from options.
- After a dialog appears, type cmd in the text box area and move forward.
- Put a check mark in the box saying “Create this task with administrative privileges”.
- Get the entrance to the Elevated Command Prompt directly by pressing the Enter key.
- When the black window arrives, type the following command at the winking cursor –
chkdsk C: /f /r /x
Here, we have included few characters with basic command “CHKDSK” explaining the following tasks –
Notation-
f for fixing the issues present in the volume.
r for identifying the poor areas in the volume.
x for splitting up the full volume before the process starts.
So, the full command looks like- chkdsk C: /f /r /x
- We have inserted C: as the Windows is installed in this drive. In your case, can use D:, E: or any.
- Now, press Enter key to power up the Disk Checking utility.
- The tool will now fix the poor areas automatically. This might be a lengthy process, hold the patience until it finishes up completely.
- When the process finishes, restart the device using the usual way.
- Upon returning back, check in the system if there is any Video Memory Management Internal Error in Windows 10.
14] Cut off Dreadful Windows Update Files
Windows Updating procedure usually doesn’t end up in manipulation but if it does somehow, Video Memory Management Internal Error can happen anytime. As a preventive measure, these files need immediate removal. Follow these installed patches using this easier way –
- Get access to the Settings app by pressing Win+I keys jointly.
- From the app UI, move ahead to Update & Security tile and eventually do a click on it.
- Once the additional settings page loads, select Windows Update located at the left overly.
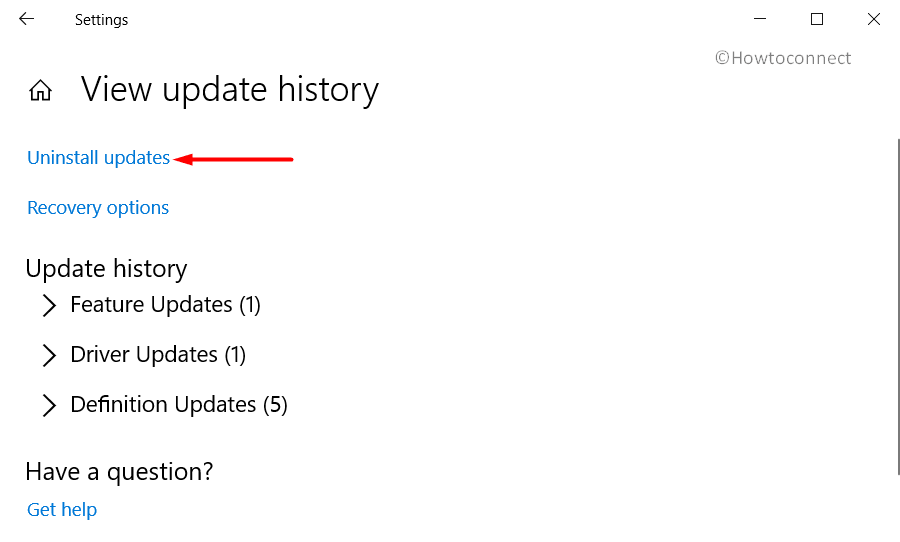
- Moving to the alternate pane on the right side, make a click on the link entitled with “View update history”.
- When the succeeding page comes to view, select Uninstall updates link from this page.
- The task will open up Installed Update window by default.
- Moving in the new window, reach out to the last receive patch and do a click on it in due course.
- Select Uninstall option from there and also follow the guidelines visible on screen to finish up the process.
15] Settle down Defective Windows Image files
Defective Windows image files can call Video Memory Management Internal Error anytime. To resolve these, there is a default Windows tool named Deployment Image Servicing and Management. Here is how to move on –
- Open the Taskbar Search using any of the mentioned guidelines from the above part.
- Fill up the blank typing area with “cmd.exe”.
- When Command Prompt arrives in the result, do a right click on it.
- Choose Run as Administrator and also hit Yes when UAC prompts for permission.
- Moving ahead to the elevated Command Prompt window, type the following command at the blinking cursor –
DISM.exe /Online /Cleanup-image /Restorehealth
- Now, hitting the Enter key will provoke the DISM tool to start detecting for problematic image files. Fixing will also start automatically when detection ends.
Note- This process will take a few minutes to complete. If you experience stuck at 20%, don’t get frightened. It is normal and will continue again.
- After the proceedings end successfully, restart Windows 10 PC and once sign back, check if the error is present.
16] Remove all Third Party Anti-malware programs as being Unnecessary
Windows Security itself is well enough to handle malware issues nowadays. There is no need of any third party anti-virus app to deal with this. Instead, they might end up causing Video Memory Management Internal Error. Therefore, we will now uninstall these programs from system using below guidelines –
- Launch the Settings app and select the Apps category from the user interface.
- Choose Apps & features from the left pane. Jump to the corresponding right side and reach out to third-party anti-malware program once the installed apps are loaded fully.
- Select the app to expand in the pane.
- Hit Uninstall option from the extended area.
- Choose Yes when User Account Control Prompts.
- Follow the next few steps as shown in desktop to finish up the uninstallation.
17] Run the System File Checker to recover DLL files
When the system resources get corrupted and DLL files go missing from Windows, Video Memory Management Internal Error evolves in that system. System File Checker can deal these task with utmost perfection. Let’s follow through the below steps to use the tool and resolve the system files –
- Manage entrance to the Elevated Command Prompt using the above guidelines.
- When the dark window appears, type the following command at the pace where a cursor is winking –
Sfc /scannow
- Hit Enter key to activate the System File Checker tool. This utility will detect all the corrupted system components and missing DLL files in it. Fixing will also be carried out automatically.
- This might be a lengthy process, but thoroughly helpful. So, do not terminate until it finishes normally.
- When ends, restart the device and when signing back in, perform a check for Video Memory Management Internal Error in Windows 10.
By far, we have already discussed all the workarounds to resolve the Video Memory Management Internal Error BSOD in Windows 10. We can expect that you have resolved the issue and working smoothly. If these workarounds could not fix up the BSOD error from your system, it’s obvious to be frustrated. In that critical situation, Clean Installing Windows came out as the last savior. If done perfectly, you will not have any more issues evolving afterward.
Before proceeding to the Clean Reinstalling Windows, make sure you have done the following tasks-
- Get the device connected with high-speed internet preferably via Ethernet cable or Wi-Fi.
- Save all the important items in a folder and take it out using USB or additional hard drive.
- If you are not competent enough, get help from professional hands to complete the task. This will reduce the risk of getting issues afterward.
Methods:
1] Never let the Windows to Restart Automatically
2] Update all the defective and outdated drivers
3] Run Programs in compatibility mode
4] Run video games in Window mode
5] Try Running Windows Security for Malware issues
6] Deploy Windows Blue Screen Troubleshooter
7] Boot Windows in Safe Mode as General Remedy
8] Fix up Exiting Memory Problems in Windows
9] Update the Operating System installing all patches
10] Stop Similar Programs colliding each other
11] Free up Space in System Files using Disk Cleanup tool
12] Perform System Restore to Undo current changes
13] Treat the Defective areas in the Hard Disk
14] Cut off Dreadful Windows Update Files
15] Settle down Defective Windows Image files
16] Remove all Third Party Anti-malware programs as being Unnecessary
17] Run the System File Checker to recover DLL files
That’s all!!