Copy-pasting in Windows is there since long but no such interface was available to view the previously copied content. Thankfully, Microsoft introduced a dedicated page for a clipboard that you let you Adjust Clipboard Settings in Windows 10. It provides you an amazing feature of clipboard history that stores all the copied items (images and text) in its interface. Once you enable it, it will keep saving all the items that you are copying and allows you to paste it from there, even if it is not the latest item.
The giant software is taking clipboard settings another level by introducing the sync feature. Furthermore, it has options to pin, unpin, delete or clear all the items depending on what you prefer. So, in this article, we will cover everything that you can do with the clipboard settings to make your work easier.
Adjust Clipboard Settings in Windows 10
Here is How to Adjust Clipboard Settings in Windows 10 –
Turn On Clipboard History
Starting from Windows 10 version 1809, you can save multiple contents on the clipboard history. You can use the items later on by simply copying them from the clipboard history. By default, the feature is turned off and once you enable it, you are just a keyboard shortcut away to access all the contents. Once you enable the feature, press the Windows logo key + V simultaneously to view the history and paste the required items.
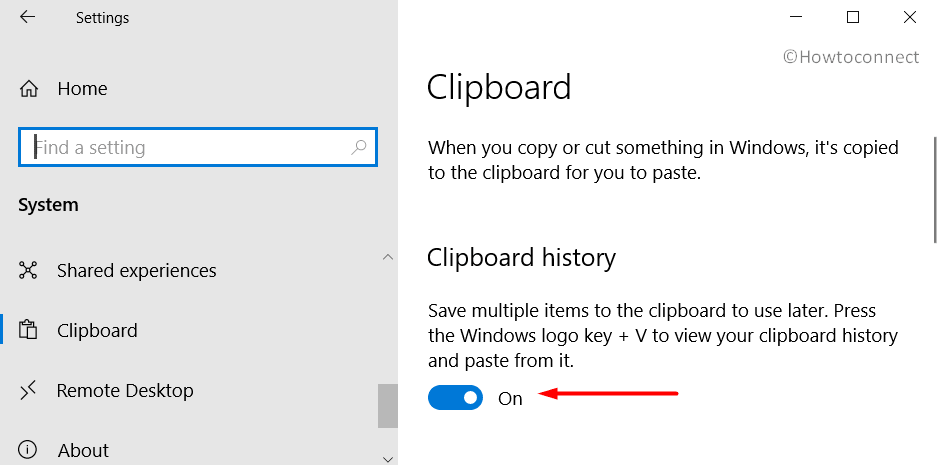
- Use the key combination Win logo + I to open Windows Settings.
- Click the System category.
- Go to the Clipboard subsection.
- Toggle ON the switch namely Clipboard history as shown in the below picture.
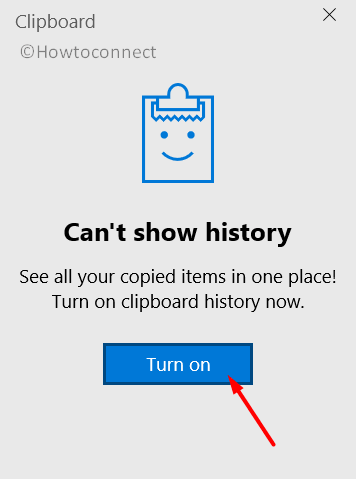
Note – As an alternative, you can also directly enable the feature through the Clipboard interface itself. Get access to Clipboard by pressing Win logo + V keys. Click Turn on.
Find Clipboard History
After turning on the Clipboard history feature, Windows will start storing each and every text or image that you copy. The behavior of copy-pasting will be the same as usual. It means using shortcut ‘Ctrl + C’ keys will copy the content; whereas pressing ‘Ctrl + V’ for pasting. But the small and significant change is that Ctrl + C will not substitute the previously copied items. It will keep adding every copied item in the clipboard and as a result, Ctrl + V will only paste the most recently copied content.
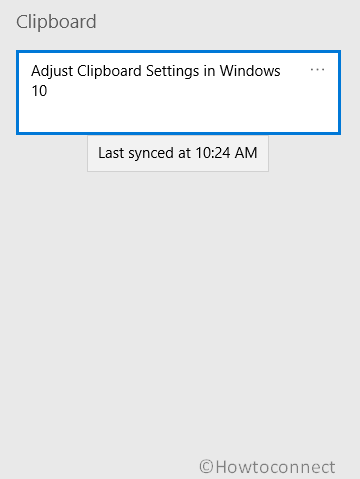
- So, to view the clipboard history jointly hit the Win logo + V keys. Furthermore, if any application where you can paste the content is open, such as Word or Notepad, the clipboard shows up just below the cursor.
- All you need is to scroll through the clipboard. Click content to paste it on the open and active text editor.
Adjust Clipboard Settings by Pinning an Item to Clipboard
- First of all, get access to clipboard history by using ‘Win+V‘ keys.
- Then locate the content you prefer to keep. Select it and click the three dots icon on its upper-right corner. Choose Pin as shown in the below image. As an alternative, use the shortcut keys Shift + P to pin the item.
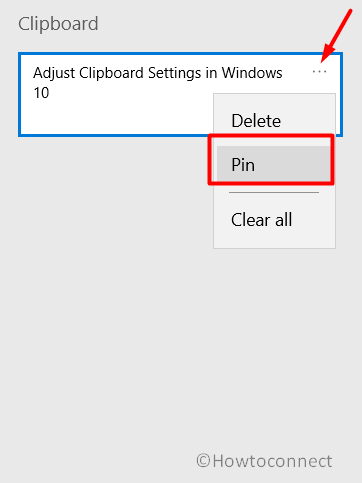
- Now, to remove a pinned item, click on the same three dots button. Select the Unpin option. Else, you can also use Shift + U for the same.
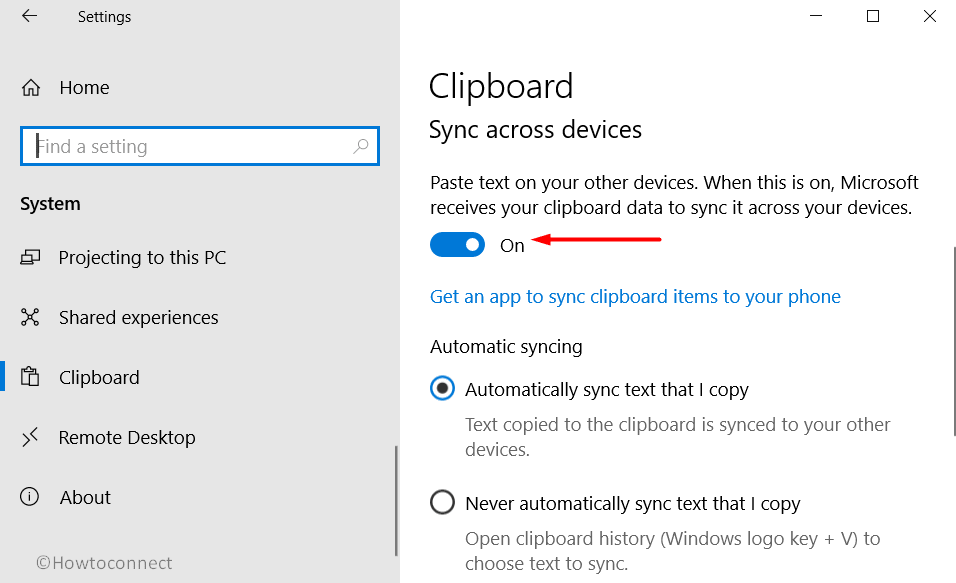
Sync Clipboard History Across All Devices
Transferring copied files to another device using a USB flash drive or taking the help of online services like OneDrive or Dropbox has always been a time-taking task. So, here comes the synchronization feature that all Windows 10 users love as it lets them access their data across all devices. The good thing is it is applicable for clipboard history as well.
Note – The sync feature is applicable on devices running Windows 10 version 1809 or higher.
- First of all, ensure that you are signed in to Windows with your “Microsoft account”. If you are using a Local account, then head to Settings => Accounts => Your Info => Select Sign in with a Microsoft account instead.
- Provide Microsoft account credentials. Then upon request, enter the current password for the local account you are using.
- Follow the instructions and complete the account setup carefully.
- Once done with it, navigate to Settings => System => Clipboard => Sync across devices.
- Toggle ON the button to enable the sync feature of the clipboard.
- Select any one option for automatic syncing –
- Automatically sync text that I copy – the text content that you copy will be synced across all devices.
- Never automatically choose text that I copy – It is applicable if you have some sensitive data copied that you don’t prefer to be synced. However, as an additional benefit, you can manually select items to sync from the clipboard history.
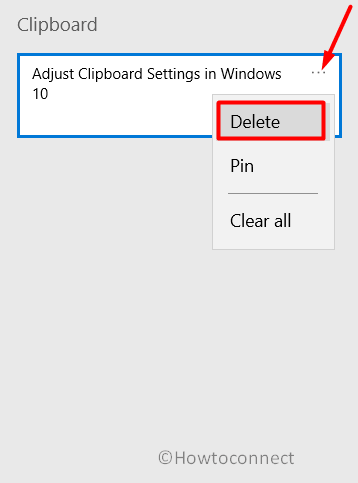
Delete a Specific Item from the Clipboard History
If you don’t prefer a particular item in the clipboard history, you can choose to remove it. To do so,
- Launch the clipboard history using Win+V keys.
- Select the item you wish to remove. Click the three dots button and hit Delete.
Clear clipboard data
While you Adjust Clipboard Settings in Windows 10, you should note that every item stored in its history will be deleted except the pinned items. Once you clear the data, the unpinned items stored on your device and with Microsoft as well will be deleted.
- Open Settings and head to the System category.
- Select Clipboard.
- On the right, go to “Clear clipboard data” and do a hit on the Clear button (see snapshot).
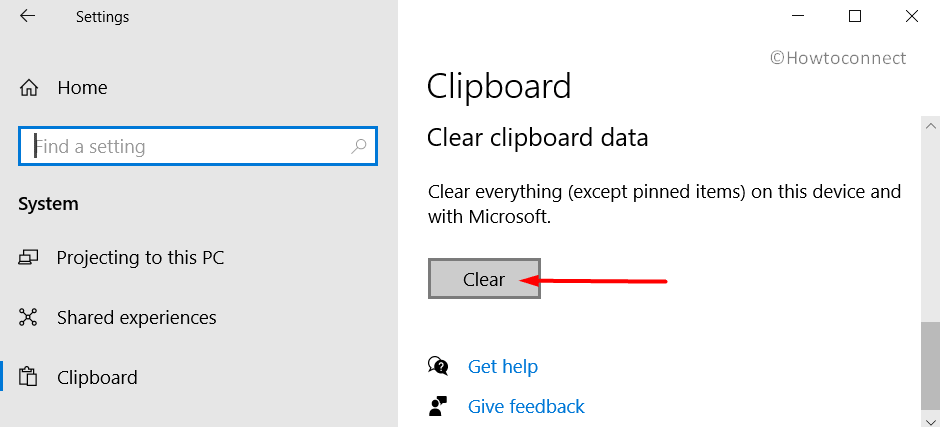
- No confirmation pop-up will appear but the Clear button will be grayed out after the deletion.
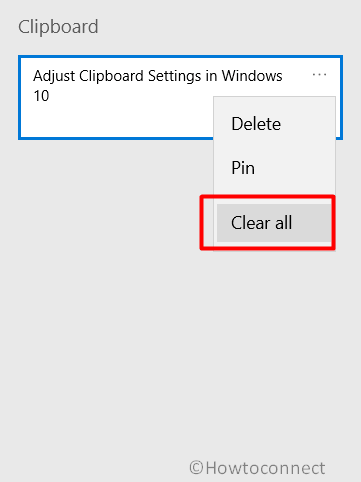
- As an alternative, open clipboard history by hitting Win+V. Choose any item, click the three dots button and select Clear all.
See – How to Clear All Clipboard History in Windows 10.
Disable Clipboard History
If you ever don’t feel like storing items in the clipboard history, you can completely disable the feature. Turning it off would delete all the items including the pinned ones. This is how you can do it –
- Click the Start icon and hit the cog icon to access Settings.
- Select System.
- Click Clipboard on the left sidebar.
- Toggle OFF the switch for the option Clipboard history.
So, this is all about the way you Adjust Clipboard Settings in Windows 10. Though it has certain limitations, it is a great feature for some users. Until and unless you are syncing any sensitive information, this feature is a great initiative by Microsoft.
That’s all!!!