You need to allow ports through Firewall in Windows 10 generally when a trouble takes place on running services or opening certain webpages or applications. After this, specific IP addresses becomes able to communicate with your computer. Port helps IP address of a device for running various apps and services but it requires manual action for allowing when they are blocked or not working.
2 very easy procedures are available to allow ports through Firewall in Windows 10. One through Windows Firewall itself and another using command prompt. But before starting, you should know how to find the port number which you will allow. So let’s see the way
Allow Ports through Firewall in Windows 10
Find the Port number first –
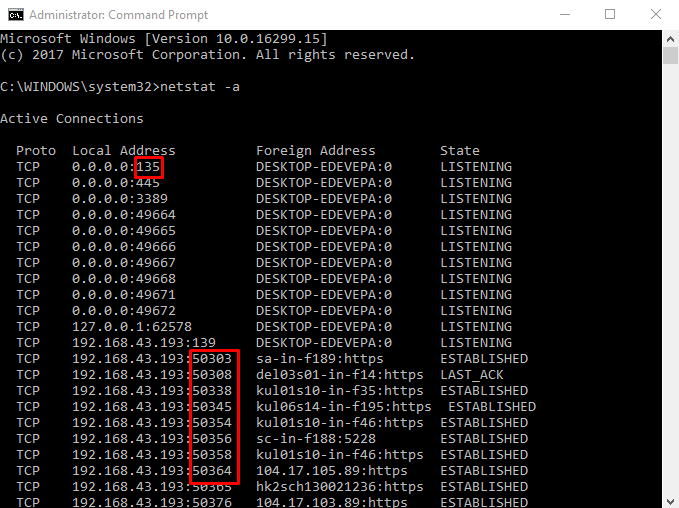
Step 1 – Follow the way to open elevated command prompt and once it appears, copy netstat -a, paste, and Enter.
Step 2 – You get a list of IP addresses including port numbers of the applications including services. Port number exists just after IP address in the Local address column. For example, See in the screenshot
Once you are sure that you have found the port number, follow the method to allow it –
Now Allow Ports through Firewall
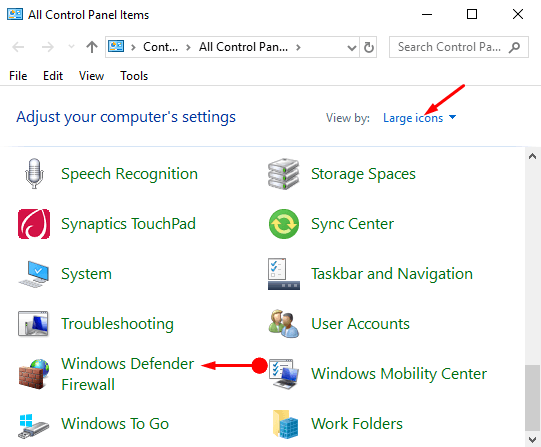
Step 1 – Open Start menu, type cp and then press Enter. After the control panel comes into sight, Choose Windows Defender Firewall from Large/small icon view.
Step 2 – Click “Advanced settings” from the left sidebar and let Windows Defender Firewall with Advanced Security appear on the computer screen.

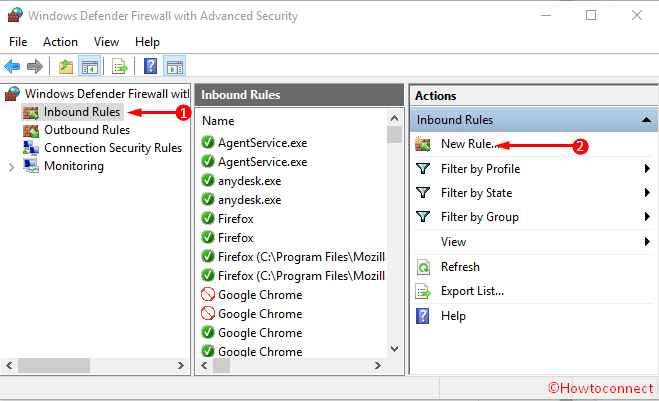
Step 3 – Select Inbound rule in the left pane of the console. Navigate to the right pane then click on New Rule under Actions.
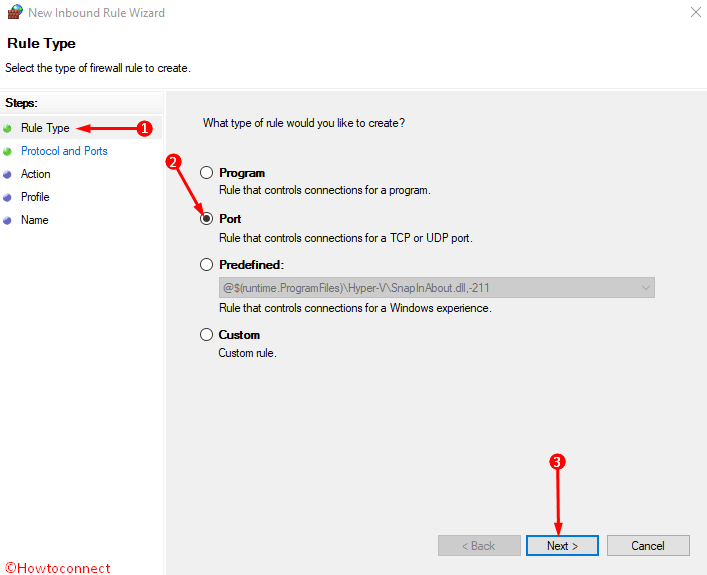
Step 4 – On Rule Type dialog, check the round cell before Port furthermore, click Next.
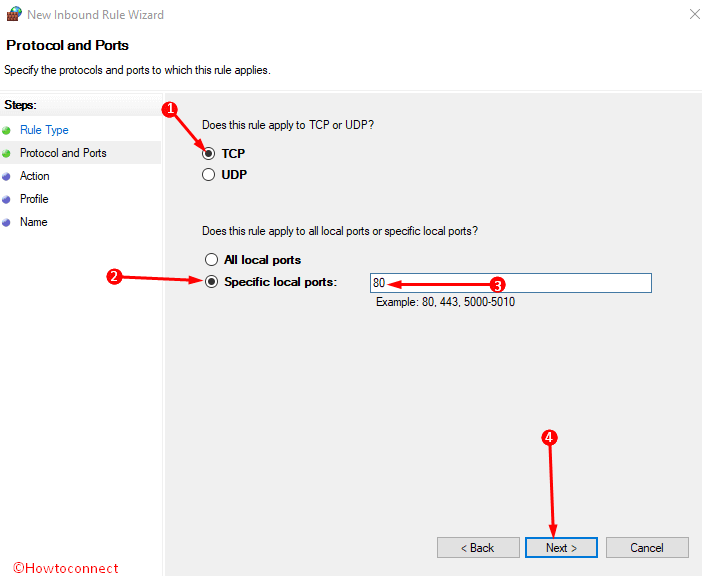
Step 5 – Look for the first option “Does this rule apply to TCP or UDP?”. Determine whether you like to allow which port and check it. We are checking here TCP (In general cases it is most used).
The 2nd option asks – “Does this rule apply to all local ports or specific local ports?”. Decide the one for which you will Allow Ports through Firewall in Windows 10.
If you want to allow all ports then check the first option All local ports. Else, the second, Specific local ports.
When you select the second one, type the port number found through the command prompt above and click Next.
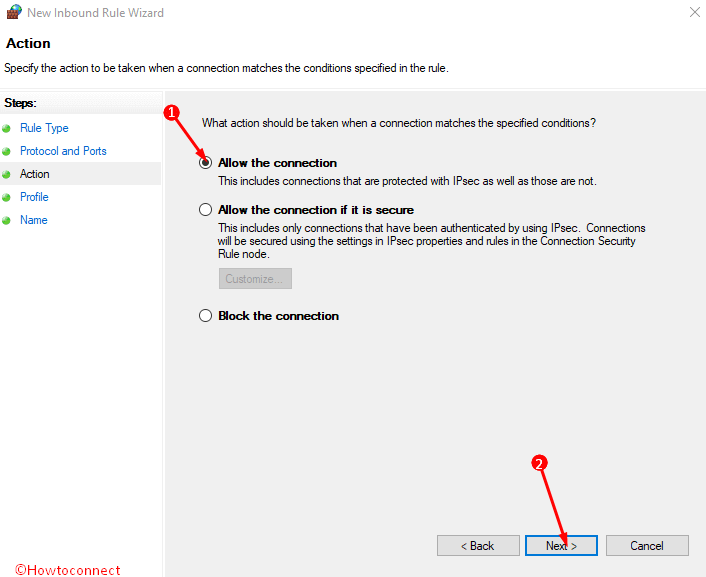
Step 6 – Check the radio button – “Allow the connection” (if you think it is less secure then choose the middle option). Hit “Next” on the Action wizard.
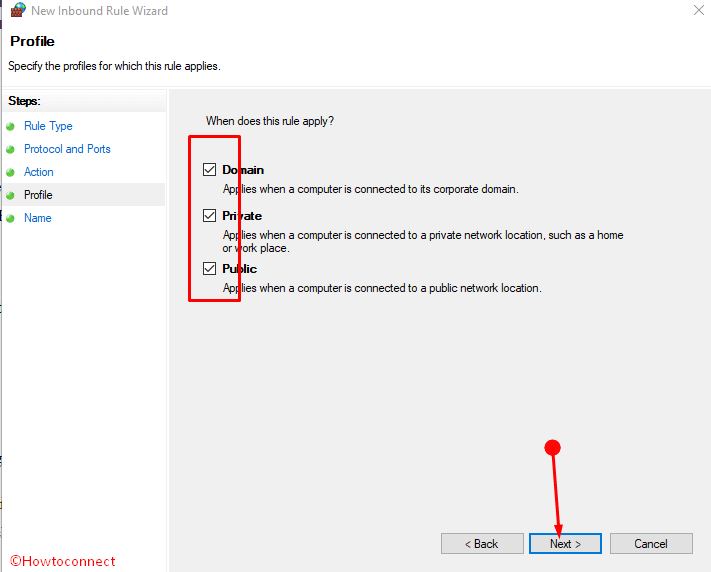
Step 7 – This dialog will provide to select Profile (Domain, Private, Public), choose one (you can also opt for multiple) and click Next.
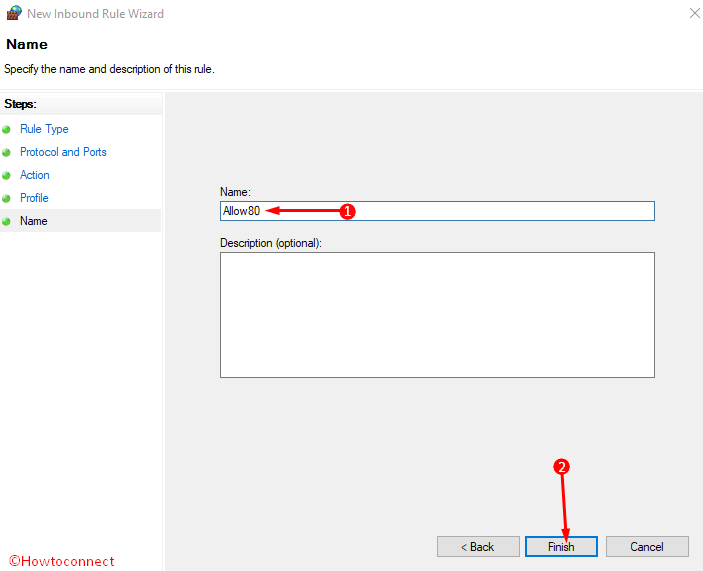
Step 8 – Give a name for this Rule then write Description if you want then Select Finish.
Isn’t this easy?
How to Allow Ports through Firewall in Windows 10 using Command line
In Windows 10, just either copy-paste or type the following piece of command subsequently Enter –
“netsh advfirewall firewall add rule name="Open Port 80" dir=in action=allow protocol=TCP localport=80” (without inverted commas)
Here Port number 80 is being allowed.
Edit open port
You can edit the allowed port settings later as per your preferences pretty simply. Make a right click on the Port and select properties. Using different tabs including options, customize the settings such as Protocol, Programs and services, Local principals and so many things. Finally, click Apply and successively OK to save the new settings modifications.
Conclusion
Once you allow ports through Firewall in Windows 10 the respective application or service creating annoyance will run smoothly. In normal cases, this is not necessary as developers add the bypassing rule considering this type of issue. But when you need we hope this would help.