If all on a sudden a program terminates showing abnormal error messages, it might be Bad Pool Header BSOD in Windows 10 system. The Blue Screen of Death issue indicates the pool header has got corrupt. Error messages can appear at the time of starting a program or ending it as well. But the most annoying thing can ever happen after being affected with BSOD problem is Automatic Restart. In addition, you can have regular freezing of Desktop as well. The stop code has a bug check value of 0x00000019.
BAD_POOL_HEADER BSOD Error (Stop Code) in Windows 10 is mainly an outcome of old, outdated and defective device drivers. Furthermore, the issue occurs because of system resources shortage due to Virus infection, the conflict between similar programs, and outdated OS. Hard Disk Drive with bad sectors, lack of space owing to junk accumulation, connecting an additional HDD, allocating memory incorrectly are also responsible. BSOD errors are pretty dominant nowadays and they can cause serious damages. Today in this write-up, we will discuss some very effective workarounds who can resolve the mentioned issue easily.
Bad Pool Header BSOD Error in Windows 10
Here is how to fix Bad Pool Header BSOD Error (Stop Code) in Windows 10 –
Prevent the Automatic Restarting of Windows 10
Since Windows 10 tends to restart automatically at a regular interval with the BSOD error such as BAD_POOL_HEADER, it becomes the worst part of the issue. You can neither resolve the problem as there is no ample time nor can take it normally. In this point, you need to disable this annoying issue first so that to find the cause and deploy workarounds accordingly. Here is the way to proceed –
- Firstly, save an ongoing process in Windows 10 and move to Desktop by pressing Win and D keys together.
- Do a right click on This PC icon available here and also select Properties option.
- Upon arriving the System window on the screen, choose Advanced system settings from left side flank.
- In a moment, when System Properties popup unrolls, jump to the Advanced tab.
- Move ahead to the Startup and Recovery area, hit a click on Settings once you see it.
- With a new wizard hit on the display, proceed to its System failure section.
- Unmark the checkbox ahead of Automatically restart.
- Choose Ok located at the bottom and save these changes in Windows 10.

Now when you leave the wizard Windows will halt its Automatic Rebooting.
Run Full Windows Defender full scan to solve Bad Pool Header
Virus components after getting a chance to get inside of Windows 10, deteriorate the system files. As a result, plenty of them goes missing and result in Bad Pool Header BSOD Error (Stop Code) in Windows 10. Currently, it’s impossible to avoid them, so the best way to defend is to perform full scan regularly in Default Windows Security. You can accomplish the task in the following steps –
Step-1: Call in Taskbar Search by pressing Win+S.
Step-2: When it opens, you will come across an empty text area. Type Security and click on Windows Security from the top.
Step-3: Advance to the app, select Virus and threat protection option embedded on the left-hand side.
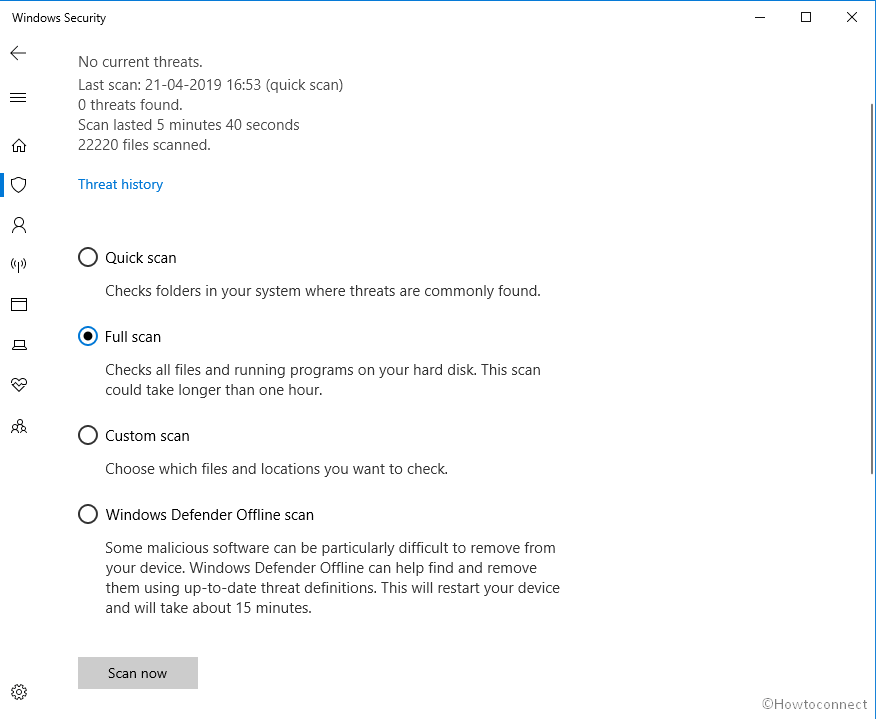
Step-4: Jump to the adjacent pane and make a click on the link saying Scan options.
Step-5: Prior to opening all the available methods, hit radio button before Full scan followed by choosing Scan now.
Step-6: When the detection ends, the system will show the result before you and if there is any virus present, select Clean threats option to dismiss them.
Step-7: In the consequent page, you can three options there. Hit Remove initially and then Start actions to begin cleaning vulnerabilities.
Get Cumulative updates to fix Bad Pool Header BSOD Error
Windows 10 Cumulative updates patches are the storehouses of the newest features and resolutions of issues. People often ignore these and leave them pending for a long time. As a result, the strength of the OS goes down and easily get caught by BSOD as Bad Pool Header BSOD Error. Since, it’s quite easy to install these Windows updates, let’s move for completing in below method –
Note – Manage to get connected with a speedy Internet connection so that to limit the time consumed for the downloading. Recommended using Wi-Fi or Ethernet connection. In lack of that, you can choose to use Mobile Hotspot but make sure Metered Connection is disabled first.
- Manage access to Windows Settings app using the combination keys Win+I pressed together.
- From the Home page, make a move for Update & Security and eventually make a click on it.
- After the following page appears, select Windows Update located at the left overlay.
- Jumping ahead to the corresponding pane, do a click on Check for updates link. Don’t bother if you see “You’re up to date” dialogue.
- After the update patches being visible here, hit Download option located beneath each and initiate.
- Installation will start. Make sure you restart the windows once asked.
When Windows will be updated, there are possibilities that, no Bad Pool Header BSOD Error will be present in your system.
Launch the Windows Device Manager and update the old drivers
In case of all BSOD issues, the culprit remains the same and this is nothing but an outdated, old device driver. You might have such a driver on your Windows 10 but never noticed really. Windows Device Manager comes handy in this case as outdated ones are indicated with Yellow mark inside the console. Follow the below guidelines to update them easily to fix BAD_POOL_HEADER –
- Hover the cursor on the left end of the Taskbar area and make a right click on Start.
- Choose Run and invite dialog upfront.
- In the search box provided here, type devmgmt.msc and choose Ok button.
- When Device Manager is launched, have a close look in the console for any exclamation marks beside the items in the list.
- Expand the device having indication first and again look for yellow indication on any driver.
- If have, do a right click on them only and select Update driver option.
- Drivers will be updated now automatically as you will follow the onscreen guidelines to accomplish that.
After the task is over, hopefully, Bad Pool Header BSOD Error will be resolved.
Boot Windows in Safe Mode – Ancient, reliable and all-time favorite workaround
Booting was Safe Mode is introduced to load only basic processes and services when Windows started its journey as an Operating System. Till then, it is recommended for every critical issue that Windows faces. This is reliable, and most favorite resolution to fix Bad Pool Header BSOD Error as they say. Proceed with the below instruction to complete the task –
- Press Windows logo key, type msconfig and then hit Enter.
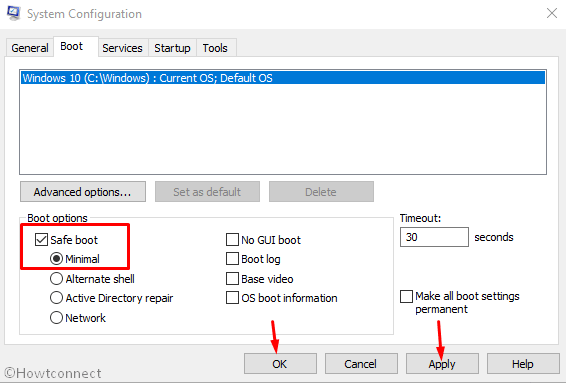
- From the consequent wizard upon opening, move to its Boot tab and reach out to second half named Boot options.
- Next, check the box before Safe Boot and make grayed out options active.
- Moving ahead in the options, select the radio button before Minimal.
- From the bottom of this page, hit Apply and then Ok afterward to save these changes.
- Now, leave the Wizard and Reboot the windows initially following the usual method.
- When the Windows is booting next, keep on pressing F8 key continuously.
- After the following page come to view, choose Safe Boot options lying in the Advanced boot options area.
- Enter into the Safe Mode automatically in the next step.
Run the Top notch System File Checker to fix corrupted windows components
There are lot many reasons for which Windows System files fall into deterioration. DLL files go missing sometimes as well. All these together cause Bad Pool Header BSOD Error (Stop Code) in Windows 10. However, we can fix these two issues using a single tool and that is System File Checker. To access the utility, you have to run specific command in Elevated Command Prompt. Here is how to proceed –
- Open the Taskbar Search using shown guidelines.
- Type cmd.exe.
- Make a right click on Command Prompt when it is visible.
- Choose Run as Administrator option from the menu to proceed.
- When User Account Control prompts for authentication, select Yes to give approval.
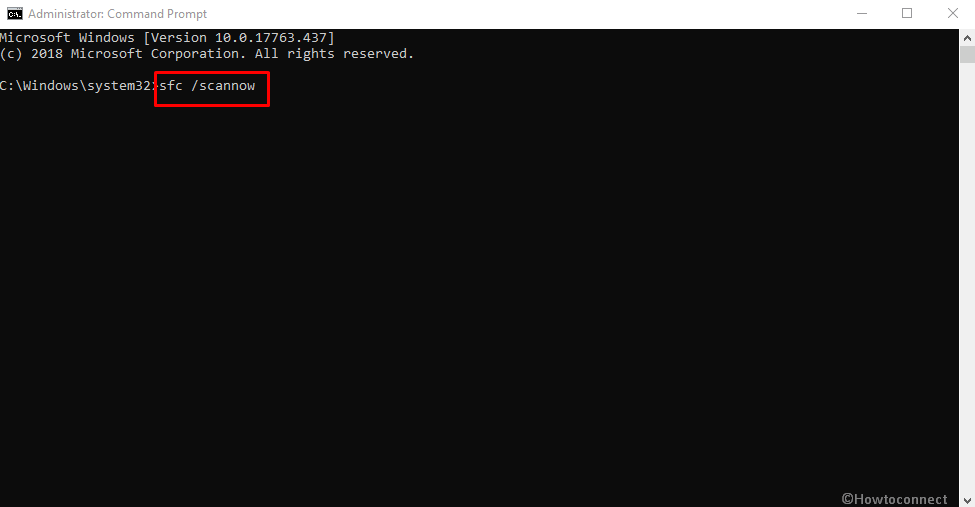
- Being in the black window, type
sfc /scannowcommand at the base of blinking cursor. - Now, pressing Enter key will activate System File Checker and it will detect the corrupted system components and missing DLL files.
- Fixing will take place also automatically.
- Eventually, you can get rid of Bad Pool Header BSOD Error (Stop Code) in Windows 10.
Re-plug External Hard Drive
Some users over the years have experienced the worst consequences of BSOD errors only because of using an External Hard Disk. This is annoying though, the workaround is simple. Only disconnecting came out as fixing the BAD_POOL_HEADER issue. The complete procedure is as follows –
- Unplug all the External Hard Drives from ports and place them safely.
- Press Windows key and hit Power cog once Start menu spreads up.
- Select the Restart option and let it reboot completely.
- After performing the cycle of the restart, when head back to operation, perform a check for Bad Pool Header BSOD Error (Stop Code) in Windows 10.
- If the error is resolved, connect the external hard drive as they were back again.
- Now, you have to make a visit to its makers’ website using default browser.
- Download and install the up to date driver to use safely.
Run the ultimate BSOD tool – Windows Blue Screen Troubleshooter
Windows 10 is famous for its versatile operations and fixing issues with default utility. Seeing BSOD errors daunting, Microsoft came out with probably the best utility ever for Stop errors in Fall Creators Update edition. The Blue Screen Troubleshooter can solve your problem so easily and you need to rely on that. Being a default tool, you don’t have to download additional program stuff. Here is how to move to the utility –
- Open the Start menu using any convenient way.
- Upon launching, select the Gear icon and allow Windows Settings to appear.
- When in the app UI, move to Update & Security and eventually do a click on it.
- Once the next page loads, choose the Troubleshoot placed in the left-hand side.
- Jump next to adjacent right and reach out to Blue Screen.
- Expand it by making a click and hit Run the Troubleshooter option from elongated pane.
This built-in utility will now start checking for BSOD issues in the system and fix automatically. Once the process ends, there should not be any Bad Pool Header BSOD Error (Stop Code) in Windows 10.
Perform Disk Checking for Poor Areas inside of it
As of using for a long, you might notice some areas in the Hard Disk having bad. This will ultimately call in Bad Pool Header BSOD Error (Stop Code) in Windows 10. Resolving such areas in easy when you have powerful Disk Checking Utility beforehand. Follow the below guidelines to run the tool in Elevated Command Prompt –
- Invoke the Task Manager by making a right click on Taskbar and selecting it from menu.
- Hit File located at the top left corner and choose Run new task option.
- In the appeared Create a new task dialog, type cmd in the null text field.
- Moving ahead, check the box before dialogue “Create this task with administrative privileges”.
- Once you hit the Enter key, will be directly guided to the Elevated Command Prompt.
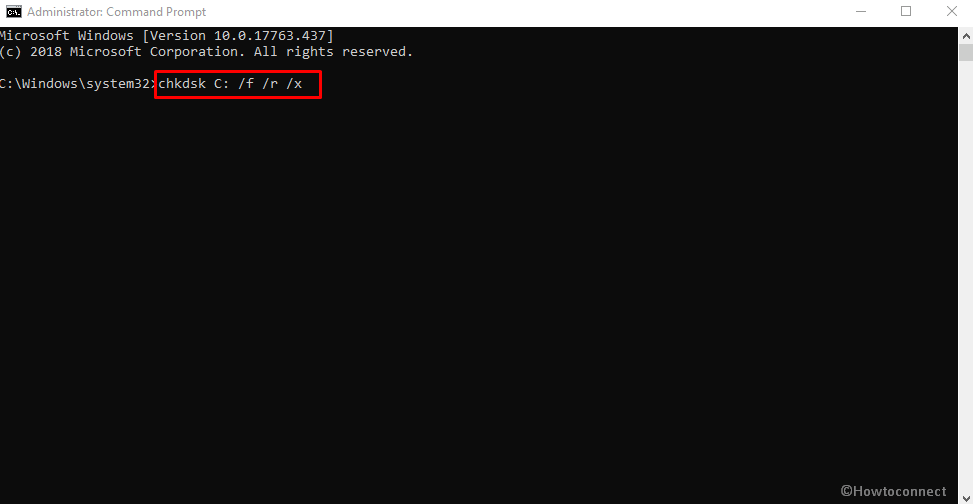
- In the black window, type in the following command –
chkdsk C: /f /r /x
Now, after pressing Enter key, Disk Checking will power up and start scanning for defective areas in the volume. Fixing will happen automatically as we have used significant characters with the base command tool “CHKDSK” explaining following –
- Operating System where Windows 10 is installed is represented by C:. You can replace it with D:. E: or any according to where you have installed the OS.
- The process will take a little longer, so wait with patience.
- When it ends, restart Windows 10 PC.
- After coming back in operation, see if there is any Bad Pool Header BSOD Error (Stop Code) in Windows 10.
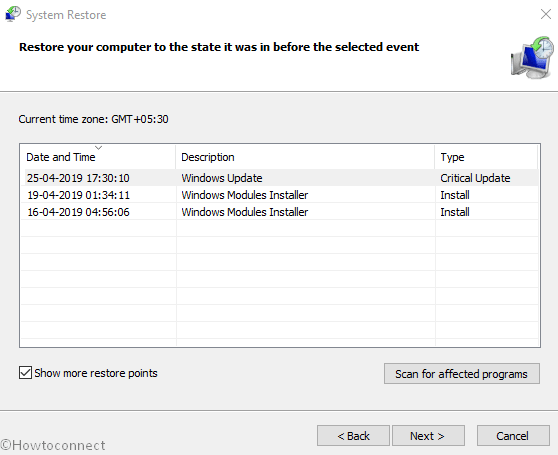
Run the System Restore and go back to an earlier point
Sometimes changes made on the Windows 10 goes wrong due to the adverse effect on Registry. In that case, it’s wise to get back to the earlier state by performing System Restore. In order to solve BAD_POOL_HEADER Follow the below instruction and Undo the recent changes –
- Invoke the Run dialog by pressing Windows and R keys together.
- In the search box provided, type rstrui and press Enter.
- System Restore Wizard will unroll where you need to make a click on Next.
- Moving ahead to the next screen, mark Show more restore points to view all previous ones.
- Hit the latest one in the list and then choose the Next button located at the bottom.
- After the following window rolls in, select Finish to start the restoring.
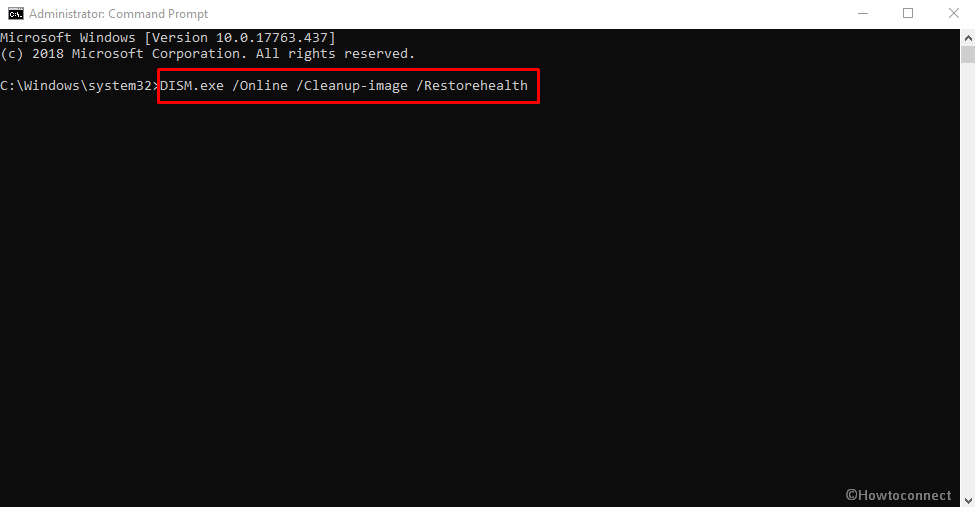
Use DISM tool in Elevated Command Prompt to Fix Troublesome Windows image Files
Windows Image Files quite often fall in corruption and result in causing Bad Pool Header BSOD Error (Stop Code) in Windows 10. “Deployment Image Servicing and Management” tool can be the ultimate solution for this issue and here is how to accomplish this –
- Access Elevated Command Prompt using the same process shown before.
- While in the dark window, type the following command where a cursor blinks –
DISM.exe /Online /Cleanup-image /Restorehealth
- Press Enter key TO execute the DISM tool and detect as well as fix defective Windows image files present in the system.
- Wait patiently as this process will end in a few minutes.
- Once it gets over, reboot the device and once starts again, check if Bad Pool Header BSOD Error (Stop Code) in Windows 10 has resolved.
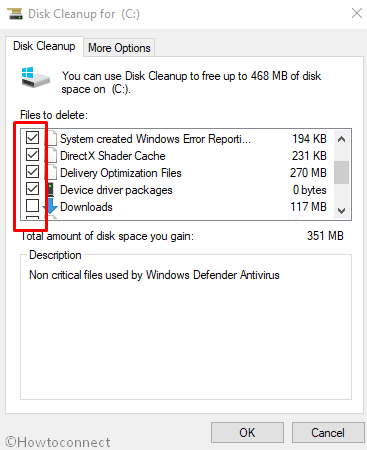
Apply Disk Cleanup to Free up space and fix Bad Pool Header
Junk Files are created for the execution of tasks and stored in Disk storage. Day by day, these files keep on storing and when gets big, occupy huge space in the Drive. As a consequence, the Disk runs in low space, the device functionalities runs sluggishly and BSOD error like BAD_POOL_HEADER occurs. Disk Cleanup Utility can delete these all together and free up space. To complete the task, proceed with the below steps –
Step#-1: Open up Taskbar Search and type cleanmgr in the provided empty bar.
Step#-2: When Disk Cleanup Desktop app appears in the result, select it.
Step#-3: In a moment, a small wizard prompts for choosing preferable Drive to carry on freeing up.
Step#-4: Choose C: by clicking the dropdown menu and then press the Enter button.
Step#-5: Disk Cleanup tool will first calculate the recoverable space in the drive and show up wizard next.
Step#-6: Move to its tail end in the wizard and do a click on Clean up system files from there.
Step#-7: Do choose C: again when the small dialog comes up to select the desired disk and press Enter.
Step#-8: After the Disk Cleanup for C: wizard hit on screen, proceed to Files to delete region here in the popup.
Step#-9: Check all the boxes available leaving Downloads only.
Step#-10: Lastly hit Ok button to start the cleaning.
Important- Make sure there is nothing important left in Recycle Bin as they will be deleted as well. Restore if have any in the proper location.
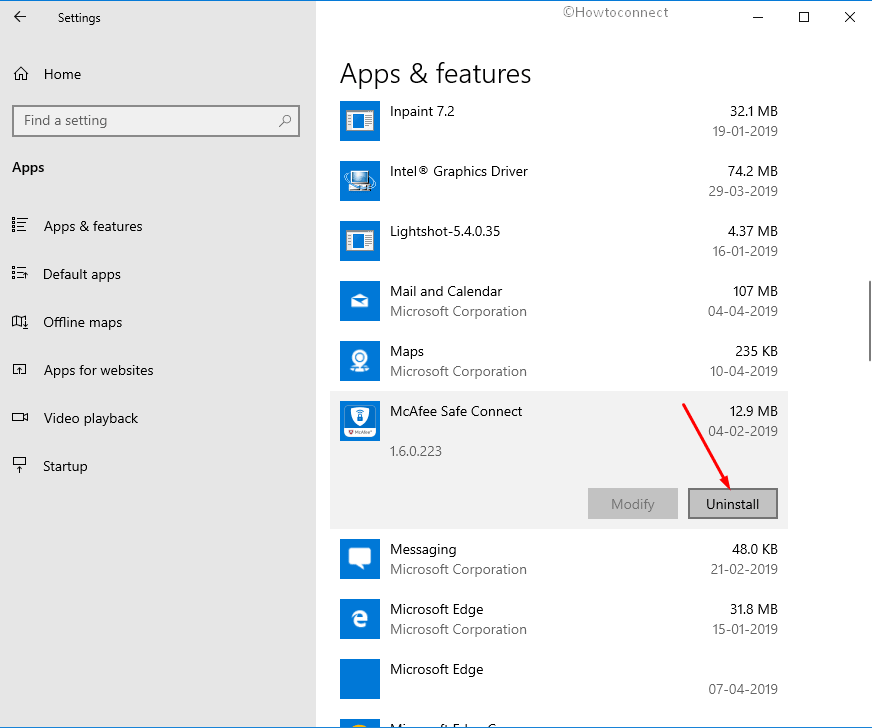
Remove Similar Conflicting Programs from the system and stop their collision
If the Windows has two or more similar applications, they have a tendency to come in contact and eventually create conflict with one another. This act leads losing of System resources and Bad Pool Header BSOD Error makes the way out. To stop this annoying act, we can momentarily delete some of these. See how to uninstall a program from Windows –
- Open the Windows Settings by pressing the combination of Windows and I keys.
- While on the Homepage, reach Apps and select it to load more settings page.
- Choose Apps and features from left-hand side and also jump to the alongside pane.
- When the installed apps are loaded here, find out programs colliding and select them.
- Hit Uninstall option when visible in expanded pane.
- If UAC prompts for permission, choose Yes to continue.
- Keep following the on-screen instructions and remove them completely.
- Restart the Device upon finishing the process.
- When it starts next, check if there is Bad Pool Header BSOD Error (Stop Code) in Windows 10.
- If the issue resolves successfully, download and install the removed apps when required.
Throw out Troublesome Windows Update Files end in corruption
Cumulative update patches really don’t fall in manipulation too often. But of the autonomous Windows Updating terminates at midway, Bad Pool Header BSOD Error (Stop Code) may arise. As to resolve, these defective files need to remove from the system. The simple way to do this task is as follows –
- Open the Windows Settings app and reach to the additional setting page of Update & Security as shown before.
- When the page unrolls, choose Windows Update from left and jump to the corresponding right side.
- Here, perform a click on View update history link and move to the next window.
- Select Uninstall updates link located here and open up Installed Updates page from Control Panel as default.
- Reach out to the recently received update patch file and do a right click on it.
- Select Uninstall and start deleting it.
Deal with Windows Memory issues and fix RAM
Memory problems present in the RAM comes guilty for causing Bad Pool Header BSOD Error (Stop Code). Windows Memory Diagnosis will handle these things properly. Move ahead with below guidelines for that –
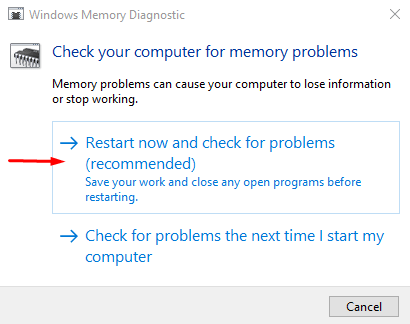
- Press Windows logo key, type ‘memory problems’ and hit Enter.
- When Windows Memory Diagnostic wizard cuts your view, choose “Restart now and check for problems (recommended)”.
- With the command, windows will prepare for the first cycle of rebooting.
- When it comes back to operation, a blue screen will appear and detect memory issues present in the system.
- As the progress rate is indicated in percentage, wait for it to reach 100%.
- Once it hits that, windows will again restart automatically.
- Report on this diagnostic will be available for you in the Notification area of System Tray.
Never Let a Third party Anti-virus program to stay-over in the system to resolve Bad Pool Header
Since Windows Security offers the best deal in malware issues, other anti-virus programs are useless in windows 10. Moreover, they can often cause Bad Pool Header BSOD Error (Stop Code) in Windows 10. Therefore, it’s legit to remove them if you have. Here is how to completely remove such an application –
- Unveil Run dialog on screen pressing Win+R keys.
- Type appwiz.cpl in the text box provided.
- Press Enter to open up Program and Features page coming from Control Panel.
- Move out to Third party Antivirus program listed.
- Select it and hit Uninstall when the option is available in the top ribbon.
- Start moving with the on-screen guidelines until this removes finally.
Till this point, we have elaborated and shown guidelines to deploy some most effective resolutions to fix Bad Pool Header BSOD Error (Stop Code) in Windows 10. Hope, you have already resolved the issue and doing well. In these workarounds could not come out victorious, the last resort will be a complete installation of Windows 10 again. If you can do that with perfection, there will be no more issues rising up next.
Before moving to Clean Installation, ensure the following things –
- Connect the device with the Internet recommended high-speed connection.
- Save a backup for all the necessary files to avoid losing them afterward. You can store them in USB or external drive preferably.
- Do the task with utmost perfection to limit issues arising up further. Seek help from skilled people or hire professionals in case of being less competent.
Hope, you will have no more Bad Pool Header BSOD Error (Stop Code) in Windows 10 after that.
Methods:
Way-1: Prevent the Automatic Restarting of Windows 10
Way-2: Perform Malware dismissal in Windows Security
Way-3: Get Cumulative updates
Way-4: Update the old drivers
Way-5: – Boot Windows in Safe Mode
Way-6: Run System File Checker
Way-7: Re-plug External Hard Drive
Way-8: Run Windows Blue Screen Troubleshooter
Way-9: Perform Disk Checking
Way-10: Run the System Restore
Way-11: Use DISM tool
Way-12: Apply Disk Cleanup
Way-13: Remove Similar Conflicting Programs
Way-14: Throw out Troublesome Windows Update Files
Way-15: Deal with Windows Memory issues
Way-16: Never Let a Third party Anti-virus program to stay-over in the system
That’s all!!