You can Change Sleep Settings in Windows 10 to ensure a long battery life of a device. This sleep mode is helpful for those who need to work long hours on the device. When you leave your laptop or computer for a certain period of time then the device goes to sleep all by itself. By default, it is 15 minutes and 30 minutes for a PC on Battery and on an electric plug.
But many users have the need to change Sleep settings because of a few practical difficulties. In fact, if the device is running short of battery then it enters the sleep mode itself without any prior warning as sleep mode consumes less battery. See a similar guide – How to Test Which Apps Drain Battery Fast in Windows 10. It solely rests upon you whether you require this setting or don’t.
Change Sleep Settings in Windows 10
Through Settings App
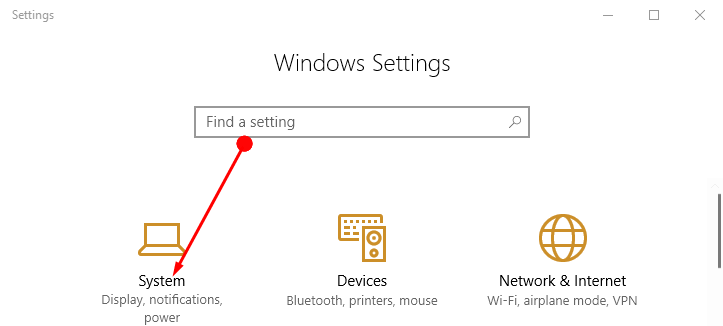
Step 1 – Press the Windows button and hit the Settings icon. Now on the home page of the Settings program, choose the System icon.
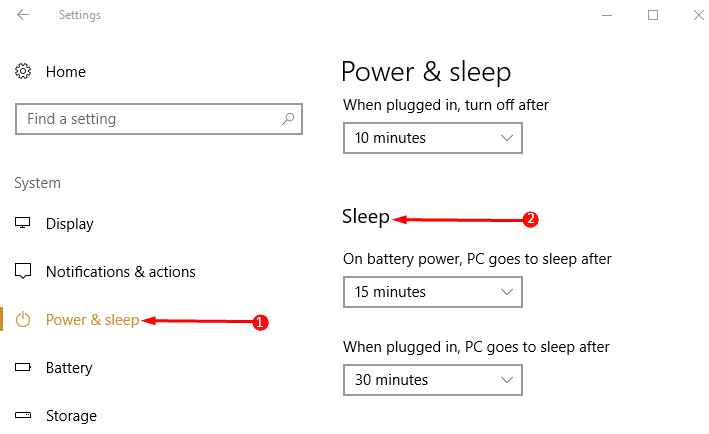
Step 2 – On the next page in view reach out to Power & Sleep and click on the same.
Step 3 – Now move to the adjoining panel and go to the heading Sleep.
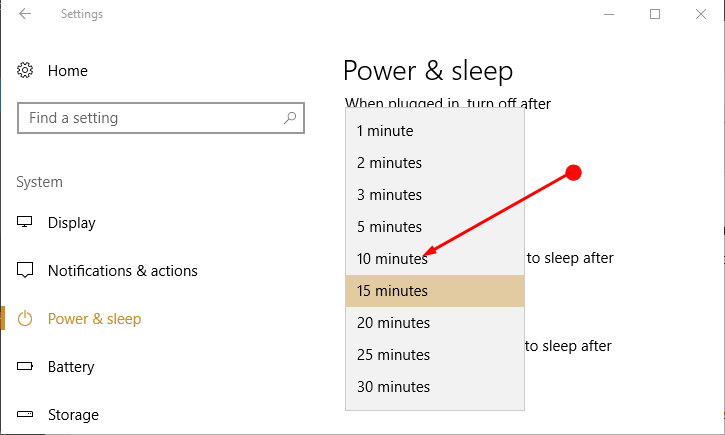
Change Timings
Step 4 – So to increase and decrease the timings click on the drop down arrow under On Battery Power PC goes to Sleep After and choose the timings. Do the same with On Plugged In option.
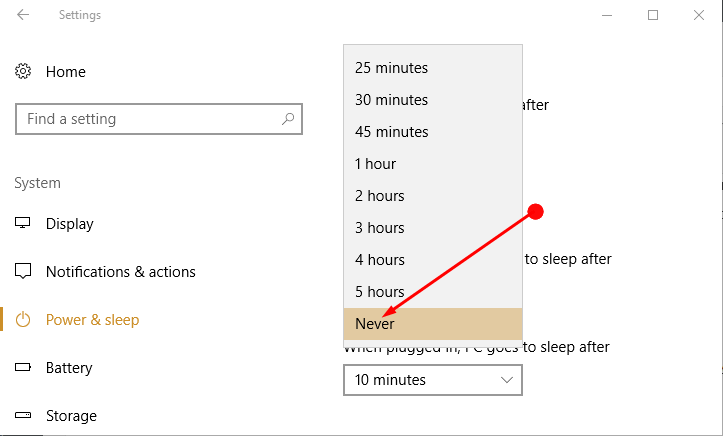
Disable Sleep
Step 5 – To disable click on the drop down arrow under On Battery Power PC goes to Sleep After and click on Never. Repeat the same with On Plugged In option.
Here it is important to note that these alterations are applicable to the present power plan only. For the other power plans change the power option and follow the steps again.
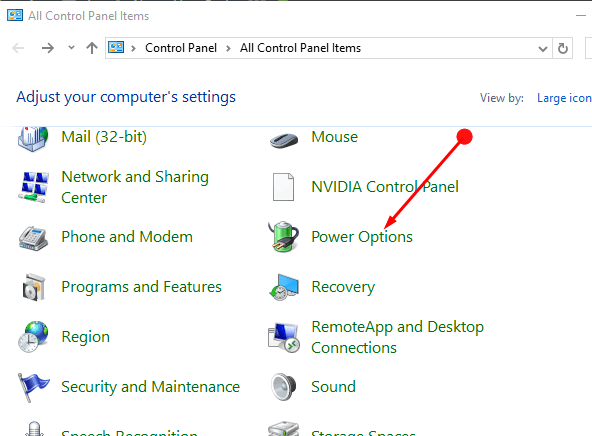
Through Power Options
Step 1 – Launch Control Panel and reach out to the Power Options and hit it.
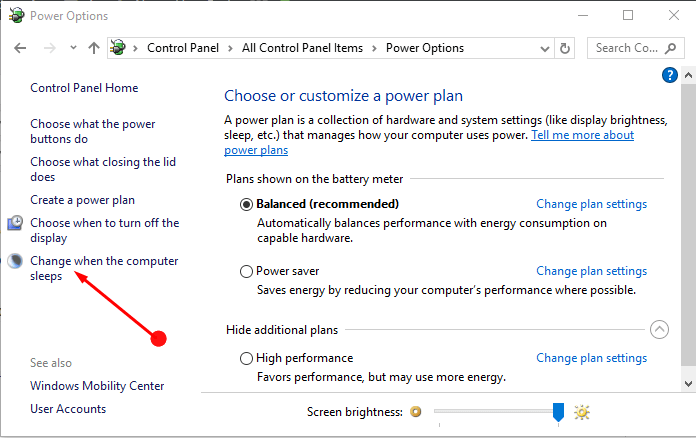
Step 2 – In the next screen, hit Change when the computer sleeps.
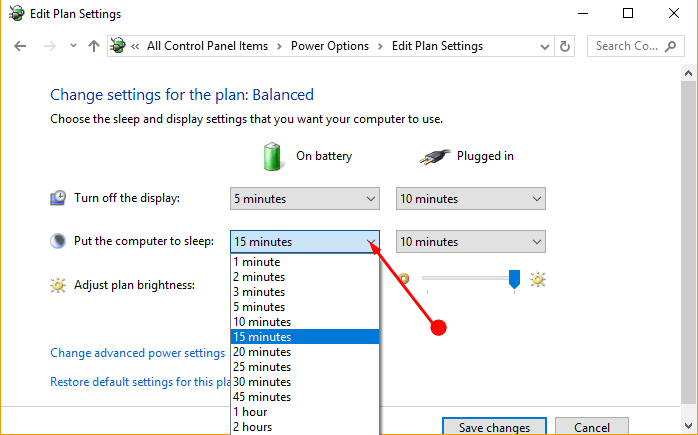
Change Timings
Step 3 – To increase or decrease the timings hit on the drop down against Put computer to Sleep under On Battery and choose the timings. Do the same with On Plugged In option.
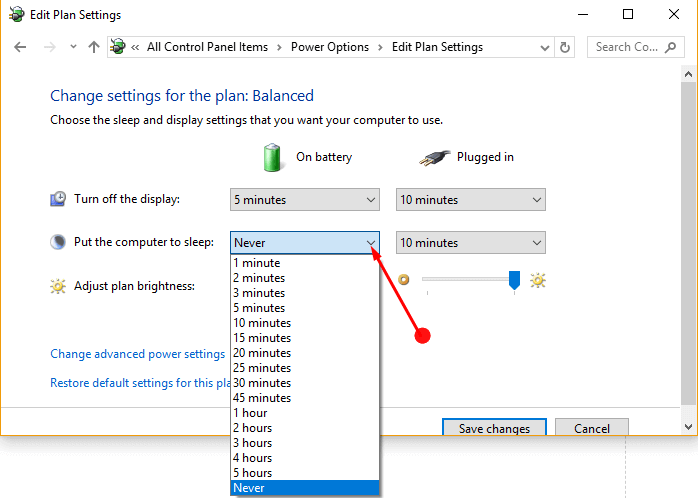
Disable Sleep
Step 4 – To stop, hit on the timings hit on the drop down against Put computer to Sleep under On Battery and click on Never. Repeat the same with On Plugged In option.
Concluding Words
This Sleep option is very helpful for saving the battery in order to prevent the shutting down of the device. But again it entirely depends on the user if they wish to use this option or not. Therefore Change Sleep Settings according to your needs and important.