The Check Disk Utility or chkdsk.exe is a tool in Windows 10 that examines the faulty drives or abnormal drives to pull out the flaws that are obstructing the drives to performing correctly. This tool gives an automatic execution whenever the machine confronts a sudden shut down or it discovers the file system to be distorted. You will read How to Check Faulty Drives with Chkdsk in Windows 10.
In few cases, this tool is scheduled to run but other times Windows itself directs it run, depending upon the nature of errors. Instead of working it once, this tool continues to run all the time the machine is booted. There are multiple ways you can run Chkdsk in Windows 10, Here we see one by one.
How to Check Faulty Drives with Chkdsk in Windows 10
1. Via This PC
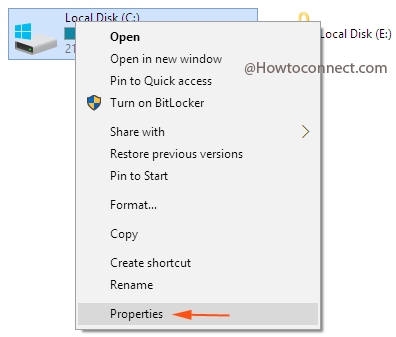
- Open up This PC and implement a right click on the Drive for which you need to run Chkdsk. Move off with Properties.
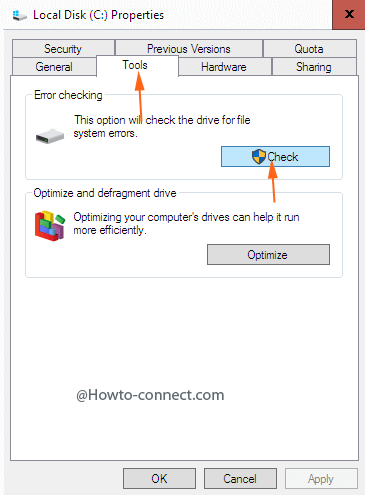
- On the Properties Window of the regarding drive Click the menu Tools and moreover Check button in the Error checking block.
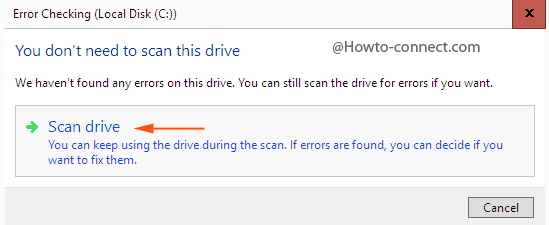
- Click Scan Drive in the middle of the pop up.
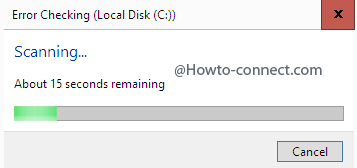
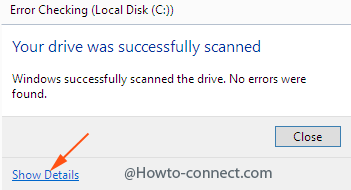
- Error checking begins and shows you the status of the process.
- Click Show Details link after the accomplishment of the operation.
2. Via Command Prompt
- Running a tiny size of command in the Elevated Command prompt Checks Faulty Drives with Chkdsk in windows 10. The Command for C drive is
CHKDSK C: /F
If the name of the drive is different from the written then replace with letter C.
- Copy this command from here make the desired change and hit Enter. Chkdsk commences. Read the result in Event Viewer.
3. Through Cortana Search
- Copy the above command and paste in the text field under Cortana and hit Enter
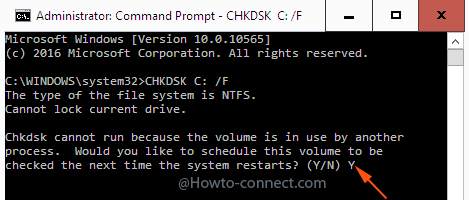
Chkdsk cannot run because the volume is in use by another process
Sometimes you get a twist when you run Chkdsk in Command Prompt. The result in the command prompt conveys like Chkdsk cannot run because the volume is in use by another process. The note intimates to schedule Chkdsk to subsequent reboot and when you schedule it will complete checking before the volume will not be in other use at the startup. The fix is also written ahead. Follow the process written below to fix Chkdsk cannot run because the volume is in use by another process
- Read the next line of the message which says Would you like to schedule this volume to be checked the next time the system restarts (Y/N). Just ahead of the sentence Type Y which indicates yes but if you don’t like to run Chkdsk moreover type N. If you write Y this means Chkdsk is scheduled to be started at the next startup.
How to Access Chkdsk Scan Result in windows 10
Windows Event Viewer stores data in bulk about all the occurrences of your system. In this current OS, Microsoft decided to hide the results of Chkdsk scan if it is operated before Windows has booted. It only displays the percentage of the scan completed. And it does not convey the user if it has traced any defect or amended any changes in the file system. The only place to see the Chkdsk results is Windows Event Viewer. Obey the method to see:
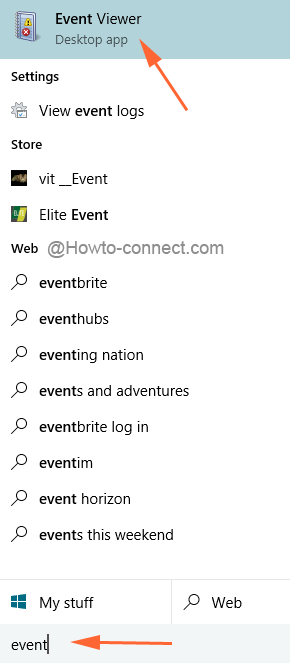
- Together press Windows and Q keys and write event in the text field.
- Event Viewer is seen at the top when the results are fetched out. Click on it.
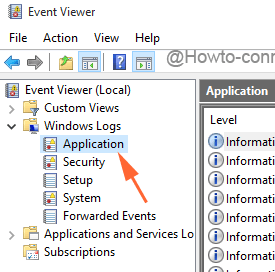
- Upon the emergence of Event Viewer, travel this path on the left pane: Windows Log => Application.
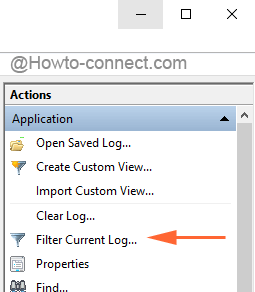
- On the extreme right pane, conduct a click on Filter Current Log.
- This will bring a separate window of the same where you have to type either the number 26226 or chkdsk in the event ID field.
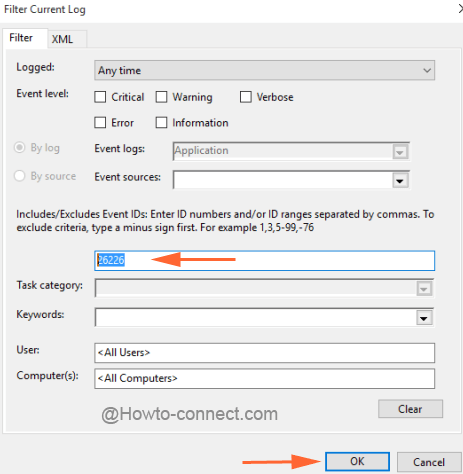
- As you click Ok you will see the results of all the checks.
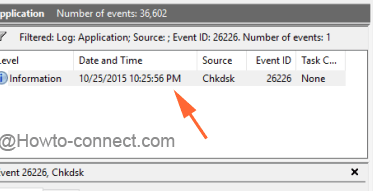
In a normal way, the link Show details emerged at the completion of Chkdsk is good enough to find the outcome of Chkdsk in the event viewer.
