On several occasions, you may need to Check Number of Cores in CPU of the PC you are using for various reasons. Especially, when you buy a new PC a thought might come to mind to verify the specification claimed by manufacturer. If you are running Windows 10 or 11, then the OS provides you with a few simple ways to find out the core count.
In the era of modernization where Intel is looking forward to releasing Cannon Lake, Kaby Lake and Coffee Lake at soonest, it is much easier for a user to afford a Quad Core computer. However, we have already got an idea of Intel’s upcoming processors with the latest technology. It’s time to know the core of the processor that you are using.
Check Number of Cores in CPU on Windows 11 and 10
Before we start to instruct the ways to Check Number of Cores in CPU on Windows 11 or 10, it is relevant to collect information about the same. See what it meant for –
What does Core refer to?
A computer incorporates a number of significant components altogether termed as Hardware. Among all these elements, the most important part is a CPU (viz. Central Processing Unit). In a computing operation, CPU is the one to get the information first to perform a calculation. This processor contains a set of instructions. Here comes the term core. If the processor has only 1 set of instructions, we call it a single core processor.
With the passage of time, Intel has made tremendous modifications in the processor instructions. As we said earlier, based on the number of instructions, a processor is named. In case of 2 sets of instructions, we call it a Dual Core processor. Similarly, 4 sets is a Quad Core, 6 sets is a Hexa-Core and the latest one is Octa-Core as it has 8 sets of instructions. By this time we have already come to know about the core. Now let’s go to Check number of Cores in CPU.
There are different methods to determine the core and let us explore them one by one.
You can use either Task Manager, or System Information tool or take assistance from Google or third-party software as well. Here, we will discuss every method in a sequence of steps to make you understand clearly.
Ways to Check Number of Cores in CPU on Windows 10 –
Way 1 – Through System Information
System Information is an alternate method that lets you Check Number of Cores in CPU without involving any software. For this reason, the steps are:
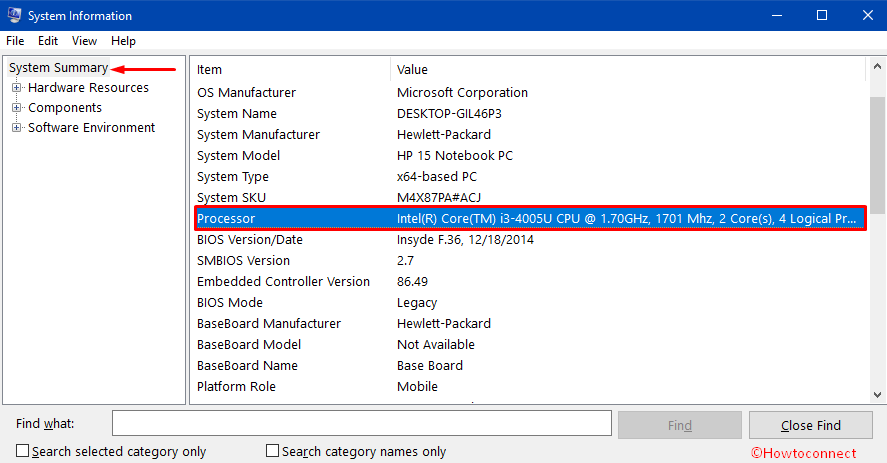
Step-1: Click on the Start Menu on your computer and in the search box, type system information. Press Enter to open the System Information app. By default, System Summary is selected.
Step-2: On the right pane, you can see a list of items that describes every detail of your PC. Come down slowly checking the items until you see the Processor on the list. In any case, if you have two processors, the list shows both of them separately. Carefully, look at the Value of Processor and you can see the number of Cores (see screenshot).
Way 2 – Use Task Manager
Among all the procedures to check the number of cores in CPU, the quickest one is to verify it using the Task Manager. To accomplish the whole task, pursue the given steps.
Step-1: Launch Task Manager on your computer and there are two ways to achieve it. You can press CTRL + SHIFT + ESC shortcut keys altogether to open it. Instead, you can put a right-click on the Start Menu and from the list of options, choose “Task Manager“.
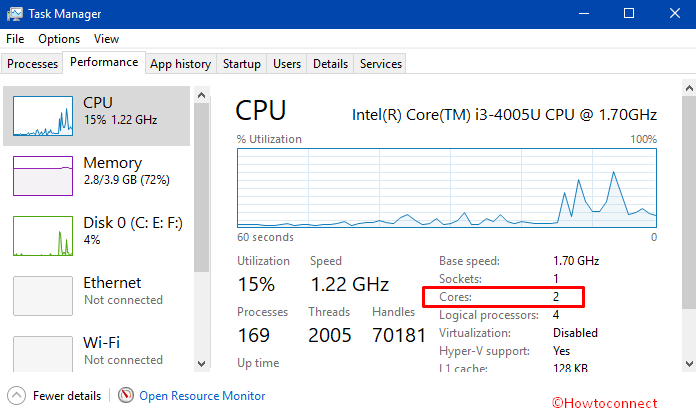
Step-2: In the Task Manager, you can notice see some tabs, switch to the Performance Tab. Here, you can see some graphs for CPU, Memory, Ethernet, and Disk 0, Disk 1, etc. on the left sidebar.
Step-3: Click on the CPU graph and it opens a graph with additional information on the right side pane.

Step-4: Just below the graph, you can notice information such as Base speed, Sockets, Cores and so on. So, here locate the number next to Cores, for example – in the below image it displays 2 which means the PC has a Dual Core.
Usually, it shows a single graph and you can change it according to your choice too. For this, you need to put a right click on the graph. You see few options, hover over Change graph to and from the submenu choose “Logical processors“.
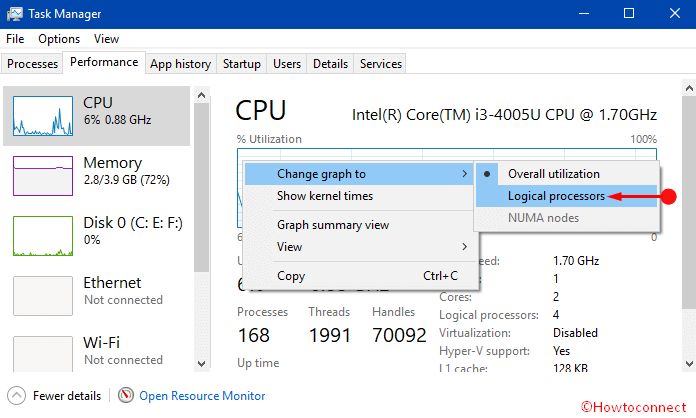
You will be happy to know that in Windows 11 or 10, there is no need to change the graph actually. Because, it automatically tells about the number of Cores, Sockets as well as Logical processors present in the system.
Additionally, it also provides information about the caches like L1, L2, and L3 caches. In some cases, special caches are used in CPU of computers in order to give faster processing performance.
Way 3 – Via Google Search
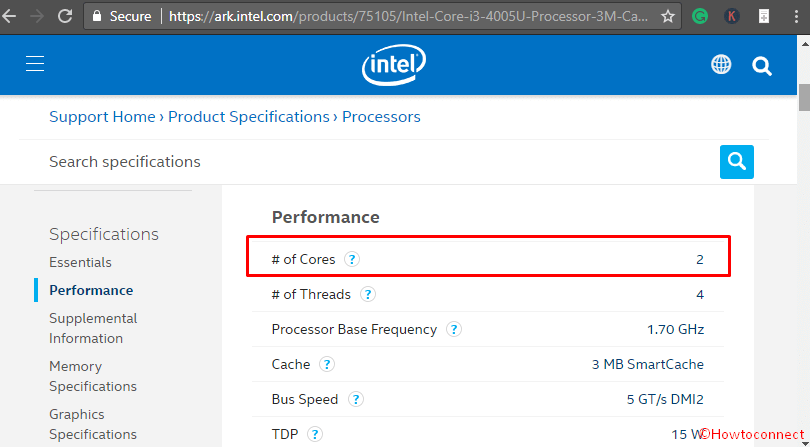
Google search also assists you to Check Number of Cores in CPU pretty effortlessly if you are aware of the CPU model number. If you don’t know the number, you can obtain it from either Task Manager or System Information (see above methods).
For example, I Googled core – i34005U and out of various results, when you open anyone, you get a spec sheet. The sheet contains every detail of the processor. Locate Core and you can see the number.
Way 4 – Third-Party Applications
You can also use some third-party applications to know the detailed information about your processor and these applications or programs are free. Along with the processor details, the apps also inform you about the CPU support virtualization, SSSE3 as well as vt- x etc. These are really effective and equally helpful to know the hardware information.
We have a collection of a few Best System Info tools – Know motherboard, CPU detail of Computer here.
Hence, the above-mentioned are the few easy and simple ways to know the number of cores in your CPU. Remember that, if you are going to buy a computer having more than one processor, Windows 11 or 10 Pro for Workstations is the best choice. Though, it is not available on the market yet. However, it is generally uncommon that a user needs two processors at the same time.
For additional information, Windows 11 or 10 is competent enough to support up to 32 cores for 32-bit Windows. If you choose 64-bits, it can support up to 256 cores. We really cannot expect these much cores in our lifetime!
Conclusion
While using a computer, you should know about the details of the device and it is really helpful to determine the performance as well as to work professionally. Knowing the number of cores in the CPU is a must and Windows 11 or 10 makes it easy. As a matter of fact, we feel the necessity to know the methods to find this information by simpler means. So, give a shot to the above methods to Check Number of Cores in CPU and if you are aware of more tips, do write them to us.