Method to choose Branch Readiness Level when updates are installed on Windows 10 with steps. – The branch readiness level in Windows 10 OS refers to the time when you can install quality or features updates. There are two branches that Microsoft provides you to choose from. The first one is Current Branch and the second one is known as Current Branch for Business. Read a similar guide on How to Get Windows Update With PowerShell in Windows 10.
Current Branch means that the update is ready for most of the people. The second one Current Branch for Business determines that the update is ready for widespread use in organizations. In the circumstance, you confront with any problems while downloading updates, then Use Common Windows Update Troubleshooter on Windows 10, 8.1, 7. So, here we present a guide about the Ways to choose Branch Readiness Level during the installation of updates in Windows 10.
Choose Branch Readiness Level When Updates are Installed in Windows 10
Step 1 – To choose Branch Readiness Level, click on the Start button and select the Settings icon. As an alternative, you can also press Win and I keys altogether. Now choose the Update & Security icon from the homepage of the application.

Step 2 – Here, find the option Windows Update and click on the same in the left pane. As this is the first option under Update & Security the modifications regarding the same will be in the right pane.
Pursue How to Enable Disable Update Restart Notifications on Windows 10.
Step 3 – Now move to the right pane and click on Advanced Settings under the heading Update Settings. This will lead to the box for tweaking the settings to choose the Branch Readiness Level.

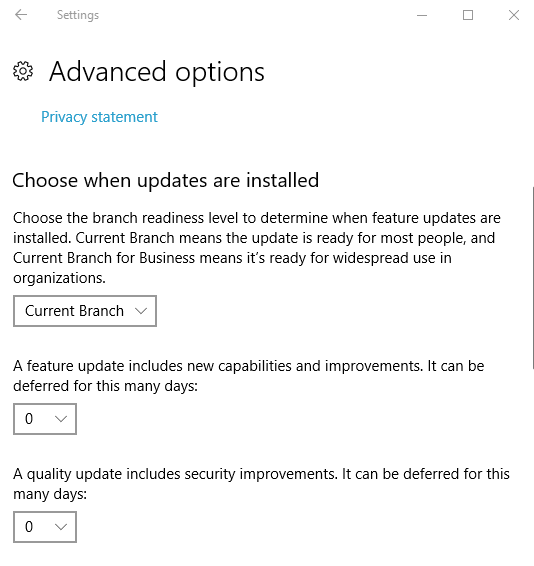
Step 4 – The Advanced Options box provides a few sections for choosing where the foremost section is about choosing the correct branch for security updates.
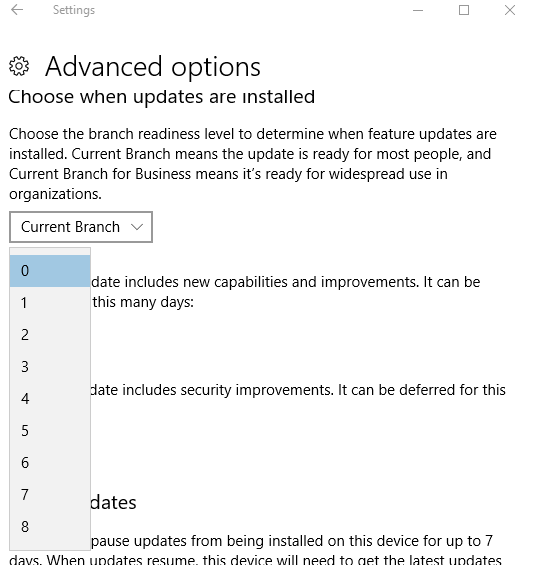
Step 5 – The next section sets the number of days to defer a feature update. To choose the number of days hit the arrow and choose it from the options.
Note – The feature update incorporates the latest capabilities and improvements. Hence it is not good to delay it for long. Yet if the need of the situation is delaying the update then this option will help you do so.
Step 6 – The last section asks the number of days you wish to defer security improvements. Even here just like the previous section click the arrow to choose the number of days.
As a quality update needs security improvements this option finds a place here. Just like the previous situation, it is not good to delay such security issues for long.
For reference, you can follow How to Pause Windows Update on Windows 10.
Concluding Words
Windows 10 tried to incorporate many features useful for its users. So, completing the above steps will help you to Choose the Branch Readiness Level during the installation of Updates in Windows 10. Hence try using this new incorporation and keep control over the installation of new updates.