Wherever the cellular network is obtainable you can get connected to the internet. And with the availability of the cellular network you can easily send or collect emails, visit social networking sites, browse web pages, download updates or apps, and many more such things. To connect Windows 10 PC with a mobile network, you need to use cellular service. We bring you the details of the cellular connection of Windows 10. In this post, we will show you how to connect Windows 10 PC to a cellular network.
You may like to read: Windows 10 – How to Turn On or Off Airplane Mode
Connect Windows 10 PC to a Cellular Network
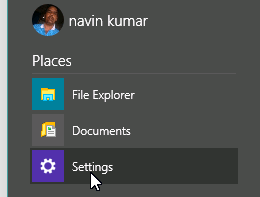
- Click the – Start.
- Select – Settings.
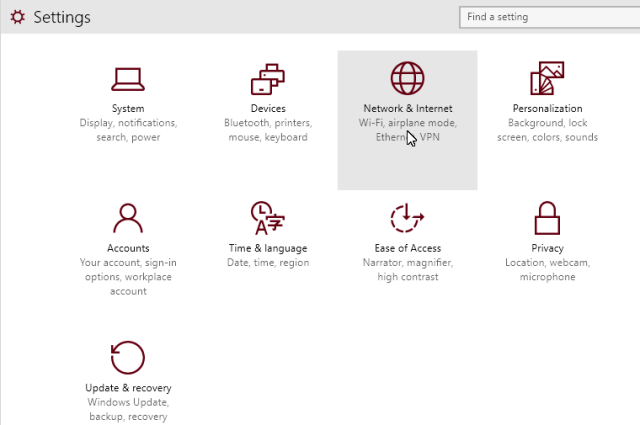
- Upon the arrival of the Settings window, click on Network & Internet.
- Click on Cellular. Next, click – Connect.
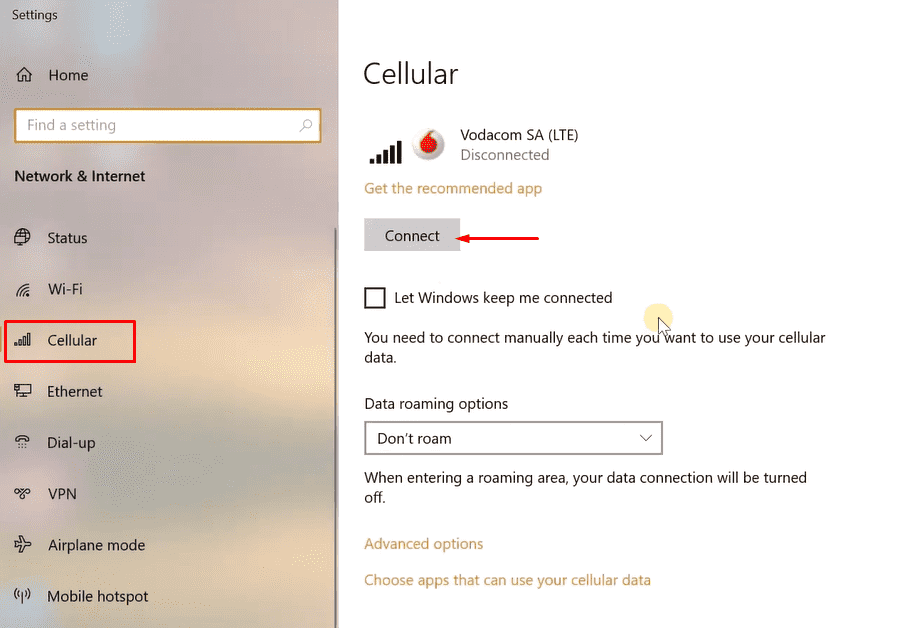
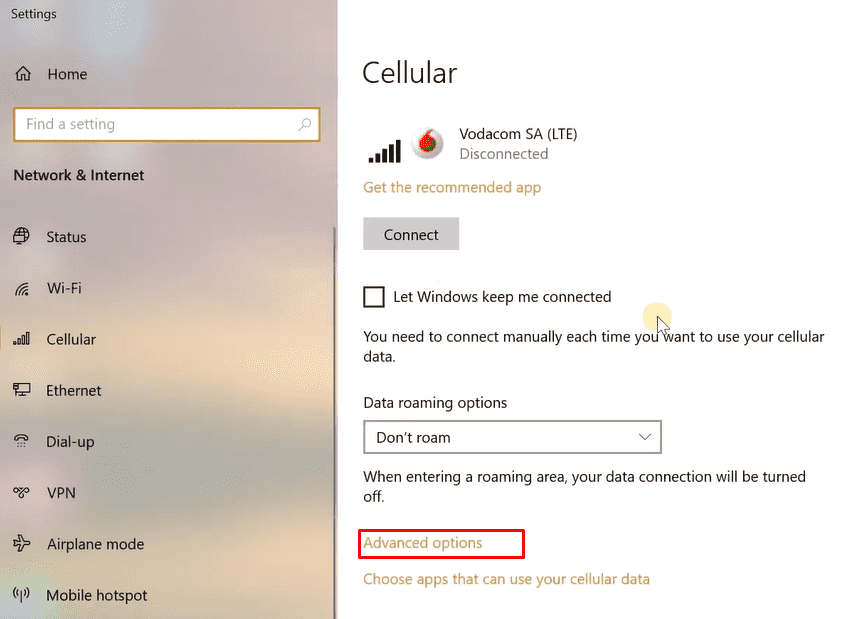
- If you are first time using the Cellular network then you may have to set up APN. So click – Advanced options.
- On the next page, click – Add an APN.
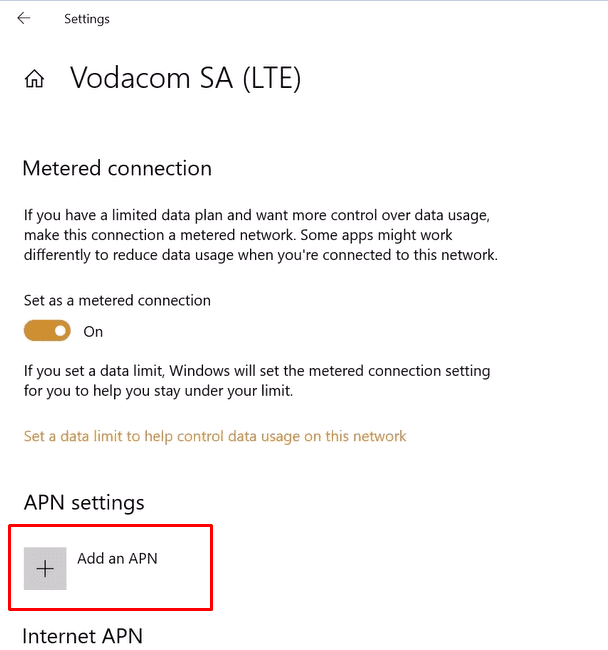
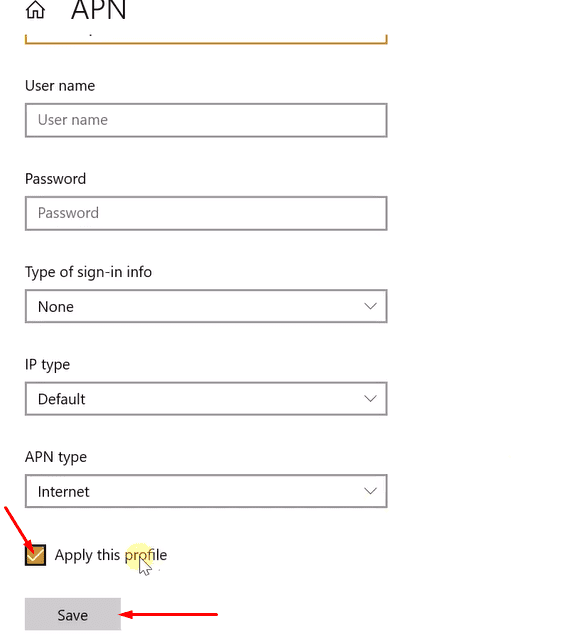
- Fill up the boxes with the required info and check – Apply this profile. Click – Save.
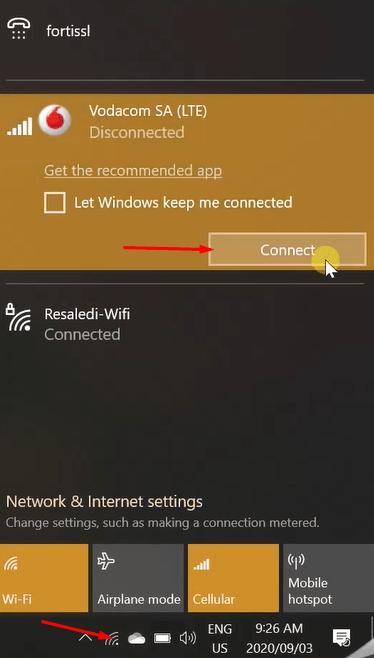
- Click on Network icon located on the taskbar.
- Find the Cellular one from the Available networks list.
- Click on the name and then on Connect.
It’s done! Connecting to the cellular network in Windows 10 is very easy. The scene was a bit different when compared with the just previous edition of Windows 10. Try to use the data within the set limit or else you have to pay the supplier. Try it and let us know about its performance.