The rollout of Windows 10 May 2019 Update included a wide range of amazing features and enhancements. One such interesting thing was the separation of Windows Search and Cortana in the taskbar. This significant change will light up their features independently to the best of their capabilities. Talking about the search, users can now have the best experience as it includes a dedicated page with several options in the Settings app.
In this article, we would concentrate on the way to Customize Search from Settings App so that you can make the most of it for your device. Following is the list of customizations that you can proceed with –
Customize Search from Settings App in Windows 10
Here is How to Customize Search from Settings App in Windows 10 –
1] Manage Search History
Windows now easily keep your search history not just of the device you are using, but also provides you with the ability to have them synced. However, in case you don’t prefer to keep the search record, you can simply toggle off the setting to prevent this. Follow the below steps to make the desired change –
- Press the shortcut keys Win logo + I in order to open Windows Settings. In the app interface, navigate to the Search category and click on it.
- Permissions & History subsection will show up by default.
- On its right pane go to the History section. Here, turn OFF or ON the switch namely My device history.
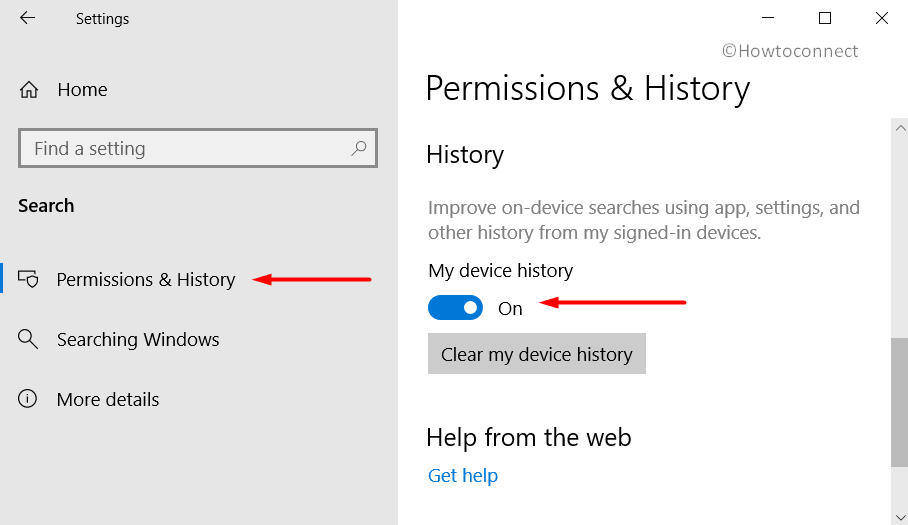
- Turning it OFF would prevent Windows from collecting and retaining the search information in the future. If at a later point of time, you’d like the device to start showing the search activities, then simply toggle ON the above-mentioned option.
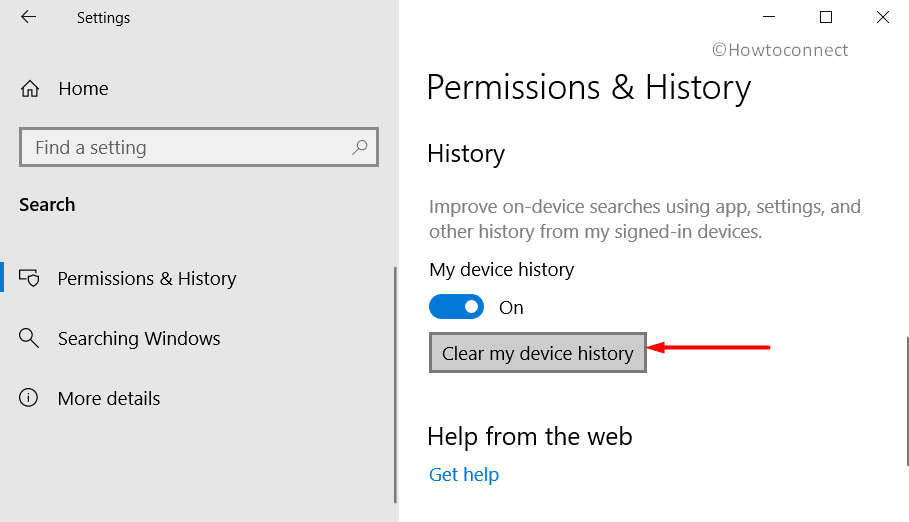
- In case you prefer to erase the already fetched data, hit the Clear my device history button (see snapshot).
2] Include Cloud Content in the Search
Microsoft improvises Windows 10 search to another level. It continues to release several features that make searching more simple and also lets you Customize Search from Settings App as well. One such option that the giant software offers people is to include Cloud content in the search. The items that are stored on your cloud services like OneDrive and Outlook can be easily retrieved now. You can dig out the photos, documents, files, personal emails, and more from your cloud storage by enabling the related option. Let us see how to use this feature –
- Right-click on Start icon and select Settings option from the Win+X menu.
- Navigate to Search => Permissions & History.
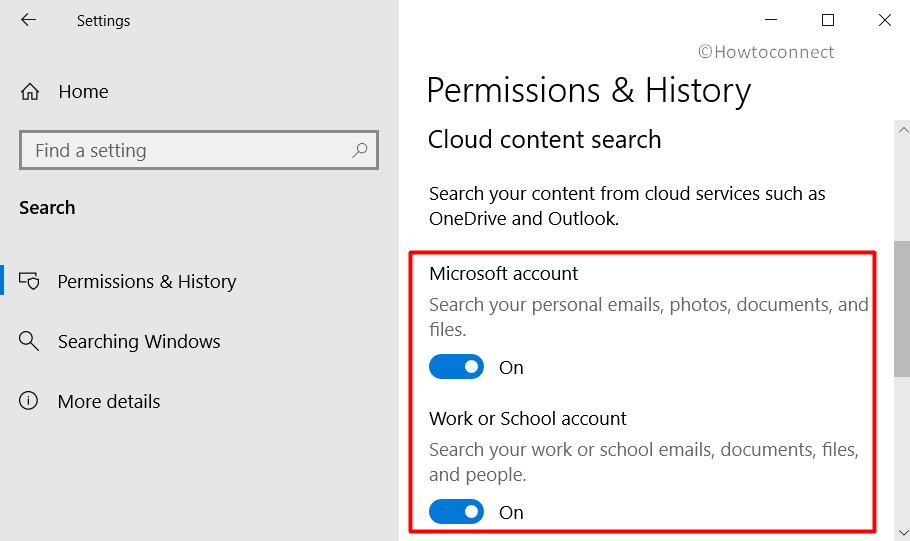
- On the adjacent right pane, beneath the section Cloud content search, you will find the following options:
- Microsoft account (for searching files, images, and emails stored in your personal connected cloud).
- Work or School account (for exploring files, people, school emails, and content stored in your organization’s cloud).
- From the options, choose to turn ON or OFF the switch as preferable to allow or deny your Windows 10 to access and search connected Cloud contents.
- By selecting either one, you can have your OS check and load results from the chosen account.
You can also use this feature through the Group Policy Editor. For reference, read our guide – How to Allow Cloud Search in Windows 10
3] Limit the Search Results
By conducting a Windows search for any item, you must have noticed some results as web previews. These previews will not load web results all by itself if they may contain any inappropriate content. However, the giant software offers you three options to manage SafeSearch. You can choose the level of limit and restrict the web results that are shown in the search.
- Press the Windows key and select the cog icon to access the Settings app.
- Click the Search category.
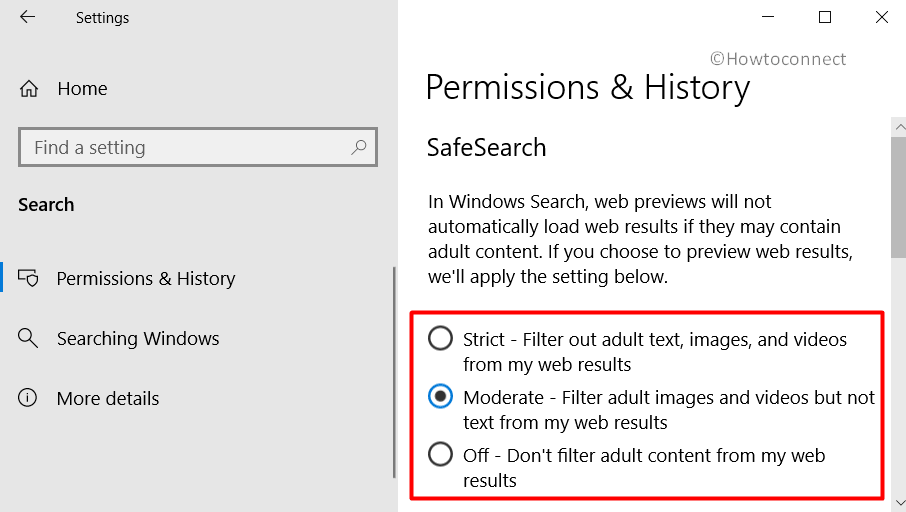
- On the right pane of the following page, see the section SafeSearch. Choose the option that would like to Windows apply to display web previews in the search.
- Strict: For filtering out any adult content or inappropriate text, content, and files as well.
- Moderate: To filter out adult videos, images only and not text.
- Off: To list the search without any restrictions.
- By default, it would be set to moderate. You can change the restrictions as per your preference and Customize Search from Settings App accordingly.
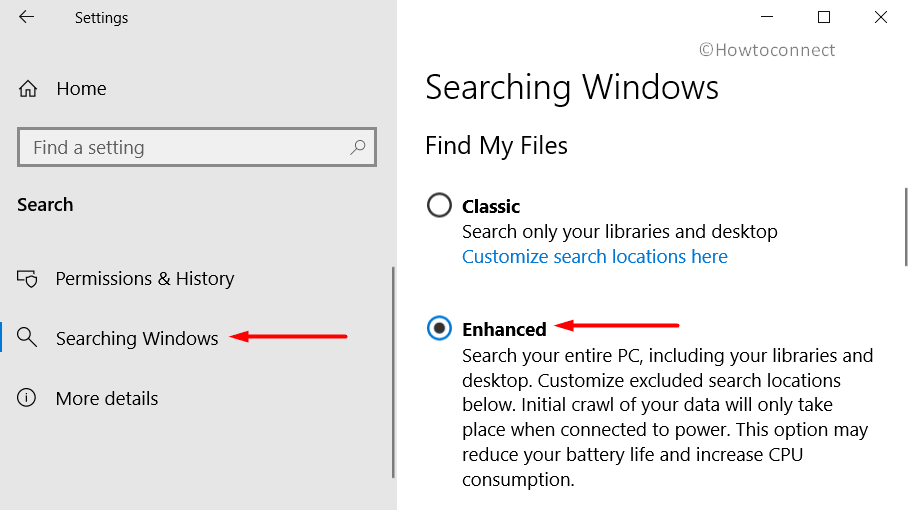
4] Use Enhanced Search Mode
To Customize Search from Settings App, the May 2019 update had brought an ‘enhanced search mode‘ which allows, as the name suggests, a more in-depth search. Basically, it would check the entire device and not just files, folders, videos, documents and images. There is a drawback to this enhanced mode though- it consumes extra power and can increase CPU consumption as well. So, you can turn it on or off as and when required following the below steps –
- Open Start Menu => Settings => Search.
- Select the subsection Searching Windows on the left sidebar.
- On the right pane, under “Find My Files” head, there would be Classic and Enhanced options.
- Choose Enhanced mode whenever you’d like to keep the search extensive, looking into the entire system, including the libraries and desktop.
- Otherwise, you can switch to the Classic mode.
5] Exclude Folders During Search
Your device might have certain items that you don’t prefer others to know about. So, to prevent the secret folders from showing in the Windows search, you can exclude them. All you just need to do is to eliminate a folder by mentioning its path in the Search settings page. This is how you can accomplish the task –
- Launch the Settings app and head to the Search category.
- Be into the Searching Windows section that is available on the left side. Go to the Excluded Folders heading and you can view certain paths listed there.
- If you want to choose any folder from the given list then select the same. Otherwise, click the + Add an excluded folder button and choose the folder you wish to block.
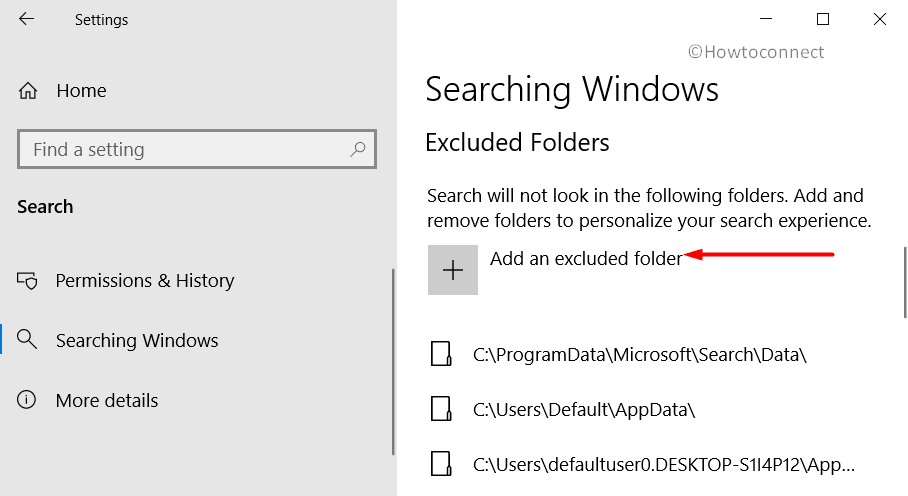
- Windows will not index the selected folder(s) in Search anymore.
- If at a later point of time, you’d like to have those indexed in search again, select the same and click Remove excluded folder.
6] Advanced Search Indexer Settings
There are some advanced options in Search settings if you’d like to do some more tweaks to enhance the experience. It offers you choices of rebuilding index database, the inclusion of encrypted files, the ability to make new file formats searchable, etc. Here are the steps and tweaks you can follow –
- Get access to Settings => Search => Searching Windows.
- Head to the Advanced Search Indexer Settings link on the right pane.
- In the Indexing Options wizard, perform a hit on the Advanced button.
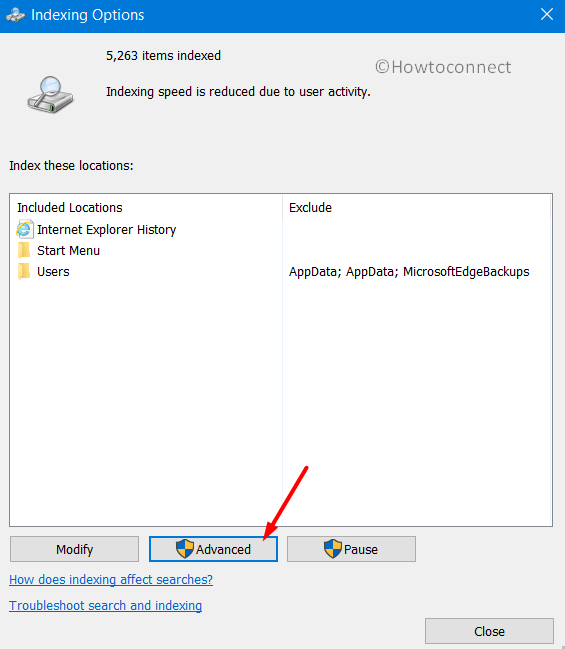
- The window that appears will have two tabs, be into the Index Settings. Under File Settings, you’ll see two choices –
- Index encrypted files: Selecting this would make encrypted files searchable.
- Treat similar words with diacritics as different words: Checking this would enable the OS to recognize two words as similar in case the words are the same, with the only difference being the presence of an accent.
- If the search hasn’t been working well, you can hit the Rebuild button under Troubleshooting. This will delete and recreate the Index database.
- The ‘Index location‘ section specifies the folder holding the index database. You can specify another folder of your choice. But we’d recommend to leave it as it is.
- Now, head to the File Types tab.
- To begin with, you’ll see two settings under “How should this file be indexed?” section.
- Index Properties: For indexing metadata information.
- Index Properties and File Contents: This is for indexing the metadata information as well as the file contents.
- Lastly, there is an option for Add new extension to list. It allows you to specify new file formats for making them searchable.
7] Troubleshooting the search-related issues
If any issues occur while conducting a search, then Windows 10 offers you a built-in troubleshooter. The tool will help you to resolve the common search issues. Here is how to put it into use –
- Perform a right-click on the Start icon and choose Settings.
- Click the Search category.
- Straightaway head to the Searching Windows subsection. Click the link Run the indexer troubleshooter to resolve common search issues.
- The troubleshooter wizard will come into view with possible problems. Choose the issue that you are facing and proceed forward.
- Once you complete with the scan, Restart Windows 10 PC and see if this fixes search-related issues.
Hopefully, by now you would be able to perfectly Customize Search from Settings App as per your preference. Make the changes and see which one index the best results for you.
Methods:
1] Manage the search history
2] Include Cloud content in the search
3] Limit the search results
4] Using enhanced search mode
5] Excluding folders during the search
6] Advanced setting customizations
7] Troubleshooting the search-related issues
That’s all!!