Registry hack to Disable Cortana Service on Windows 10 after Anniversary Update – Microsoft’s Windows 10 Anniversary Update is hitting very shortly and that too with loads of inventive features. You will be probably sad with one of them – due to the incapability to turn off Cortana personal help feature. The operating system updates will replace the simple and old search box of Cortana.
Certainly, not everybody wants to connect to Cortana’s qualities, regardless of how helpful and magnetic it might be. Well now, uproar on the internet has started mainly, because updates are compulsory with Windows 10. People who feel Cortana is forcefully being mandatory on them are not glad, and that consists of people who just do not want a digital help muscling in on their PC. Furthermore, people worried about privacy issues as well as the kind of information Cortana may be perched up from their searches (mixing Windows 10’s accessible privacy miseries).
Want to Disable Cortana Service on Windows 10 after anniversary update?
Cortana is said to be the all new digital help packaged with Windows 10. You have the power to regulate Cortana implementing voice commands or discover different information from the internet by typing in the search box or computerize definite works on your PC. Oppositely, few users do not like the service of Cortana regarding privacy and other reasons.
The users will be astonished cognizing that no choice will remain to disable Cortana service on windows 10 once they obtain Anniversary Update. Microsoft has deleted the disable option for Cortana in Windows 10 Anniversary Update.
In the earlier edition, titled ‘Threshold 2’ (1511), the user could apply the gear-shaped Settings icon in Cortana in order to instantly disable it. Instead, there were other alternatives. You can disable it from your Settings app. But, there is a method to disable or uncheck Cortana with a Registry hack.
Steps to Disable Cortana Service on Windows 10 After Anniversary Update
Follow the below-mentioned steps:
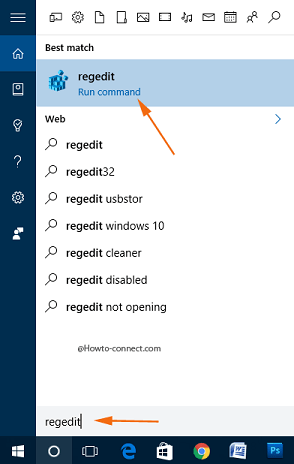
Step 1 – Launch registry editor with the method suitable for you. However, the easiest one is writing regedit in the Search box of Cortana and click the same on the top.
Step 2 – Follow the below-given path
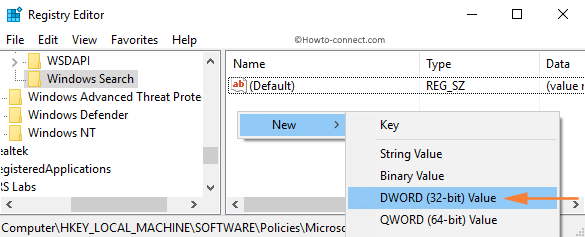
HKEY_LOCAL_MACHINE\SOFTWARE\Policies\Microsoft\Windows\Windows Search
Step 2 – Move towards the right pane of the registry editor and locate AllowCortana. If it is not available create a new one.
Step 3 – Perform a right click in an empty space and choose New followed by DWORD (32-bit) Value. Give it a name AllowCortana.
Step 4 – Double click on the AllowCortana subkey, write value data 0 and hit OK.
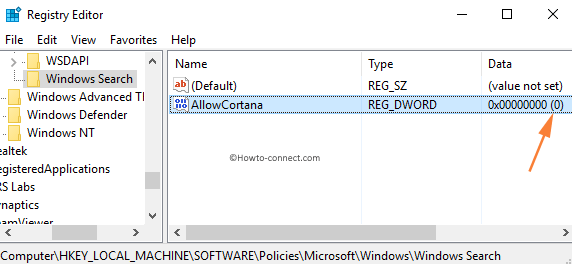
It is noteworthy that though you are operating Windows 10 64-bit, still you need to generate a 32-bit DWORD value.
Finally, restart your Windows 10 and that’s it!
Conclusion
Hence, gratitude to the registry hack which has made possible to Disable Cortana Service on Windows 10 After Anniversary Update.