You might be a lover of cloud storage such as Dropbox, Google Drive, Box, or others and want to quit the Windows 11 built-in OneDrive. However, Microsoft has configured the OneDrive to work as a native cloud service on Windows 11 but many people want to get rid of this. There are simple ways using which you can disable OneDrive in Windows 11.
To deactivate and uninstall the cloud service functionality, you can use Registry settings, Group Policy Editor, and its Settings. Furthermore, you can pause the Sync for a certain time such as 2, 8, and 24 hours. The Settings, uninstallation, regedit, and Gpedit methods will completely disable OneDrive, and Pause Syncing will temporarily.
Disable OneDrive in Windows 11
Here is How to disable OneDrive in Windows 11 –
Way-1: Using Unlink this PC
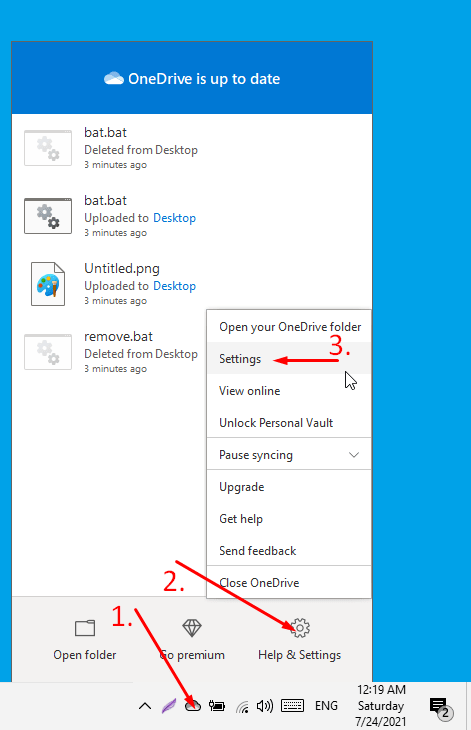
- Click OneDrive Cloud icon from the taskbar (Note: If you can’t see the icon, first of all, click on Search, Type onedriive, and hit Enter).
- Next, click – Help & Settings.
- Select – ‘Settings’.
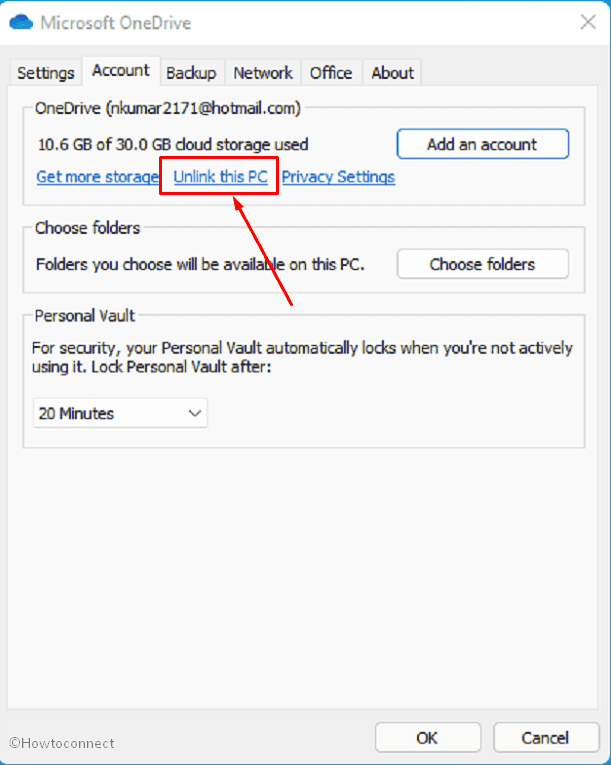
- Click – Unlink this PC.
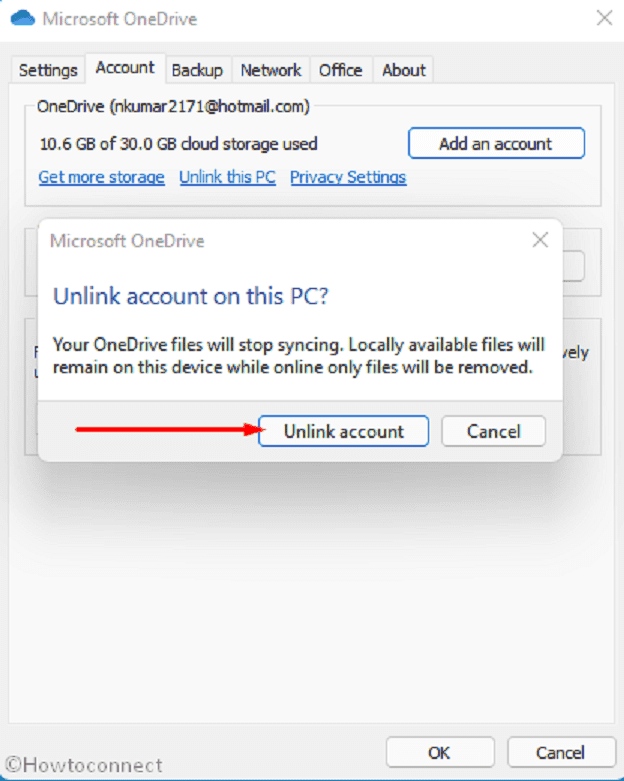
- On the confirmation dialog, select – ‘Unlink account’.
Way-2: By uninstalling OneDrive
Additionally, you can uninstall OneDrive to disable the built-in cloud in Windows 11 as one of the best methods using the following steps –
- Press the – Win+I.
- Select – Apps.
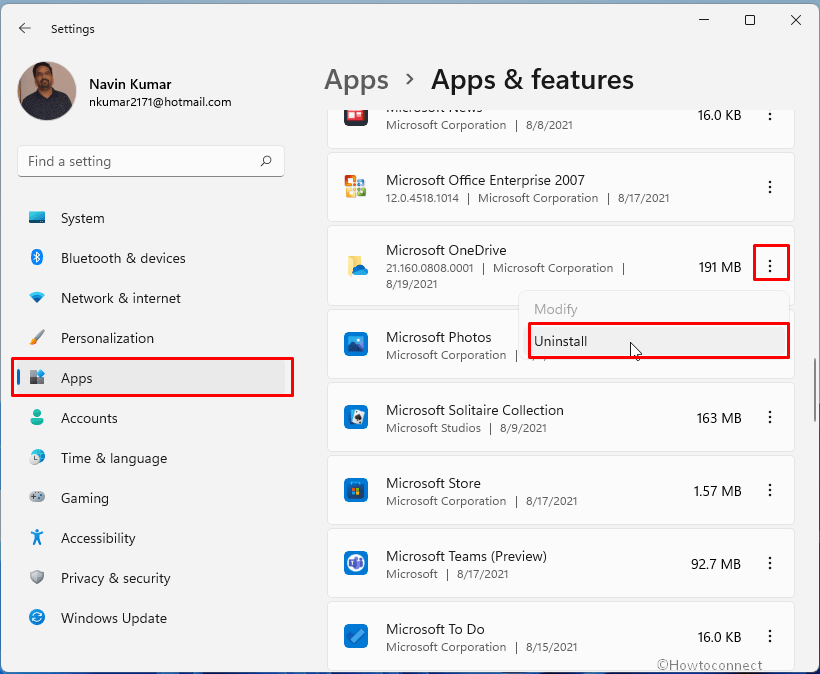
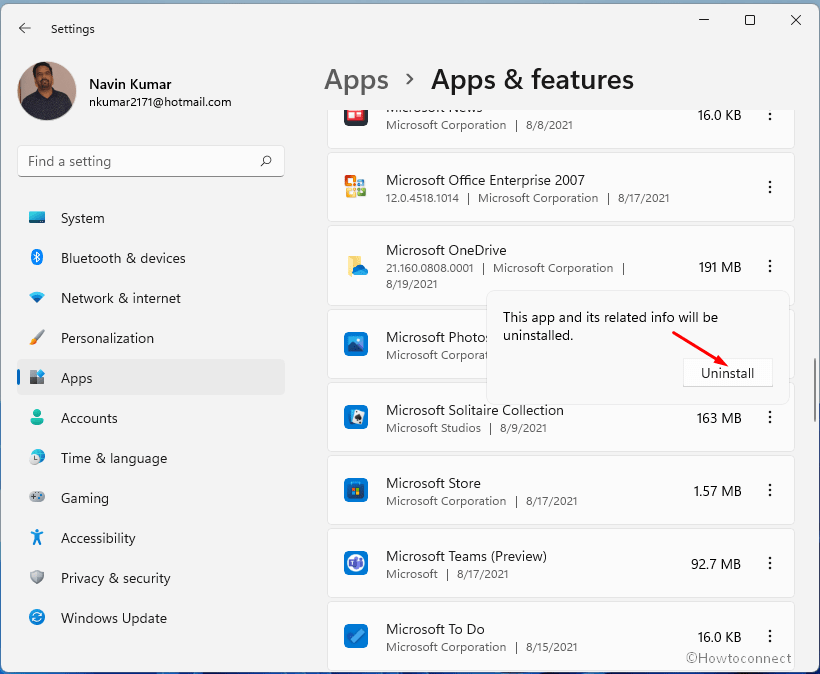
- On the right pane, scroll down and locate Microsoft OneDrive.
- Click on 3 dots icon and select – Uninstall.
- A small pop-up will appear, again click “Uninstall” there.
- On the User account control warning dialog, select – Yes.
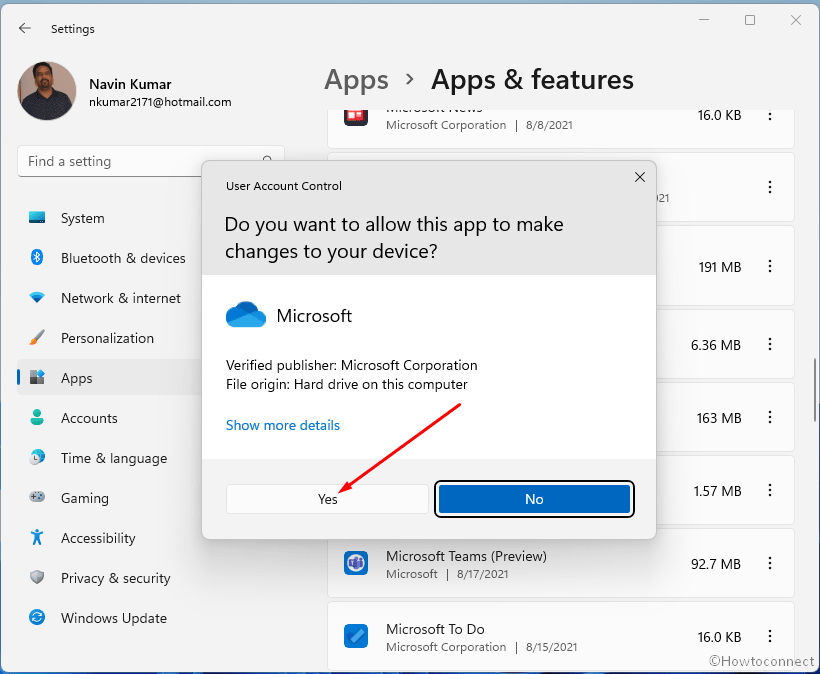
- Wait for a little until the OneDrive is removed and reboot your PC.
Way-3: Through Group Policy Editor
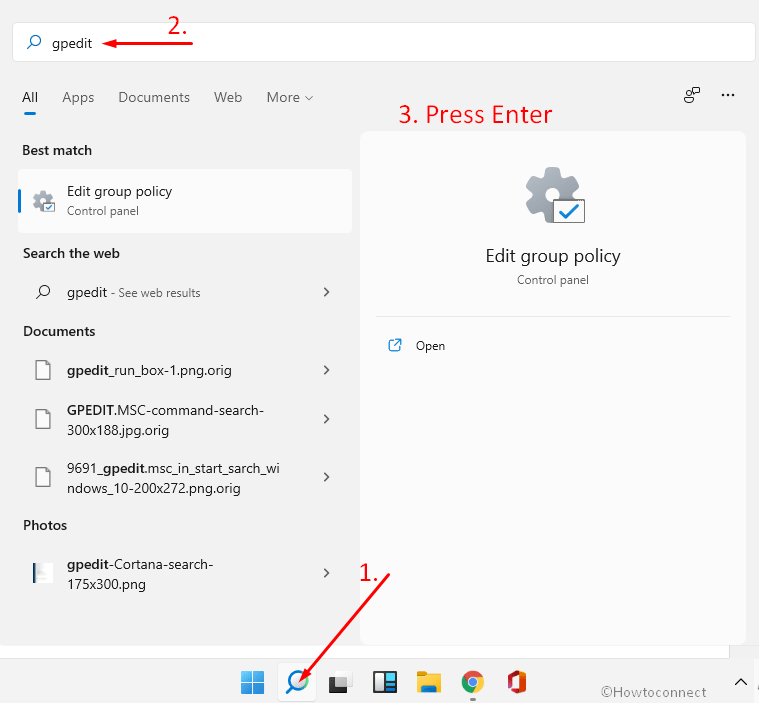
- Click the – Start.
- Type in – gpedit.
- Press the – Enter key.
- When Group Policy Editor appears, navigate to –
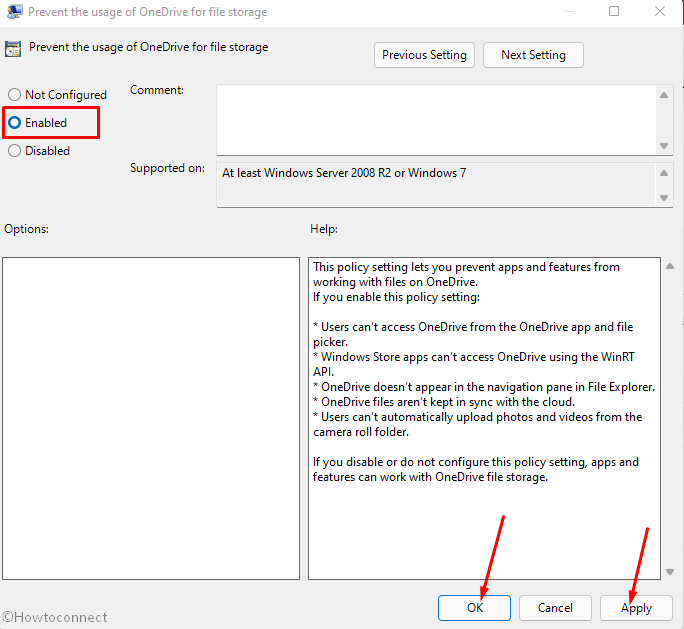
Computer configuration > Administrative Templates > Windows Components > OneDrive- Double click – Prevent the usage of OneDrive for file storage from the right pane.
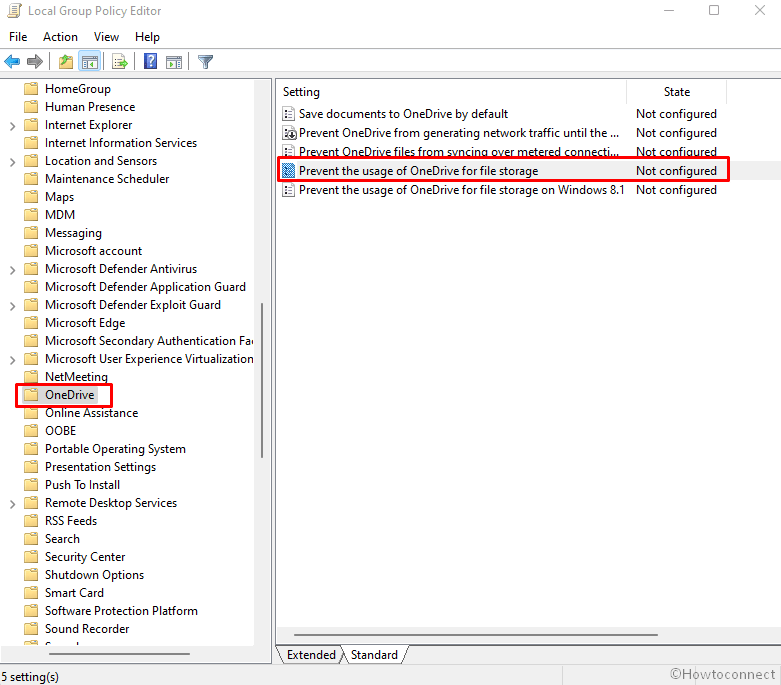
- Select Enabled from the Policy Setting window.
- Click Apply then OK.
Way-4: Via Registry Editor
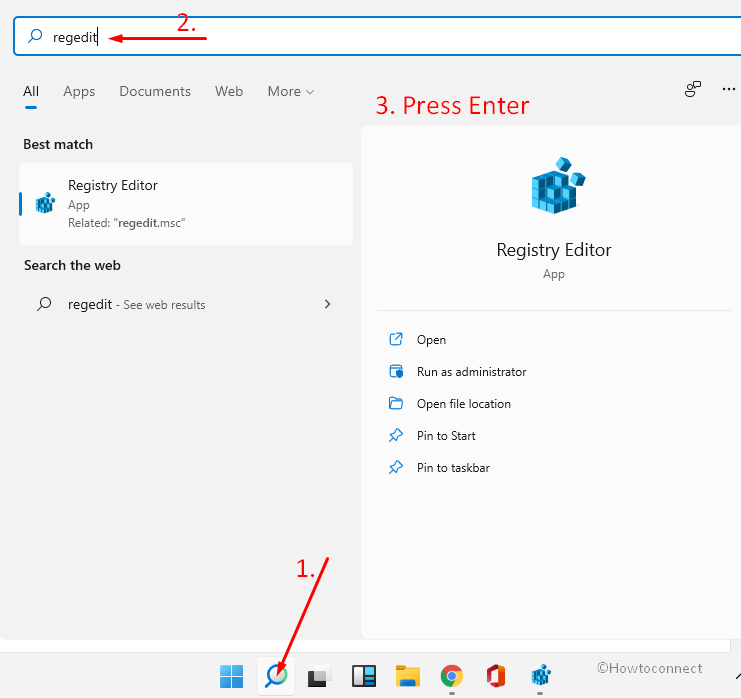
- Press Winkey.
- Type – Regedit.
- Hit – Enter.
- Click Yes on the UAC confirmation pop-up.
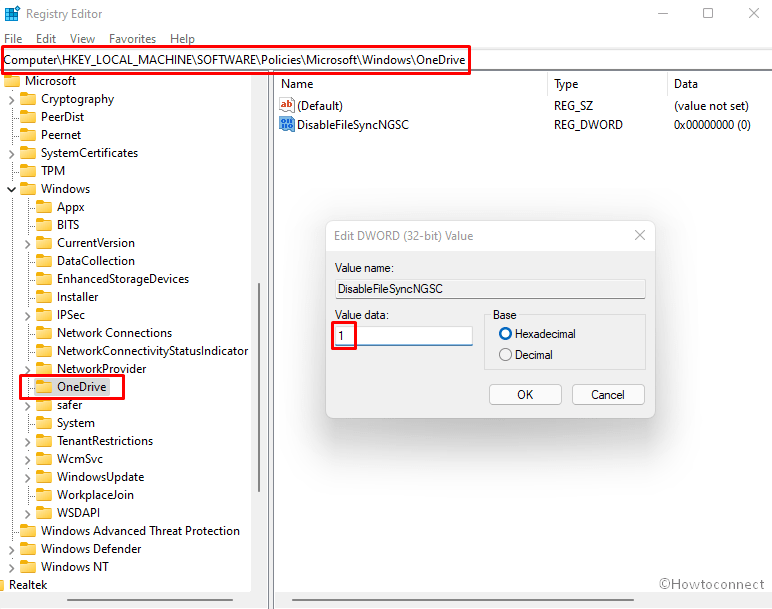
- Once the Registry Editor opens up, copy the below string, paste it into its address bar and press the Enter key –
Computer\HKEY_LOCAL_MACHINE\SOFTWARE\Policies\Microsoft\Windows\OneDrive
- Go to the right pane and double click the DWORD DisableFileSyncNGSC.
- In the Value data field, put in 1 and click OK.
- In case you can’t find DisableFileSyncNGSC DWORD or OneDrive key then create a new one and change the Value data. You can find the help here – How to create a new key in Registry Editor Windows 11.
- Finally, restart your computer to see the effect of changes in the entry.
Way-5: Using Pause Syncing
If you want to temporarily disable OneDrive for a period of time Windows 11 provides 3 options. You can see the method for the same here too – How to Pause Syncing in OneDrive for 2, 8 and 24 Hours. Furthermore, you can follow the steps –
- Click on OneDrive icon from the Notification area on taskbar.
- Click – Help & Settings.
- Choose anyone from 2 hours, 8 hours, and 24 hours that fulfills your need.
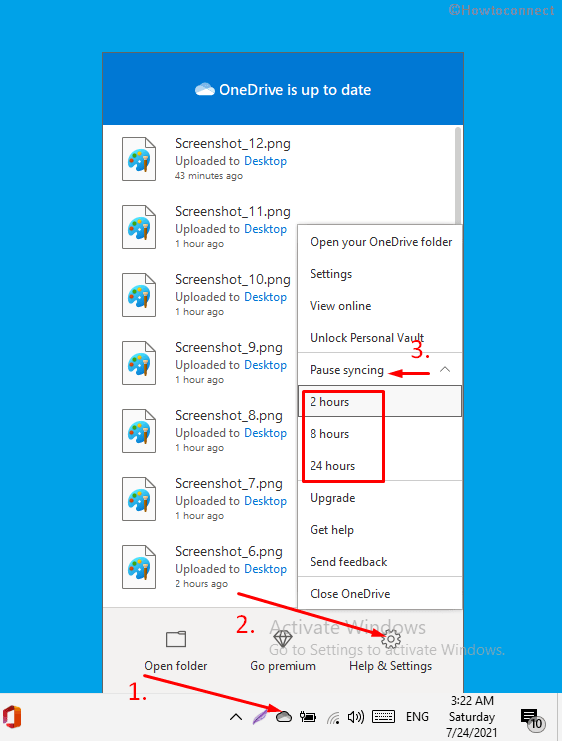
- After the time gets over the syncing will be automatically started.
Methods list:
Way-1: Using Unlink this PC
Way-2: By uninstalling OneDrive
Way-3: Through Group Policy Editor
Way-4: Via Registry Editor
Way-5: Using Pause Syncing
That’s all!!