Turning the PC off and on every time you walk away from the device is pretty annoying and time-consuming as well. For safety and privacy purposes, the better option is to have your screen locked when you leave. So, in such scenarios, it is better when you Enable Automatic Lock in Windows 10.
Ideally, you should have a password for your lock screen to top the security. But it becomes even better when the device gets locked all by itself when you step away right? With a password protected lock-screen, your data and work will be secure and uninterrupted. Windows 10 provides you five different methods to carry out this auto lock task.
Ways to Enable Automatic Lock in Windows 10
Here is how to enable Automatic Lock in Windows 10 –
Use Windows Hello to Turn On Automatic Lock
Windows Hello is one of the great options that you can go ahead when it comes to using the automatic lock feature. To execute this procedure, first of all, ensure to pair your phone with your Windows 10 device. As soon as “Windows Hello” detects your mobile handset to be out of the Bluetooth range, it will lock the system. Here are the steps for this tweak.
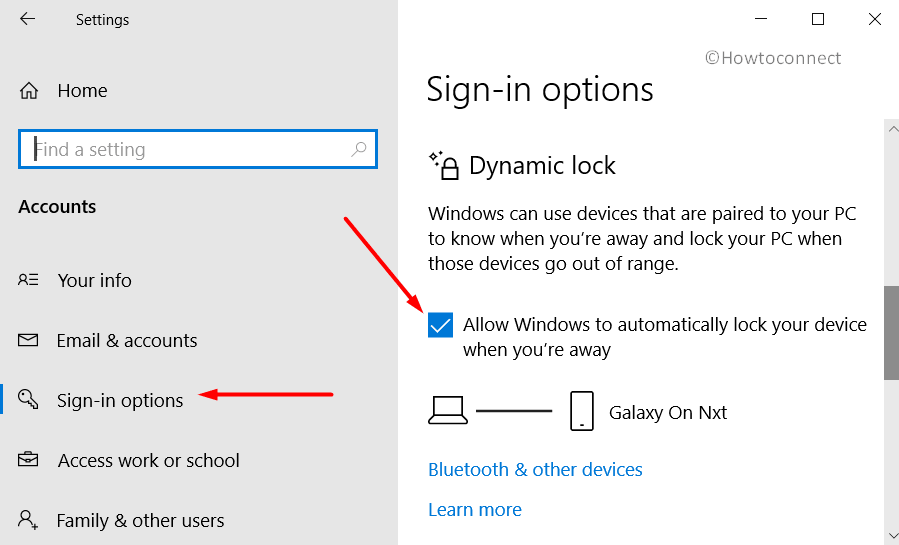
Step-1: Before starting this procedure, pair Bluetooth phone to your Windows 10 PC. After establishing the connection, open Windows Settings by jointly hitting “Win + I” hotkeys.
Step-2: When the app opens, navigate to Accounts category followed by a click on the sub-section Sign-in options.
Step-3: Select the checkbox corresponding to “Allow Windows to automatically lock your device when you’re away”.
Now try walking away with your phone. The PC will all by itself get locked once it loses the Bluetooth connectivity with the phone.
Enable Automatic Lock in Windows 10 Through Registry Editor
You can also set your system for the auto lock by modifying Registry Editor. In Registry, you will be able to set the time in seconds after which the device will switch to lock screen without your interference, that is when left inactive.
- In the search box, type Regedit. Click on the result to access Registry Editor.
- Navigate to the below Registry key location on the left sidebar.
HKEY_LOCAL_MACHINE\SOFTWARE\Microsoft\Windows\CurrentVersion\Policies\System- Switch to the right-hand side pane, right click on an empty space and select New followed by a hit on DWORD (32-bit) Value. Name this one as InactivityTimeoutSecs.
- Execute a double-click on this new DWORD to modify its value. Now, set the value data in decimals to a number between 0 and 599940. This will determine the number of seconds of inactivity after which the Operating system will lock your system.
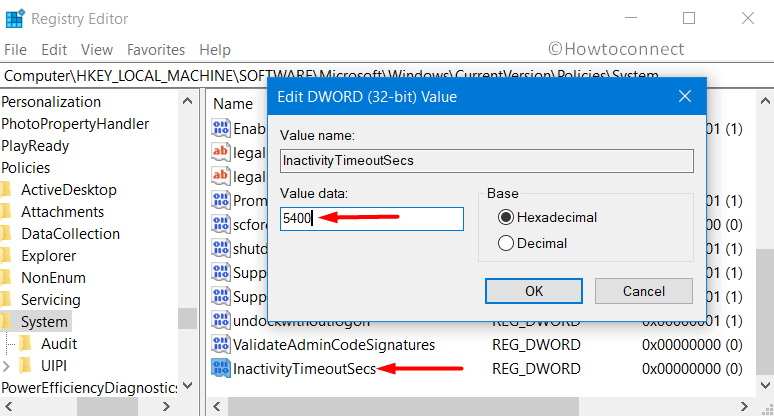
- If you set the value to 0, it would disable the auto-lock feature. Preferably set the value above at least 5 seconds.
- Finally, Restart Windows 10 PC.
Via Windows Security Policy
If you don’t find Registry Editor comfortable, you can use this procedure as well.
- In the search box, type Secpol. One of the results would be Local Security Policy, so, click on it to access it.
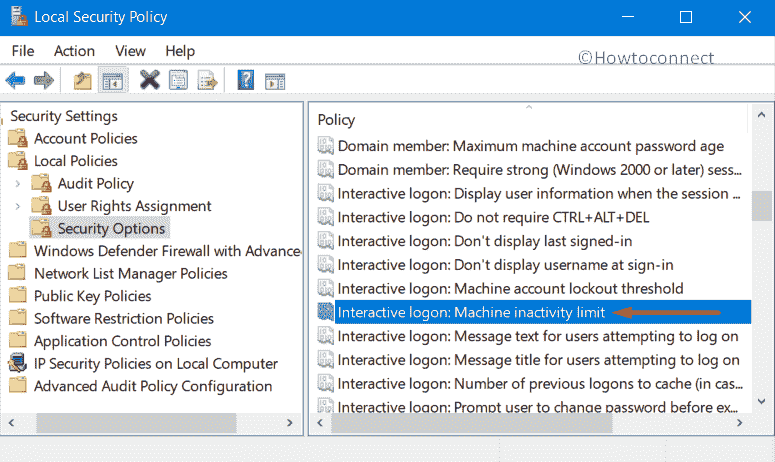
- On the left pane of the following screen, reach out to Local Policies => Security Options. This will open a list of policies on the right-hand side.
- Locate and double-click the policy namely Interactive logon: Machine inactivity limit.
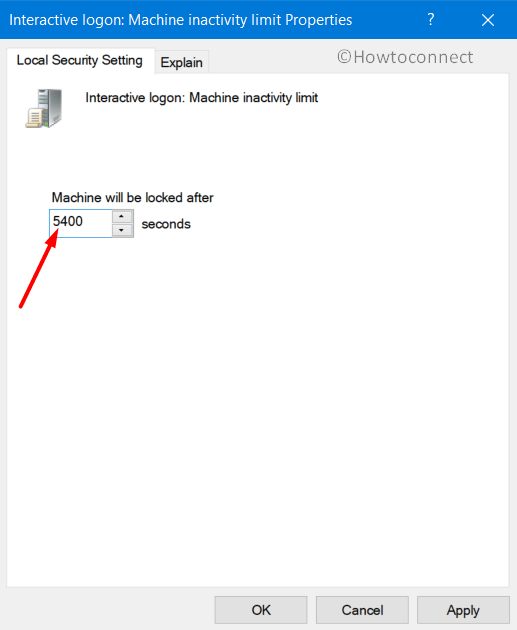
- The properties dialog of the policy will show up on the PC screen. In the box below “Machine will be locked after” text, set the number of seconds after which you would like the screen to be locked. The value can be anything between 0 and 599940. Again, set the value above at least 5 seconds.
- To make the changes effective, reboot the device.
Use automatic Sleep to Screen lock Windows 10
You are able to enable Automatic Lock in Windows 10 by customizing Power & Sleep settings. Let’s see –
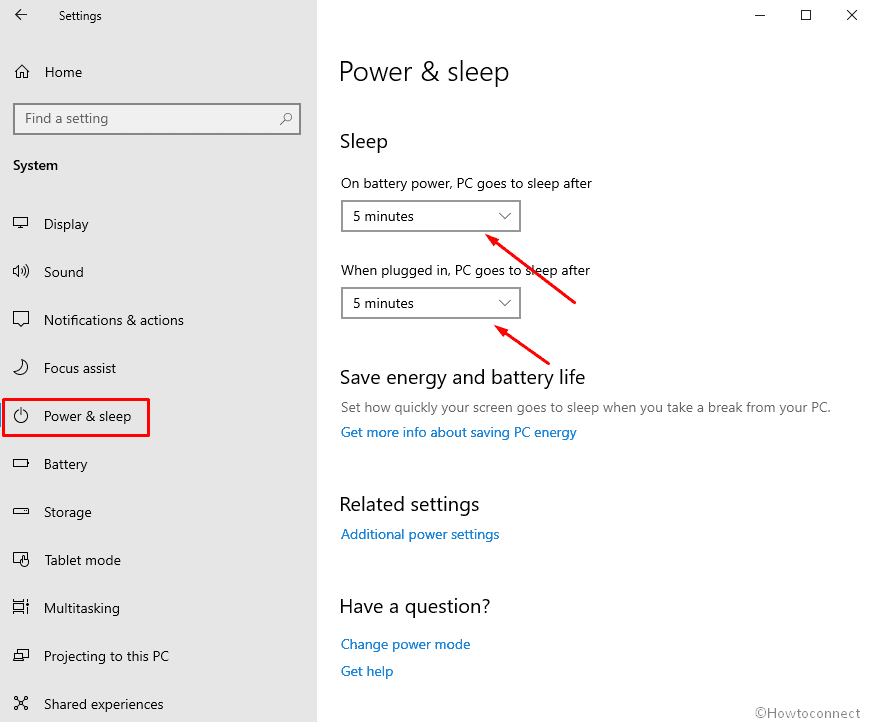
- Open Windows Settings (Win+I).
- Select System.
- Click on Power & sleep from the left-hand side pane.
- Select the time in both dropdowns under Sleep after when you want to enable automatic lock in Windows 10.
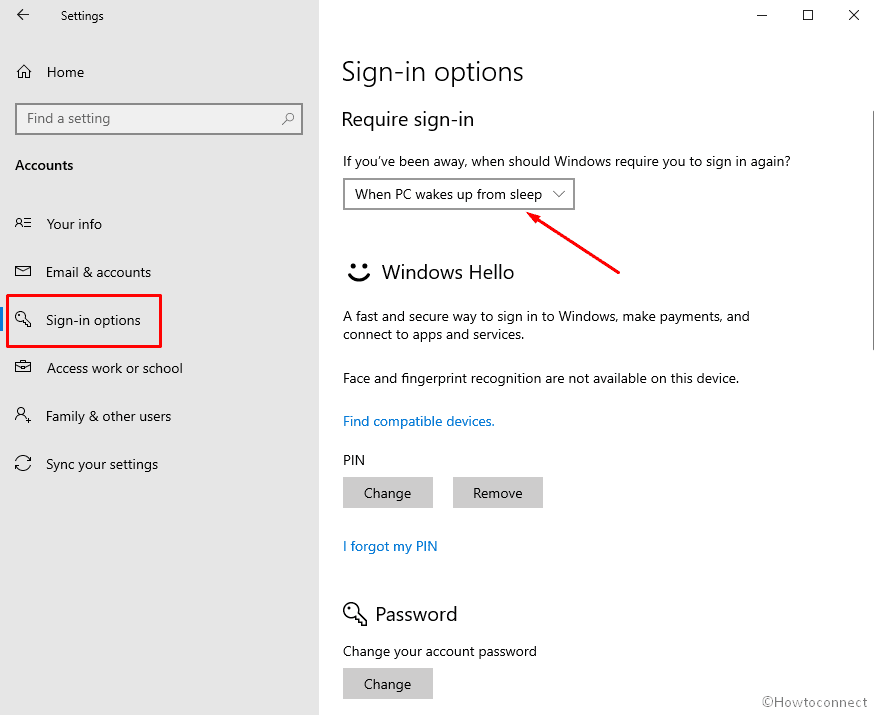
- Now click on the Home icon to return back to Settings Homepage.
- Click on Accounts.
- Choose Sign-in options from the left pane of the page.
- Click on the dropdown under Require sign-in and select the option When PC wakes from sleep.
Set Screen saver to Enable Automatic Lock in Windows 10
However, Screensaver is not so popular among Windows 10 users still you have the ability to lock your screen automatically applying it.
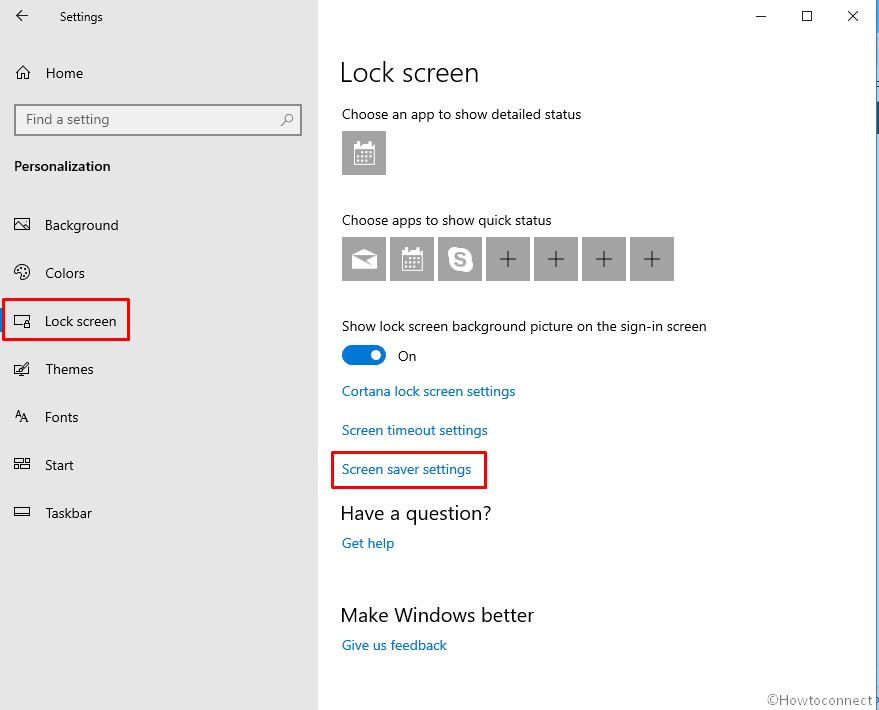
- Again, open Settings application (Win + I).
- Click on Personalization.
- Select Lock screen from the left pane and go to the corresponding right.
- Scroll down and click on the link indicating “Screen saver settings”.
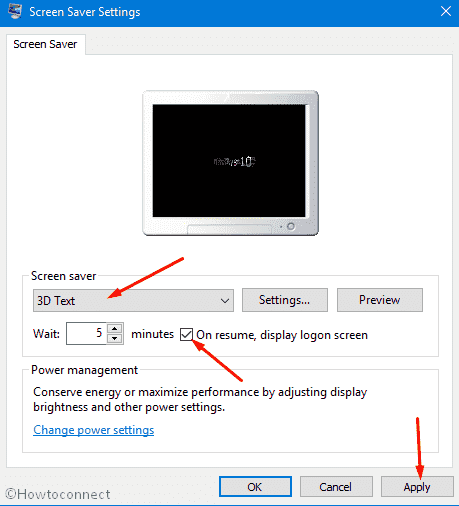
- Click on the Screen saver drop down and choose the one that meets your requirement.
- Just under this, provide a time in Wait section.
- Check the box before – On resume display logon screen.
- Finally, click on Apply and Ok to effectuate the change.
See here – How to Fix Login Screen Prompts Very Often in Windows 10.
That’s all!