Personalization category has got an option in Windows 11 22H2 (22621) that allows using Stickers. This will provide you to choose stickers for your wallpaper. However, if not seeing this feature you can enable Desktop Background Stickers using a registry trick.
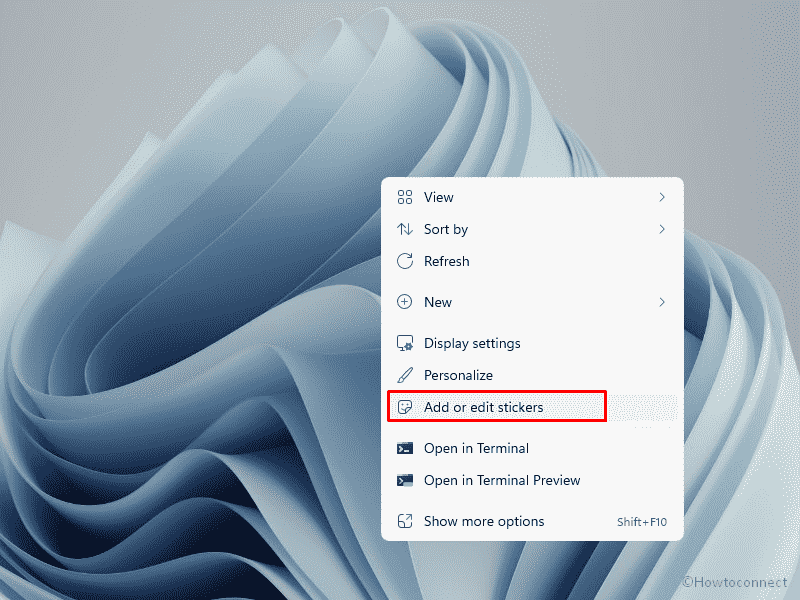
Once you enabled it, desktop icons and taskbar will disappear. The selection will include Add or edit stickers option in the Context menu of the desktop. Using this you can change the size and position of the sticker. See – How to Reset Windows Spotlight Lock Screen in Windows 11/10.
Enable Desktop Background Stickers in Windows 11
Here is how to enable Desktop Background Stickers in Windows 11 –
Way-1: Using Settings
After the feature is included in the system you can disable and enable stickers in Windows 11 directly from Settings. Follow the method –
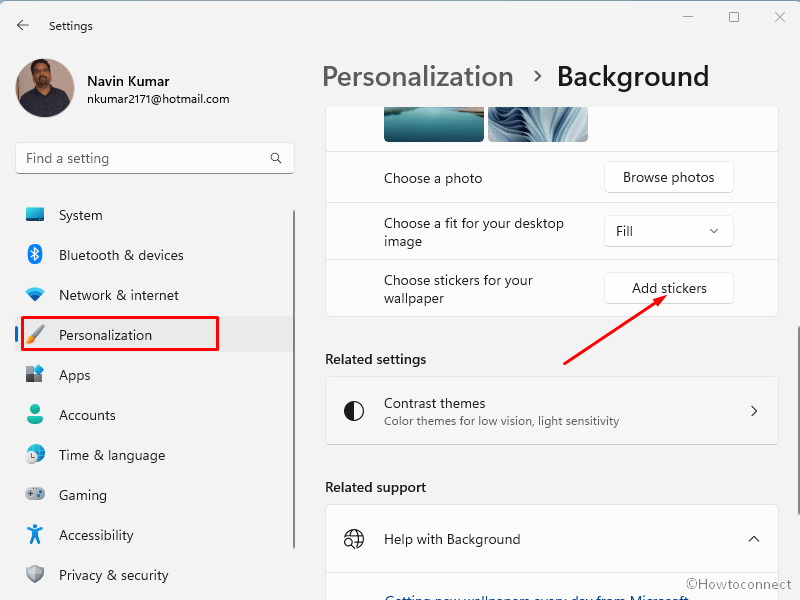
- Press Windows + I.
- When the Settings app appears, click on Personalization.
- Go to the right and select Background.
- You can see – Choose Stickers for your wallpaper. Click Add stickers.
- Navigate to the desktop and select a sticker.
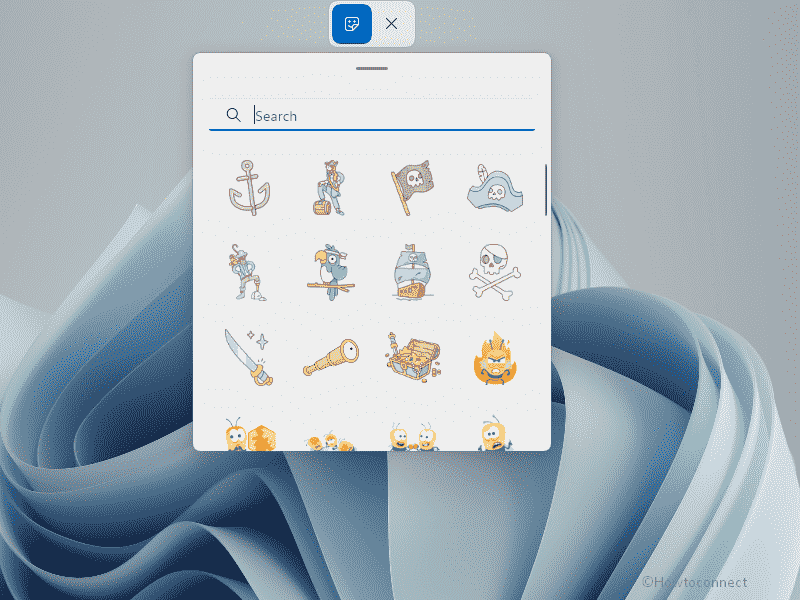
- Once selected it looks as below –

- To modify, click Add or edit stickers.
Way-2: Enable Stickers in Windows 11 via Registry
If the Desktop Background Stickers Setting is greyed out and you can not add then use regedit (Registry Editor) and modify a key by following the steps –
- Click on Start from the taskbar.
- Type – regedit. See – How to open Registry Editor in Windows 11 (Best Ways).
- Press – Enter.
- Select Yes on the User account control prompt.
- On the Registry Editor, go to the path –
HKEY_LOCAL_MACHINE\SOFTWARE\Microsoft\PolicyManager\current\device
- From the left directory, right-click on device.
- Select New > Key.
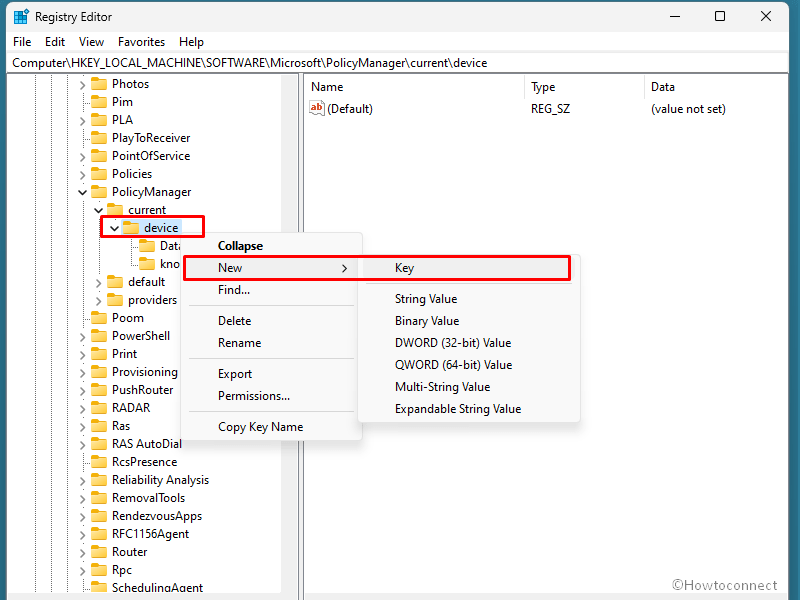
- Name this key – Stickers.
- Go to the right, right-click, and select New > DWORD (32-bit) Value.
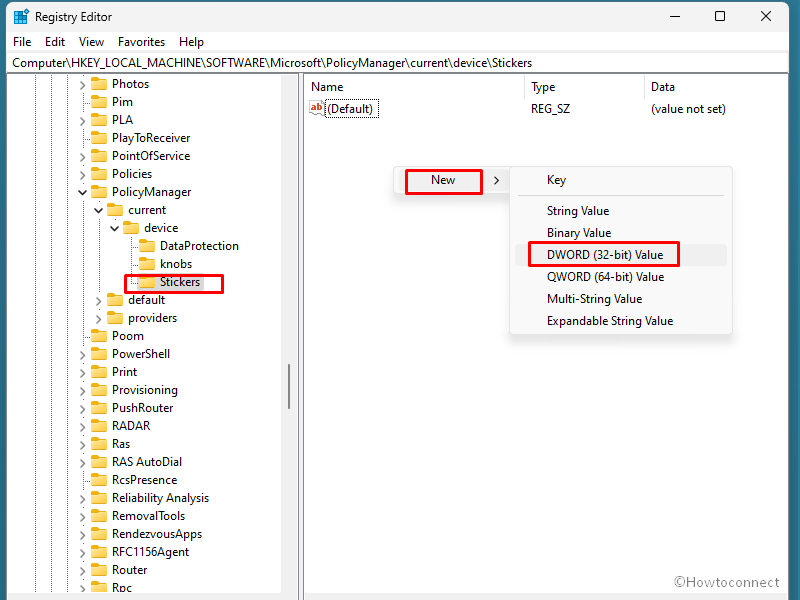
- Name this – EnableStickers.
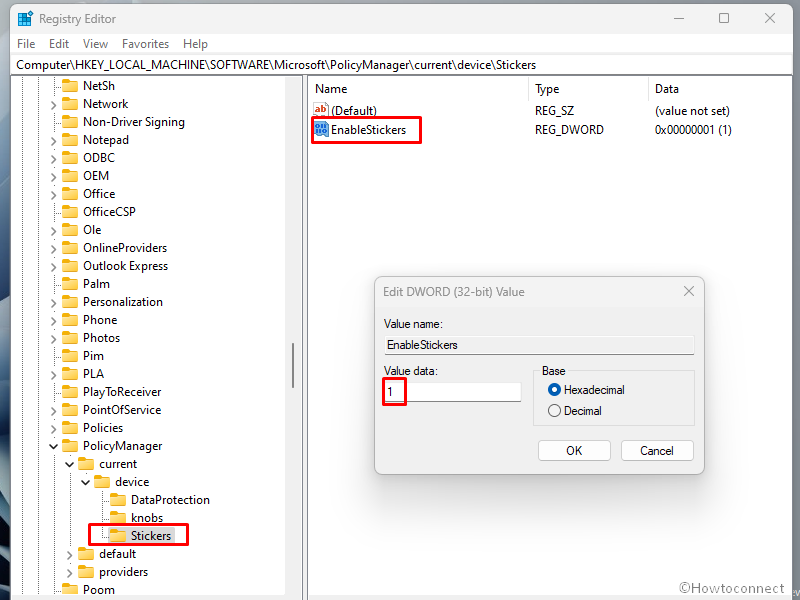
- Double click on this Value.
- Enter 1 for the Value data (0 will disable stickers in Windows 11).
- Restart your computer.
- Now press Winkey+I.
- Select ‘Personalization’ and then ‘Background’.
- You will notice that Add stickers is working now.
- Finally, click on this and choose stickers for your wallpaper.
Methods list:
Way-1: Using Settings
Way-2: Via Registry
That’s all!!