The release of Windows 10 Fall Creators Update carries various features but at the same time focuses on the user interface design as well. It contains various Fluent Design elements like the translucent effect in the Start menu, Action Center and also made other parts of Windows UI actually distinguishable. Though it gives a revamped look to the first party apps, many users are out there who do not prefer this invention. So, if you too feel the same, then you can simply Disable Fluent Design Shadowing in Windows 10.
Visual effects of Fluent Design in Windows 10 has particular attention from Microsoft for a time being. The developer did introduce a good lot of improvements in this project. However, depending on your preference, you can choose to enable or disable Fluent Design and decide the appearance of your system. There are two different ways to change transparency so let us explore both of them in details.
Way to Enable and Disable Fluent Design Shadowing in Windows 10
Here is how to enable and disable Fluent Design Shadowing in Windows 10
Through Windows Settings
Changing the transparency in Personalization settings can help you disable the unnecessary visual effects. Here is how –
Step-1: Press Windows logo + I keyboard shortcut keys to open Windows Settings, the built-in app of the OS.
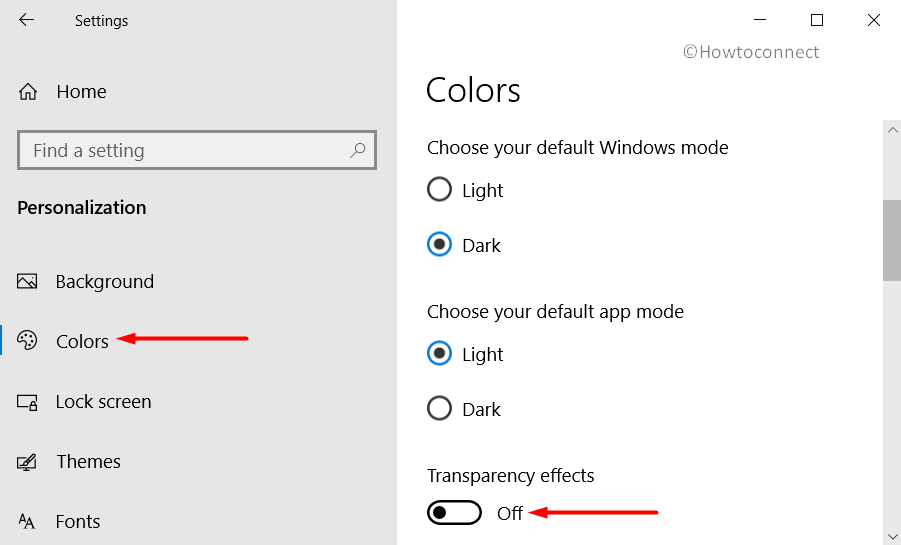
Step-2: Navigate to the Personalization category. Select the Colors subsection from the left sidebar of the following page.
Step-3: Move to the right-hand side and toggle Off the button corresponding to “Transparency effects“.
Via Advanced System Properties
- Click Cortana search box, type sysdm.cpl and select the same command on the results list.
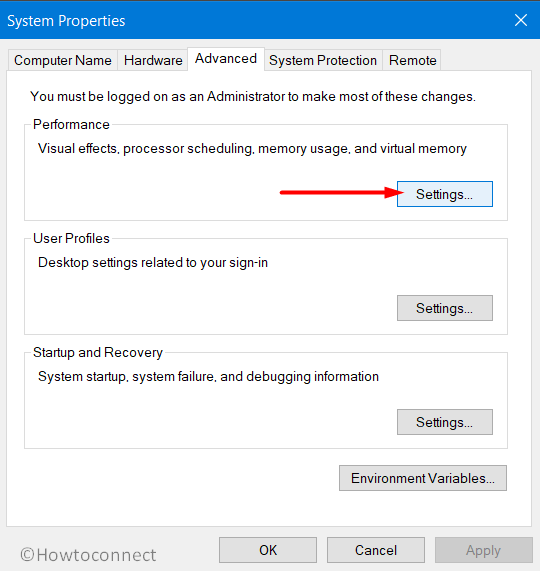
- Once “System Properties” dialog shows up on the PC screen, switch to the Advanced tab. Moving ahead, click on the Settings button that you can see under the ‘Performance’ head.
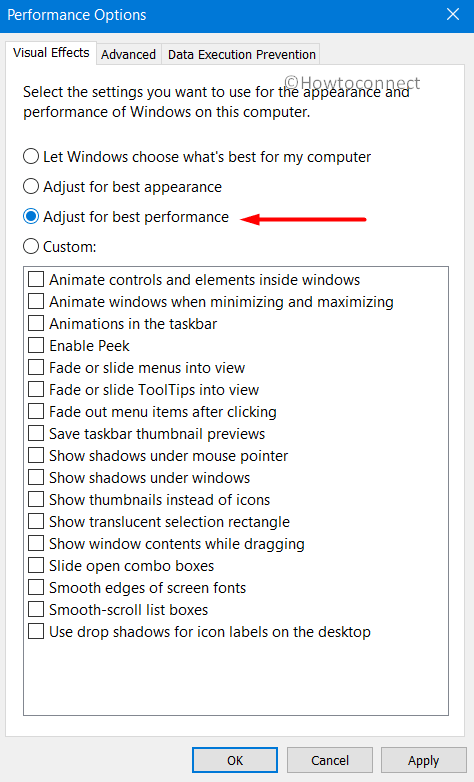
- This will open yet another dialog box and by default, “Let Windows choose what’s best for my computer” will be active/selected.
- In order to disable the visual effects, select the radio button corresponding to Adjust for best performance option. This would uncheck all such options linked to visual effects and will Disable Fluent Design Shadowing.
- Keep the choices not related to visual effects enabled. So, just select the options like “Show thumbnails instead of icons, Show translucent selection rectangle, Show window contents while dragging, Smooth edges of screen fonts, and Use drop shadows for icon labels of the desktop”.
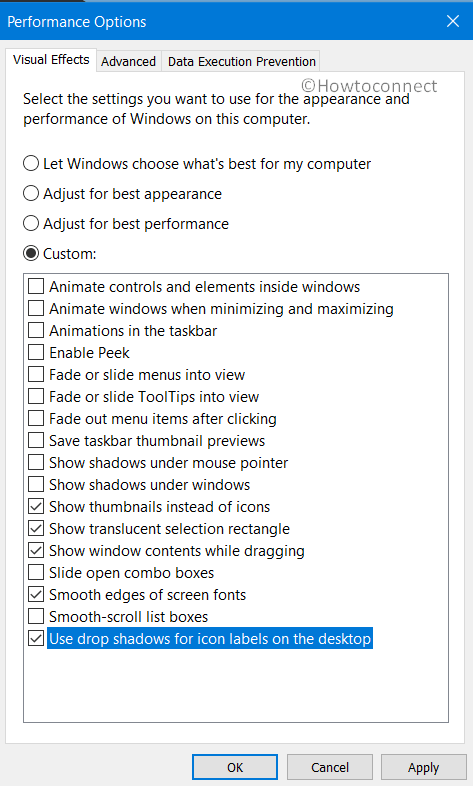
- Press on Apply followed by a hit on OK to Disable Fluent Design Shadowing in Windows 10. There will no longer be any unnecessary effects active.
- To enable the effect, simply select the radio button namely Let Windows choose what’s best for my computer.
How Show Smooth Edges of Images and Text in Windows 10
That’s all!