Windows 11 allows to remotely access another computer over the internet so that you can connect and control this PC from another device or location. However, you need to enable remote desktop, furthermore, modify some built-in configurations before establishing a connection or permit access to other.
Similar to the previous version, you have the ability to use Remote Desktop Protocol (RDP) in Windows 11. Settings related to this feature assists you to run other’s computer or server without being physically present at the place. Once you enabled this, you can take an external computer on remote using legacy Remote Desktop Connection app or the “Remote Desktop store app”.
Enable Remote Desktop on Windows 11
Here is How to enable remote desktop on Windows 11 –
Way-1: Through the Settings app
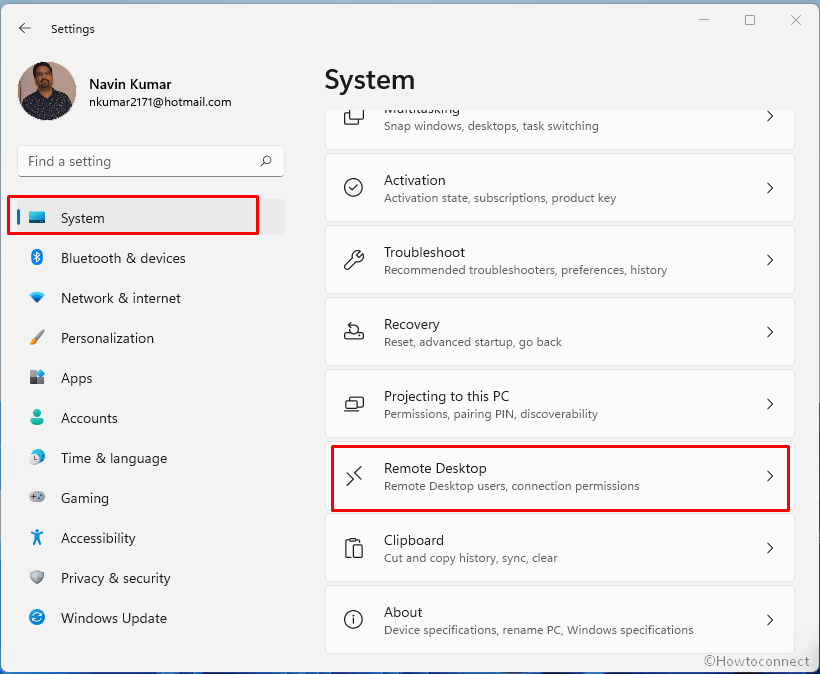
- Press – Win+I.
- Click – System from the left pane on the Settings app.
- Go to the right, select Remote Desktop.
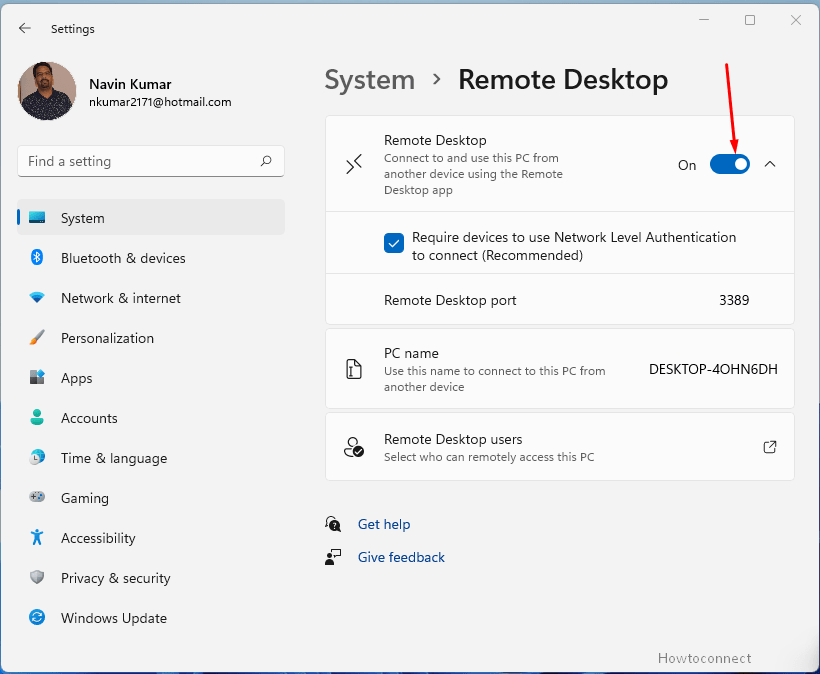
- Click on the toggle for Enable Remote Desktop.
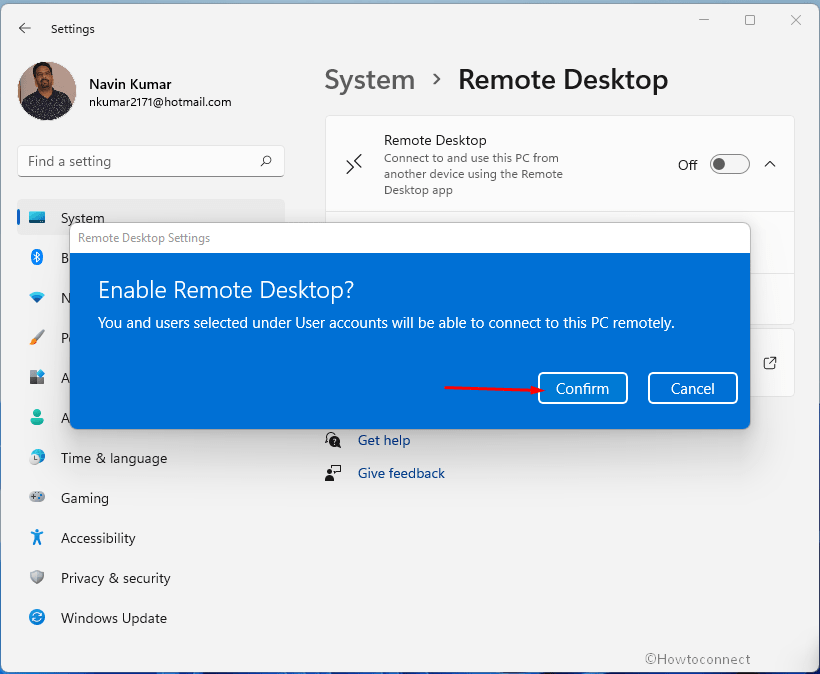
- You will come across a pop up – You and users selected under User accounts will be able to connect to this PC remotely. Click – Confirm.
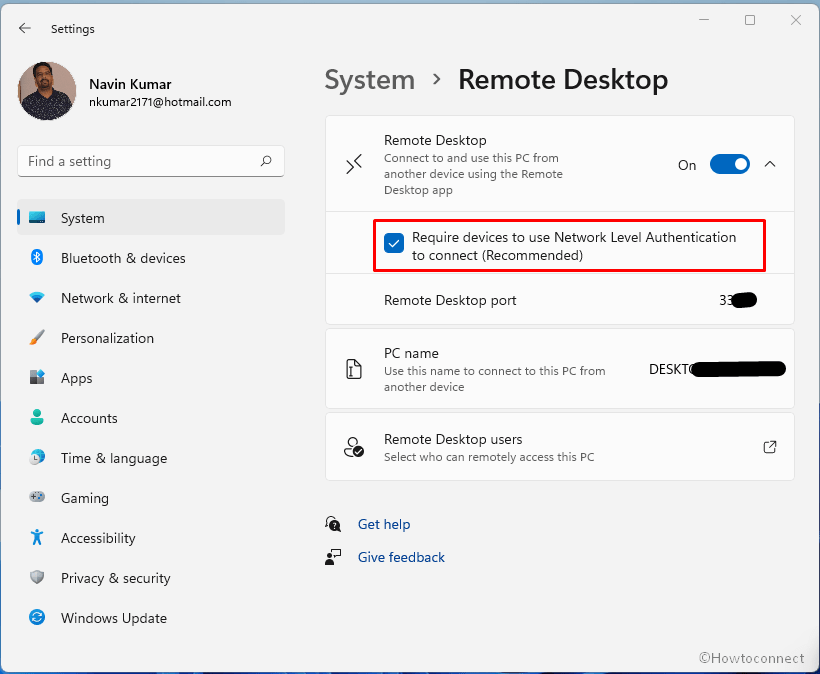
- When you enable, 2 options show up.
- Check the option – Require devices to use Network Level Authentication to connect (Recommended). You can see the Remote Desktop Port number there. After enabling this (NLA) option, you will have to authenticate the incoming connections to ensure there are no protection concerns.
- Now click the Search from taskbar and type control. Press Enter to open Control Panel.
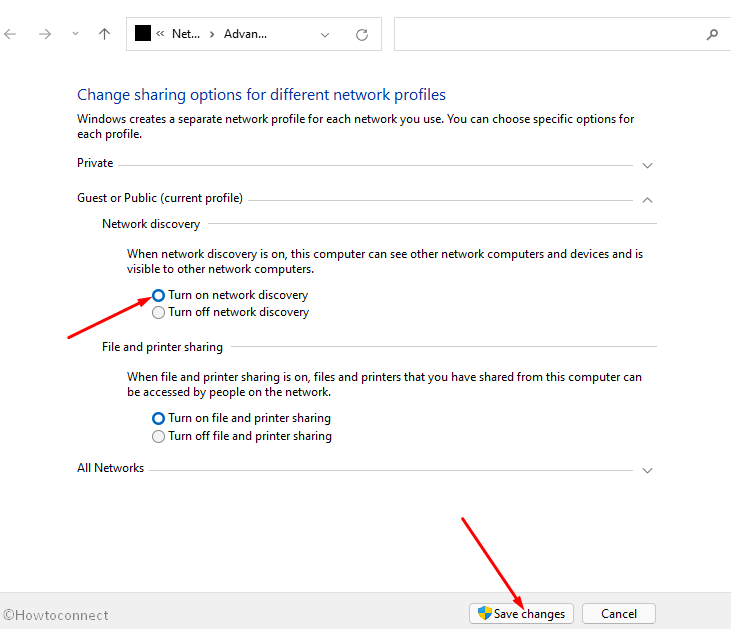
- Click – Network and Sharing Center.
- On the next window, click – Change advanced sharing settings from the left pane.
- Check the radio box for Turn on network discovery.
- Click – Save changes.
You can see – How to Disable, Enable Remote Desktop From Windows 10 Settings App.
Way-2: Enable Remote Desktop on Windows 11 via Control Panel
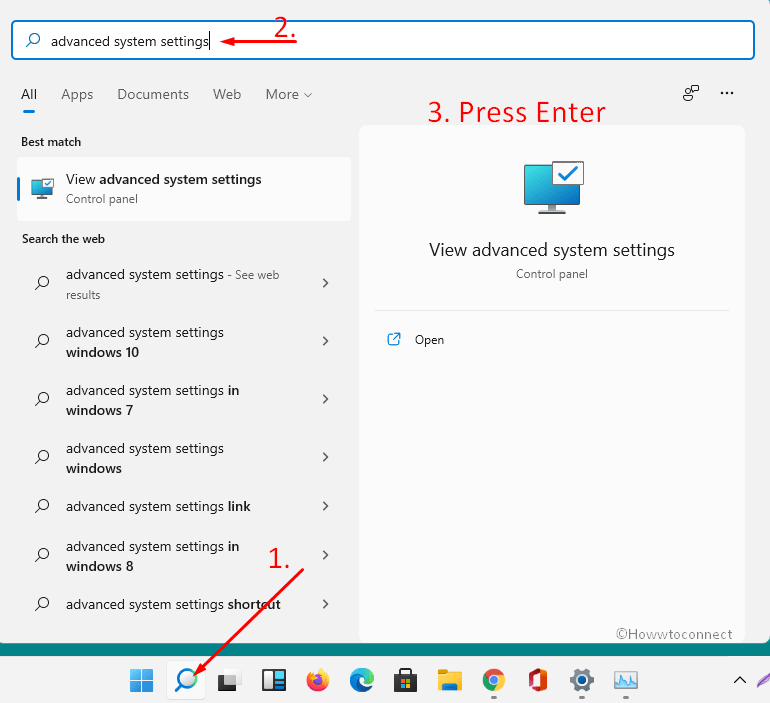
- Press – Winkey.
- Type – advanced system settings.
- Hit – Enter.
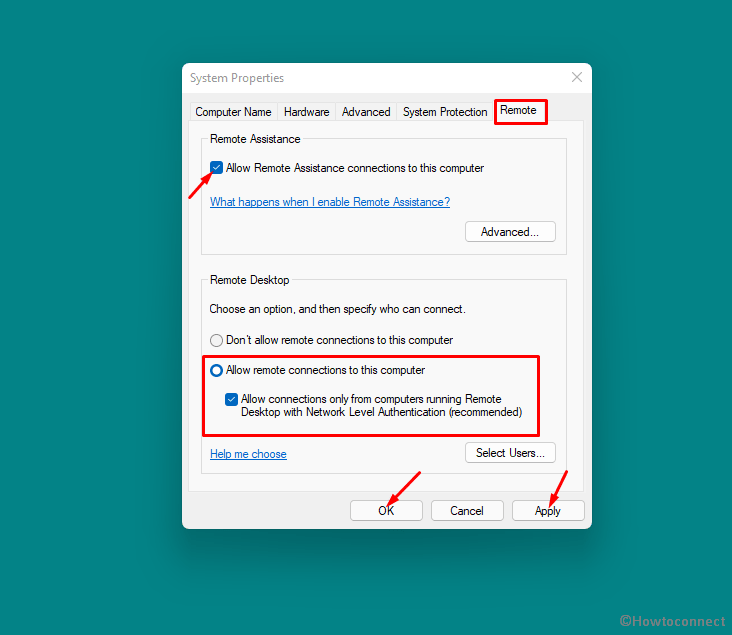
- On System Properties window, click on Remote tab.
- Check the box for – Allow Remote Assistance Connections to this computer.
- Go down to the Remote Desktop section.
- Also, select – Allow Remote Connections to this computer.
- And check – Allow connections only from computers running Remote Desktop with Network Level Authentication (recommended).
- Click Apply and OK to save the settings changes.
How to connect to Remote Desktop in Windows 11
1] Using Legacy Remote Desktop connection app
- Click Search from the taskbar.
- Type – remote desktop.
- Press – Enter.
- When a Remote Desktop connection app will appear, type the name of the computer you want to add. Note that the name of computer in written just under “How to connect to this PC” in “Remote Desktop Settings” page.
- Click – Connect.
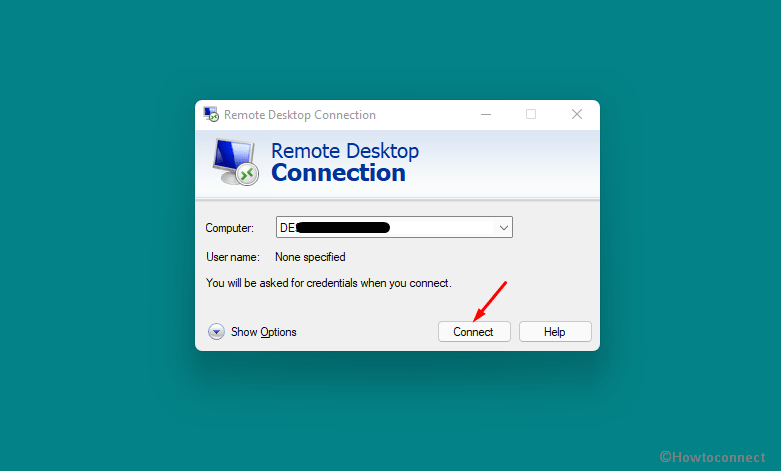
- If you want to use the username then click on – Show options.
- And check – Allow me to save credentials in case you desire.
Further, see – How to Add or Remove User that can Remotely Access This PC in Windows 10
2] Through Remote Desktop Store app
- Download Microsoft Remote Desktop from this link.
- When Installation is completed, launch the app.
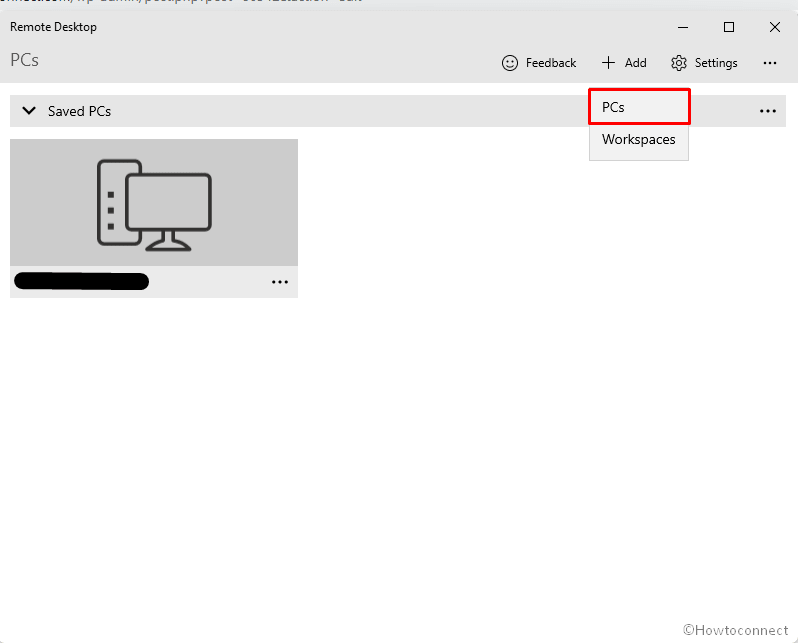
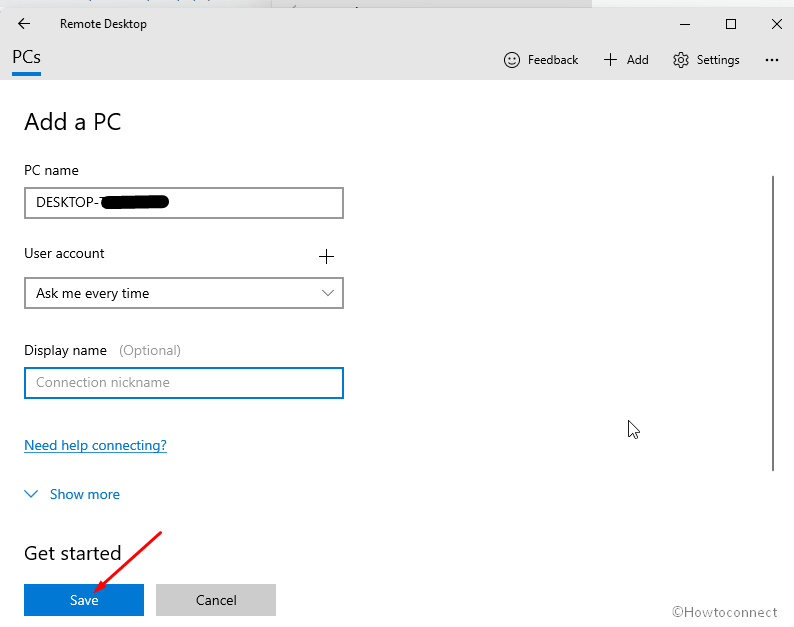
- Click +Add from the top menu bar.
- Select PCs or Workspaces whatever you need.
- If you have selected PCs type the Formal name or IP address of your PC.
- Click on – Save.
- Click on the Computer name to start remote connect.

You can read – Windows 10 – How to Establish Remote Desktop Connection
Alow the remote connections in Firewall
Using the above methods, you allow access to another computer to remotely connect to yours in Windows 11 but sometimes Windows Defender Firewall blocks the incoming connection. Therefore it’s better to configure firewall settings beforehand setting up a remote connection using the below steps –
- Press – Win+S.
- Type – Control.
- Hit – Enter.
- Select – Window Defender Firewall.
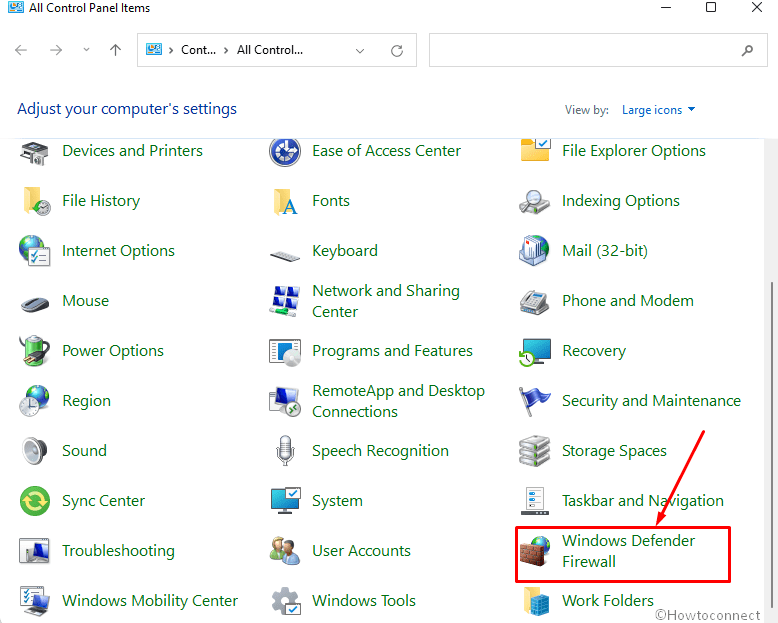
- Click – “Allow an app or feature through Window Defender Firewall” from the left pane of the next window.
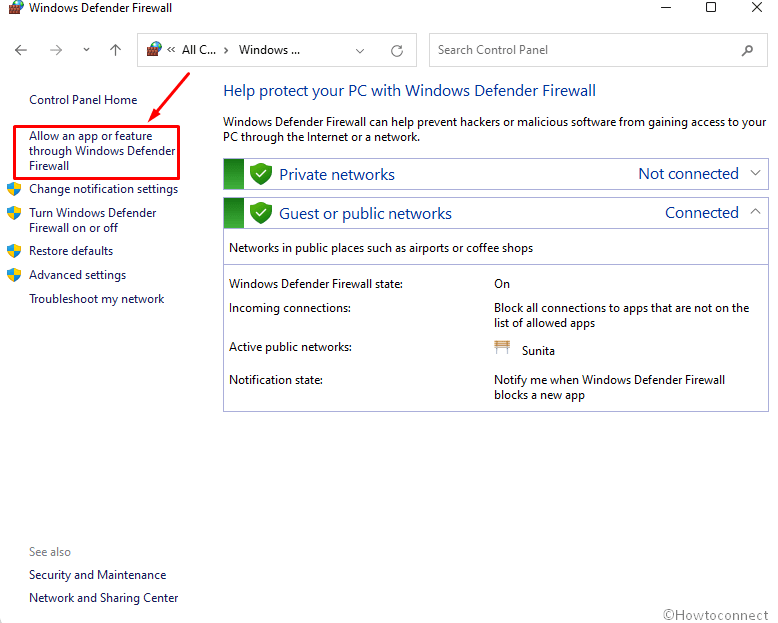
- Now, click on – Change settings.
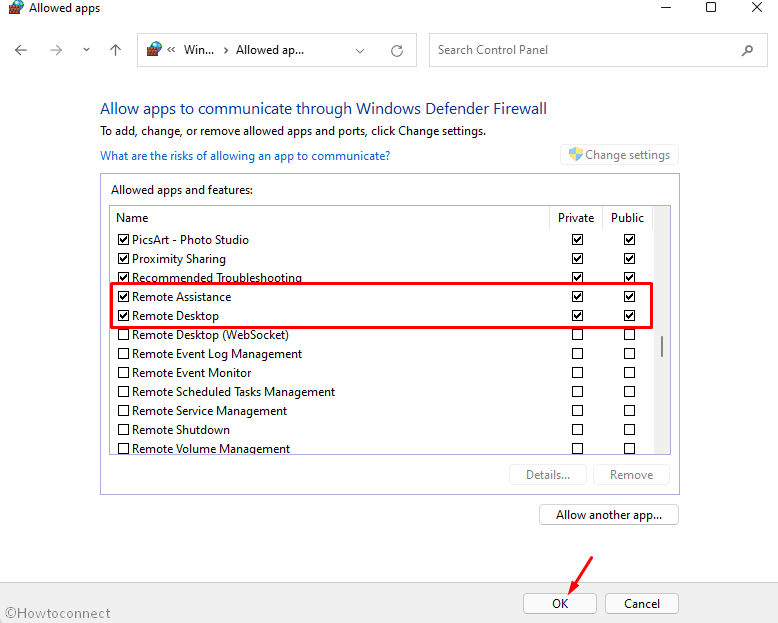
- In the Allowed apps and features, in the Name column, find Remote Desktop and Remote Assistance.
- Check the boxes for Private and Public for both the apps.
- Click on – OK.
Methods list:
Way-1: Through the Settings app
Way-2: Via Control Panel
That’s all!!