Windows Defender is a great built-in security tool available since Windows XP but in the current version, you find many modern enhancements. By default, it is enabled in Windows 11, However, in order to download certain applications or work on particular networks, you might need to Windows disable Defender.
You have the ability to turn off the Windows 11 default antimalware through Windows Security. For the permanent deactivation, any command line, Registry Editor, and Group Policy Editor don’t work but a System internal tool helps in this task. Although when you disable Windows Defender you leave your computer and the operating system open for security threats.
Disable Windows Defender Permanently in Windows 11
Here is how to disable Windows Defender Permanently in Windows 11 –
Way-1: Through Windows Security app
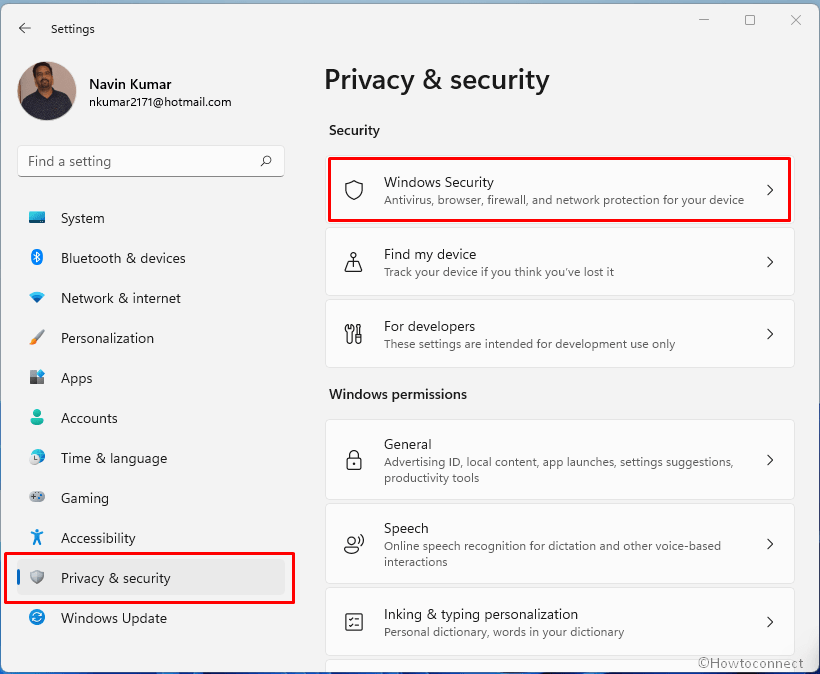
- Press Windows key + I together to open Settings.
- Click – Privacy & security.
- Select – Windows Security from the right pane.
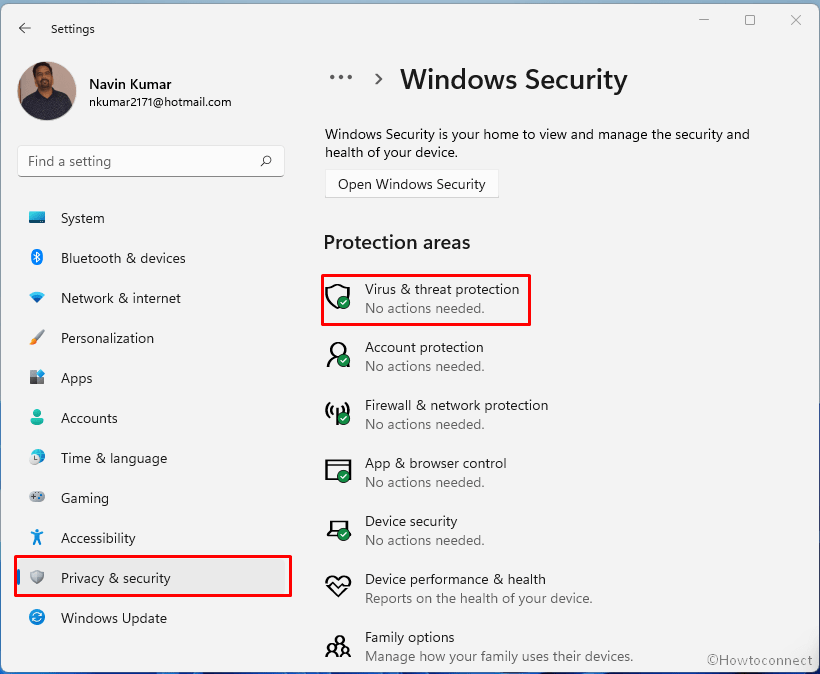
- From the next page, click – Virus & threat protection.
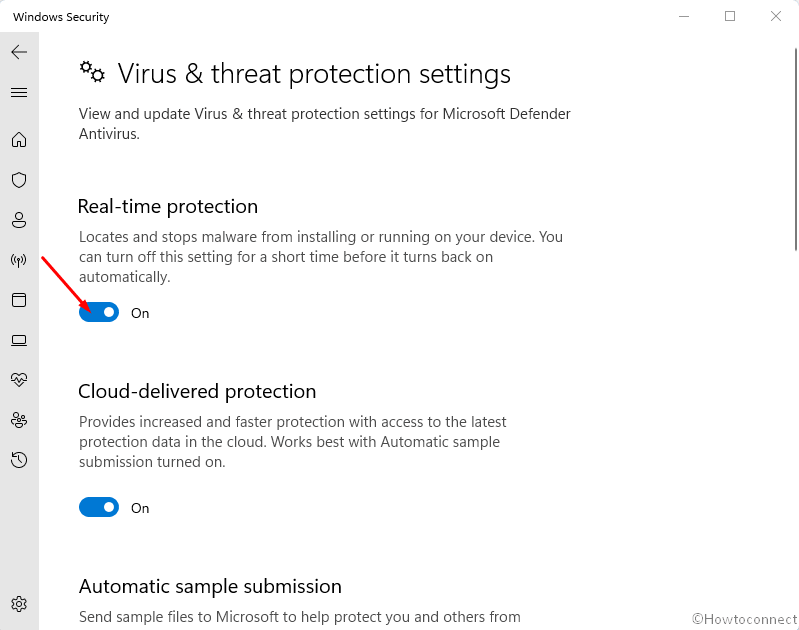
- Windows Security app will prompt up, click on “Manage settings” link there.

- On the next page, Under Real time protection section, click the toggle switch.
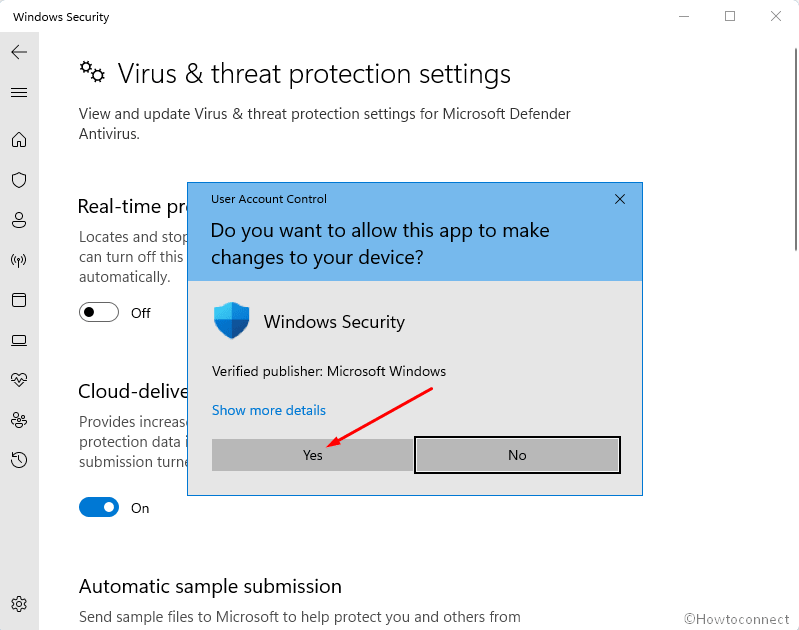
- User account control will be prompted, click on – Yes.
- To re-enable click the same toggle switch.
Way-2: Using Autorun disable Windows Defender in Windows 11 Permanently
The above method, however, will disable Windows Defender in Windows 11 but until the next restart. Whenever you will reboot your system the security settings will be automatically reversed and turned on once again. Using the following way, you can disable Windows Defender Permanently in Windows 11 –
- Make sure that Windows Defender is turned off using the above method then proceed.
- Go to this page and click Download Autoruns.
- Unpack the file.
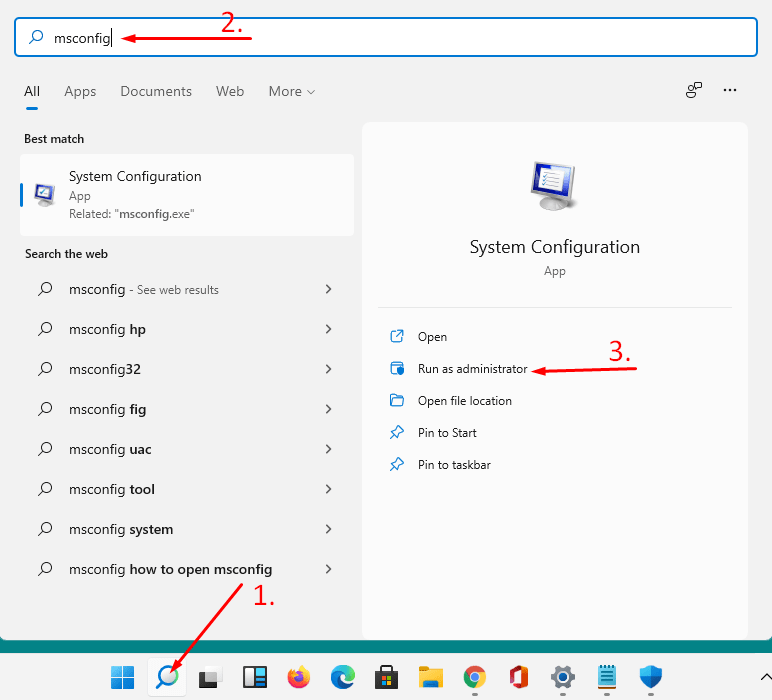
- Click the – Search from the Taskbar.
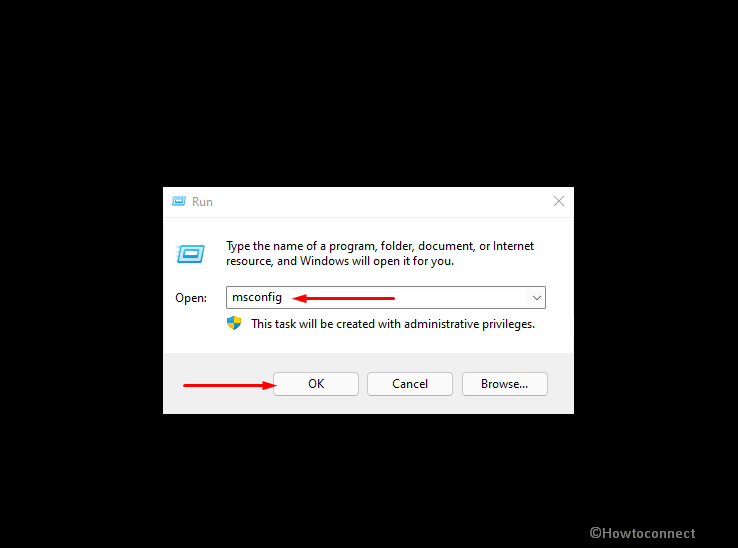
- Type – msconfig.
- When the result shows up, click on – Run as administrator.
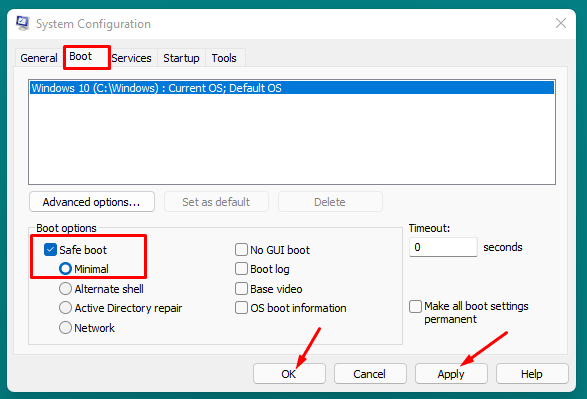
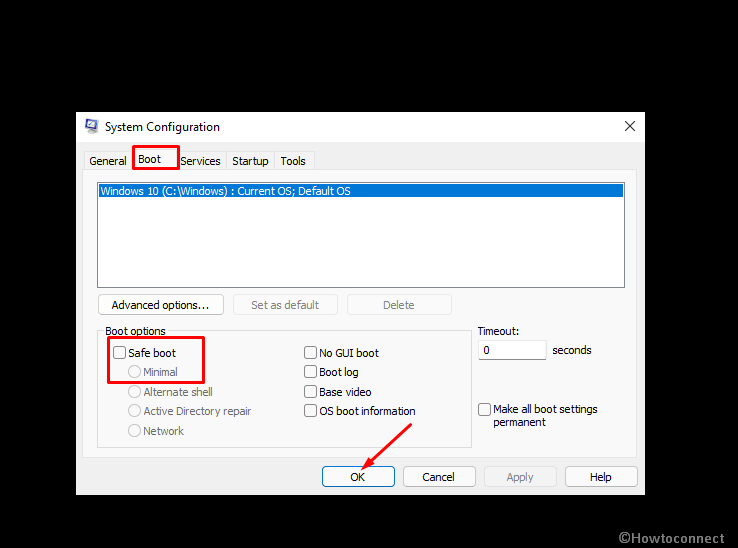
- On the System Configuration Window, select – Boot tab.
- Go to the Boot options section.
- Check – Safe boot.
- Click on – Minimal.
- Then, click Apply and OK.
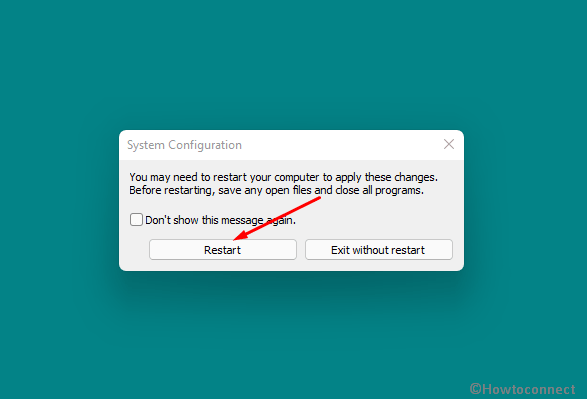
- Close the ongoing works and select – Restart.
- When you are in Safe mode, open the Autoruns program that you unzipped in the normal mode.
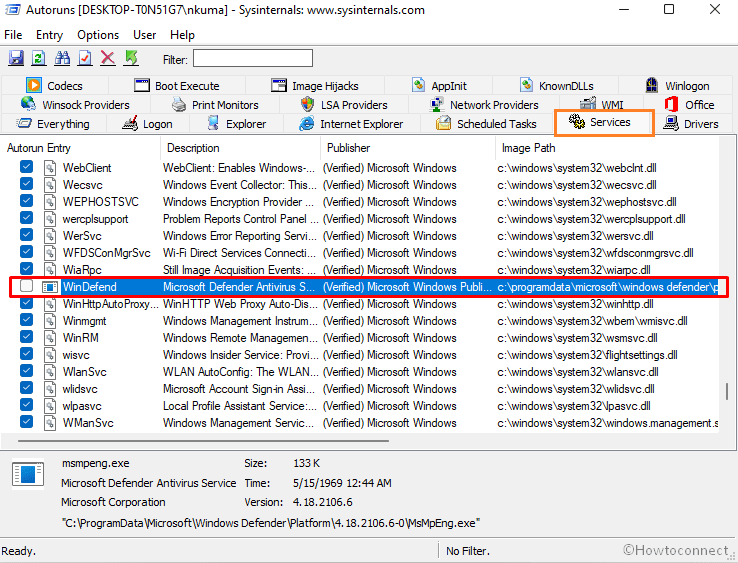
- Once Autoruns Systeminternals appear, click on the Services tab and allow the items to load.
- Now, click Options from Menubar and uncheck Hide Windows Entries by clicking on it.
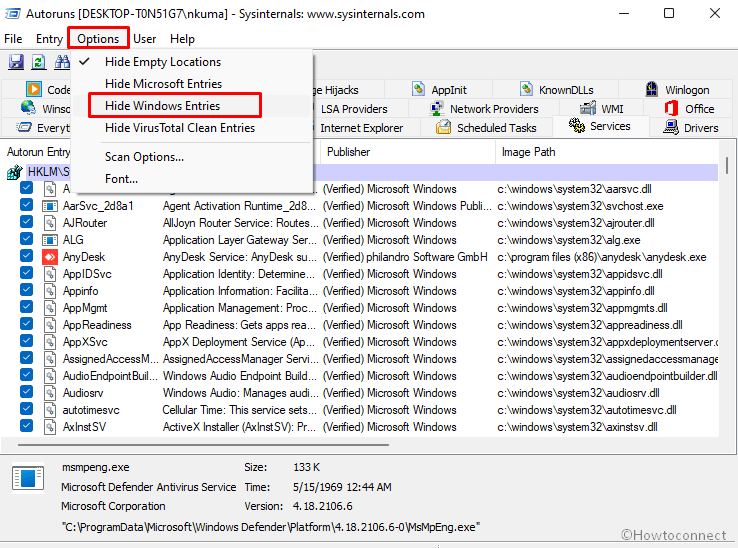
- Go to the Entries column, scroll down and find WinDefend.
- Uncheck this service.
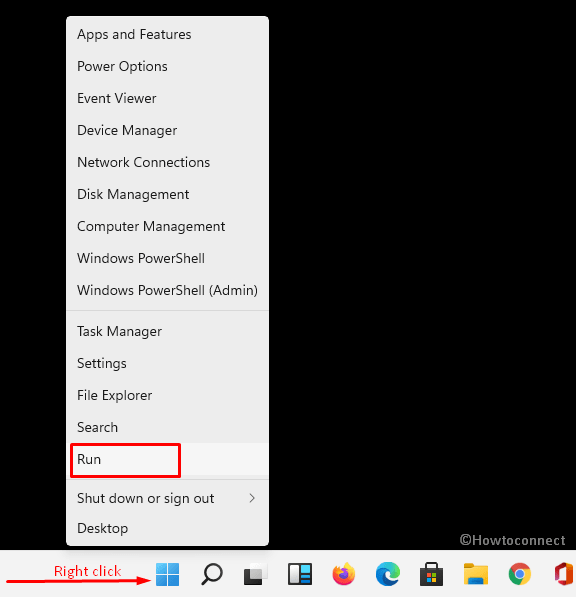
- Right-click on Start and select Run.
- Type msconfig press enter.
- Select – Boot tab.
- Unselect – Safe boot.
- Click – Apply and then Ok.
- Select Restart to return back from Safe mode.
- Open Windows Security and see. You will find that under Virus & threat protection settings, Real-time protection, Cloud-delivered protection, Automatic sample, submission, and Tamper protection are disabled permanently. Due to this change, Controlled folder access is also turned off.
- To reenable Windows Defender again boot into Safe mode, and uncheck the Service WinDefend on Autoruns. Alternatively, open the Windows Security app and click on Restart the service.
Methods list:
Way-1: Through Windows Security app
Way-2: Using Autorun
That’s All!!
Jesus! This Thread really helpful and works fine. Thank you
Hi,
Thanks for the post. The second method works on Windows 11. Perfect!
Regards.