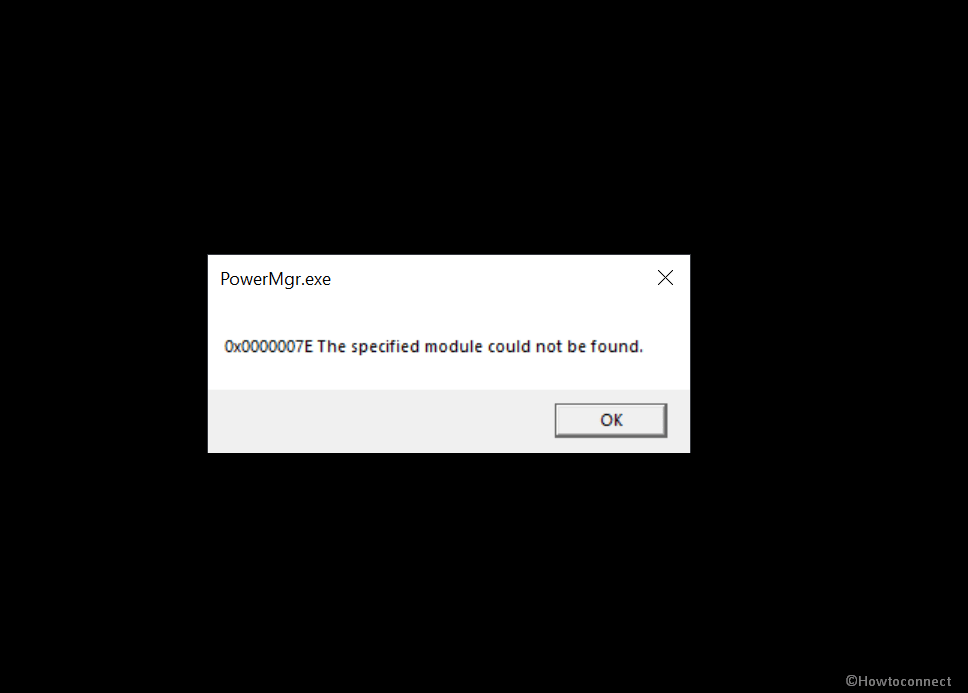
Errors in Windows 10 is quite a common thing in Windows 10 whether they occur during update, upgrade, or other. But sometimes you encounter such a problem that doesn’t have any traces so that it can be solved. One such error is0x0000007E The Specified module could not be found that shows up on PowerMgr.exe dialog box. The “PowerMgr.exe” error message will appear every time after you reboot or power on specifically Lenovo desktop or laptop such as Thinkpad.
The issue occurs because of the existence of Lenovo Power Manager app on Computer. This application is installed to save energy consumption and hold the state of the file system in RAM in the Reset, On, Idle, and Suspend power states. Therefore, when you remove this Lenovo software driver the problem gets resolved.
Table of Contents
0x0000007E The Specified module could not be found PowerMgr.exe error in Windows 10
Here is how to fix Fix 0x0000007E The Specified module could not be found PowerMgr.exe error Windows 10 –
1] Uninstall Lenovo Power Manager
Lenovo provides an application to the laptops and desktops of its company to control the energy expenses. This is Lenovo Power Manager that is automatically installed as a built-in program on your devices. Main aim of the software is cutting power expenditure through management of battery charging level and time. The app often creates problems in the resetting procedure of Windows 10 resulting in error code like 0x0000007E. So in order to fix PowerMgr.exe issue, you need to uninstall Lenovo Power Manager driver. Here are the guidelines –
- Press the Win+X and select the Device Manager from the list.
- Locate System Devices and double click on it.
- When unfolded, right click on Lenovo Power Manager and select Properties.
- Select the – Uninstall Device.
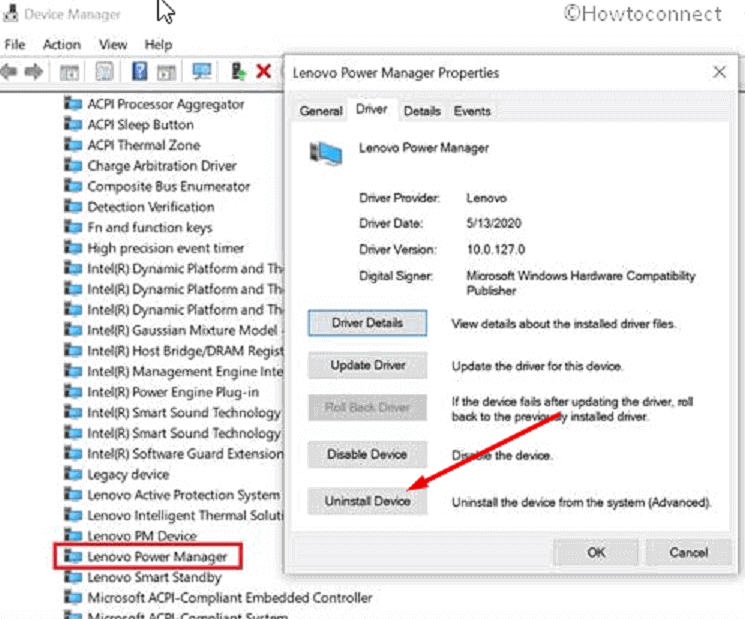
- In the confirmation dialog box, check the box against – Delete the Driver Software for this device.
- Click the – OK.
- Reboot the system and the error will be fixed.
You can also get the solution here – https://forums.lenovo.com/t5/ThinkPad-X-Series-Laptops/PowerMgr-exe-Module-could-not-be-found-X1-Extreme-Gen-1/m-p/5027103
2] Run Full Scan using Windows Defender
Microsoft is always careful about the security of its built-in products and develops tools to fully protect them. Windows Defender is among them which comes under the Windows security app that scans your system automatically when abnormal activity occurs on your PC. It detects the threats using 3 types of scanning and kills them by removal or quarantine. You can use either of Full scan, Quick scan, and Custom scan to safeguard your desktop from malware or something unusual causing errors, for example, x0000007E The Specified module could not be found. So follow the instructions ahead –
- Click the taskbar search, type security and hit the Enter.
- Select the – Virus & threat protection.
- Click the link that reads – Scan options.
- Check the radio box against – Full scan.
- Hit – Scan now.
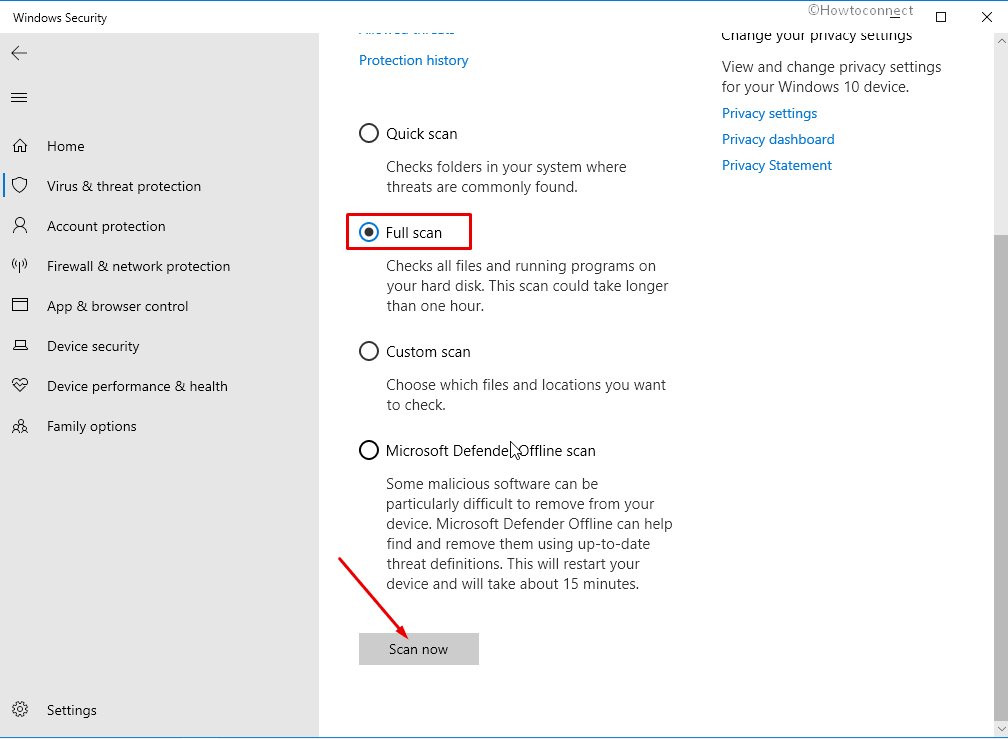
The Scanning procedure will consume a good amount of time because it will thoroughly check each and every file deeply on your computer to recognize threats. So sit back and at last reboot your computer to ensure the error doesn’t persist.
3] Use System File checker to fix 0x0000007E The Specified module could not be found PowerMgr.exe error
Corrupted system resources might be the root cause of PowerMgr.exe error occurring while restarting Windows 10. DLL and exe files are core files of Windows to manage the execution of different of data and run almost all programs. A buggy Windows update or a less trustworthy application involves the files in conflict and corrupt them. Luckily, Windows brings the utility System file checker to deal with the malfunctions and repair those files.
If 0x0000007E The Specified module could not be found PowerMgr.exe error in Windows 10 occurred due to the corrupt system resources you can use this tool too. See the steps below and pursue carefully –
- Press the Win+S and type in the – CMD.
- Select the – Run as administrator.
- Write
SFC /Scannowon the prompt and hit enter to start executing.
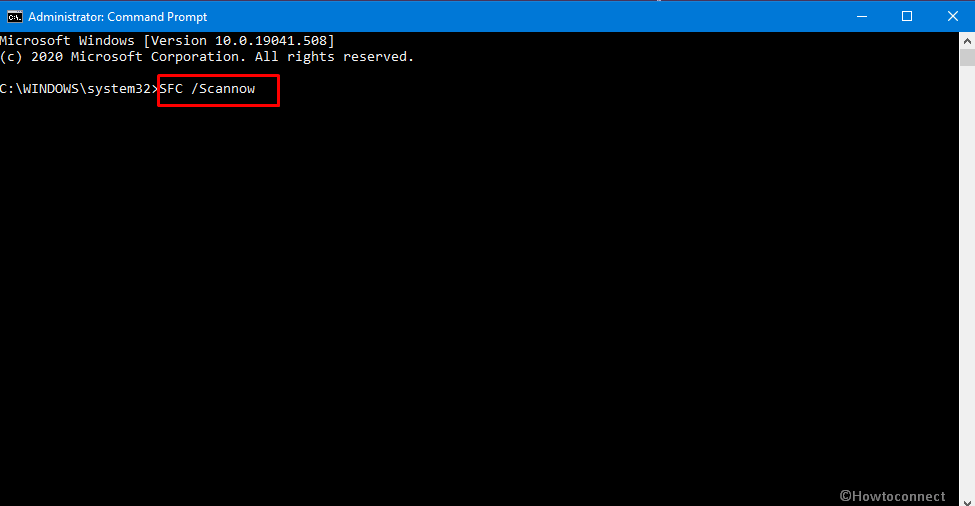
- As the repairing reaches 100%, reboot your PC.
See if PowerMgr.exe error is fixed.
4] Install the latest build of Window 10
Windows 10 receives patches and builds in every month and also whenever need an urgent bug fix. These are called Security update, optional update, and feature update that improve the quality of a specific version moreover adds new features. Microsoft recognizes the error like 0x0000007E and bring resolution time to time. So when you encounter PowerMgr.exe error message Windows update may work as a fix. Follow the guide and update –
- Click the taskbar search, type update, and then hit Enter.
- Select the – Check for updates.
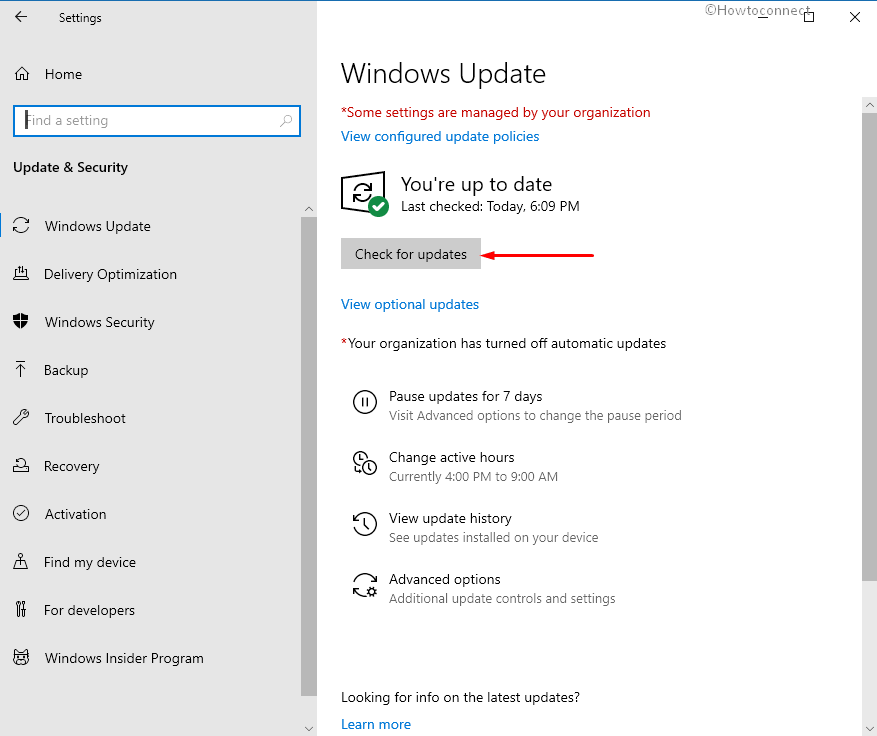
- Allow the scanning and downloading to complete.
- Lastly, click the – Restart now.
5] Perform System Restore
If the 0x0000007E The Specified module could not be found still persists then System restore is a good option to resolve. System restore is a handy tool in Windows 10 for the sake of carrying the OS back to the stage where there was no error. For instance, when the Lenovo Power Manager is installed on your computer and you run the feature it will be keeled over to the date when it was not installed. This way the reason for PowerMgr.exe error aberrates and the issue gets over. Follow the guidelines –
- Press the Windows logo, type rstrui and then hit – Enter.
- Click the radio cell before the – Choose a different restore point.
- Choose the – Show more restore points.
- Select the one Date & time when the error wasn’t existing and then click Next.
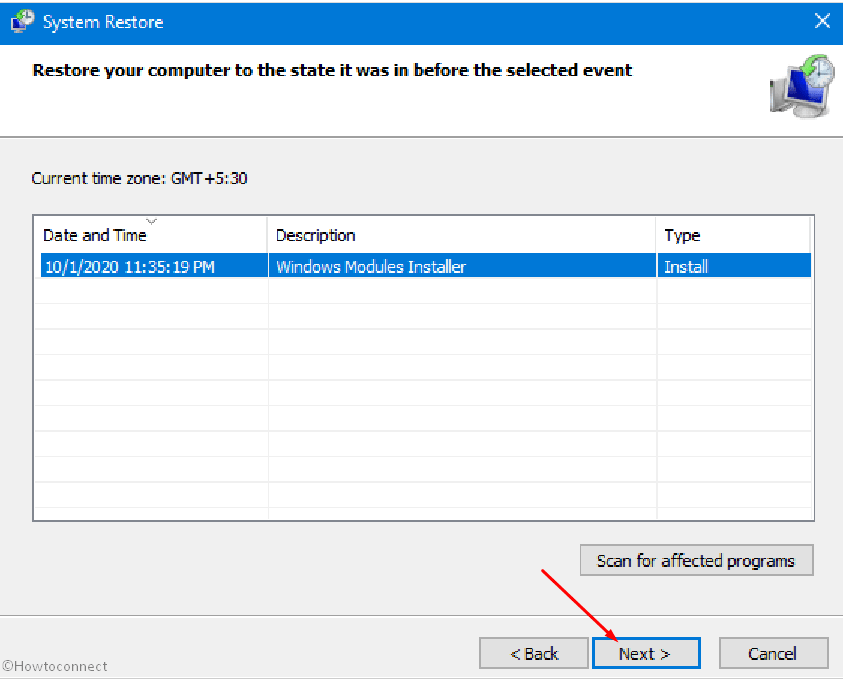
- Click the – Finish.
- You will come across a confirmation dialog box saying – Once started, System Restore cannot be interrupted. Do you want to continue? Select the – Yes.
Hope the above methods will fix Fix 0x0000007E The Specified module could not be found PowerMgr.exe error Windows 10.
Methods list
1] Uninstall Lenovo Power Manager
2] Run Full Scan using Windows Defender
3] Use System File checker
4] Install the latest build of Window 10
5] Perform System Restore
That’s all!!
